Managing Product Catalog Settings (WA Only)
 Updated 2 months ago
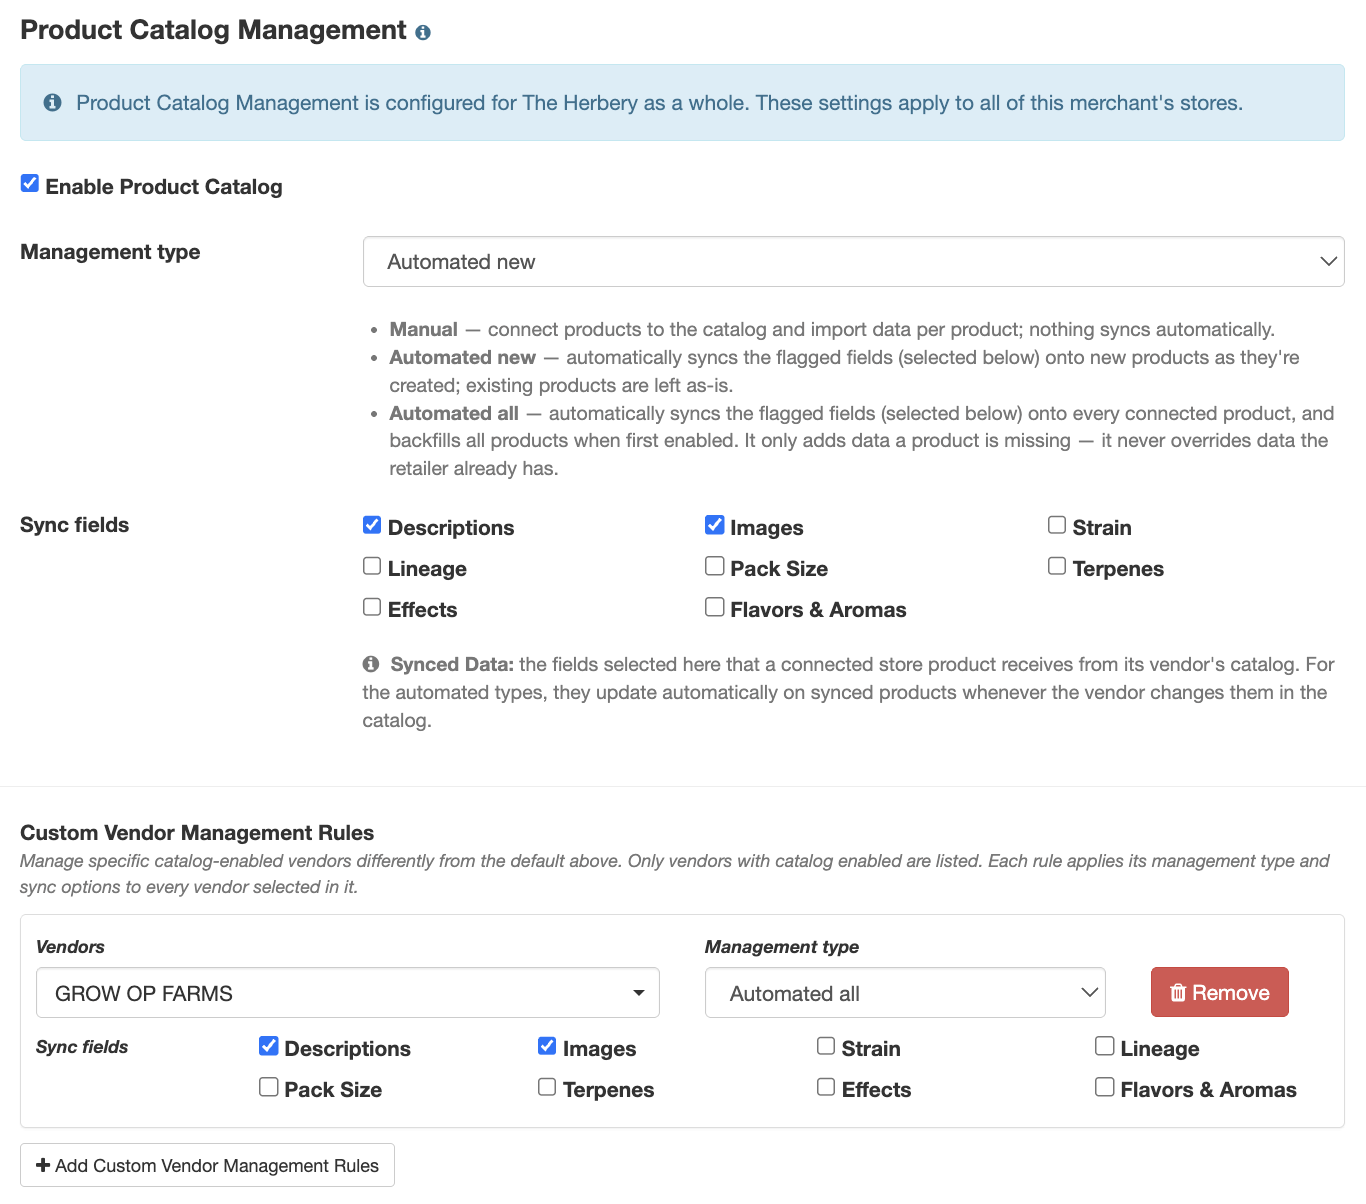
The POSaBIT Product Catalog can be customized to fit how your team manages product data across your stores. Whether you prefer full control with manual mapping or want to automate how products are enriched with supplier-provided images and descriptions, these settings allow you to tailor the experience to your workflow.
This article explains how to enable or disable the Product Catalog and configure management options, including automation levels and sync preferences for images and descriptions.
To enable or disable the POSaBIT Product Catalog:
- Navigate to your Merchant settings to configure management options (select user name drop down > Merchant > Settings > General Settings).


- Scroll down to Product Catalog Management to configure how you'd like your Product Catalog to be managed.Note: enabling the Product Catalog is at the 'Merchant' level - meaning, these settings will apply to all stores (venues) associated with your POSaBIT POS account.
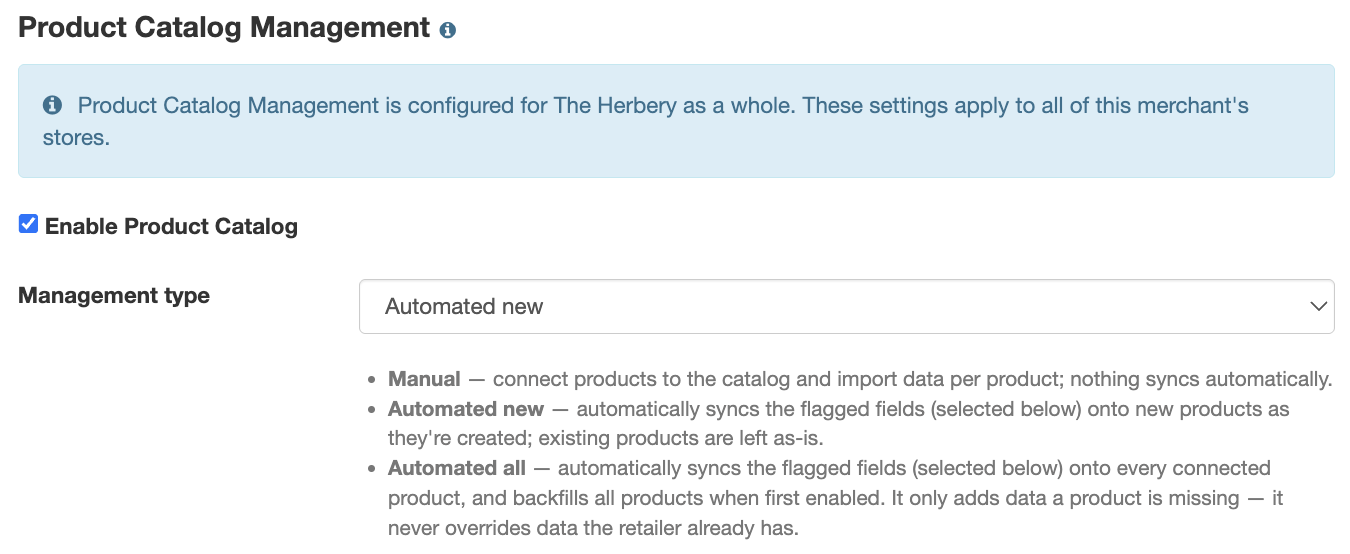
- Enable Product Catalog: This flag will enable the Product Catalog for all your venues.
- Management Type:
- Manual: this option enables users to manually search the product catalog and connect to catalog data from the product details edit page (creating a new product from the Products tab and from incoming manifests).
- Automated New: this option includes automating the mapping of NEW products incoming from manifests. If POSaBIT detects there is catalog data for a NEW product, we will automatically populate the product details form from the incoming manifest product creation modal with the 'suggested' catalog product. This is suggested to help streamline the creation of new products from incoming manifests (in addition to the ability to still manually map existing products to catalog products).
- Automated All: this option includes mapping ALL products to products in the catalog that have data available (images and/or product description is available from the catalog). If there is no data available in the catalog, your products will NOT sync with the catalog product until there are images and/or a description to sync with from the catalog.
- Sync Fields
- Descriptions: check this box if you'd like to keep your products you've connected to the catalog with vendor's product descriptions. Meaning, if your product is connected to a catalog product and the vendor updates their product description, then the description will automatically update on your product as well.
- Images: check this box if you'd like to keep your products you've connected to the catalog with vendor's product image. Meaning, if your product is connected to a catalog product and the vendor updates their image, then the image will automatically update on your product as well.Note: from the product details form, you can select/deselect which images you'd like to map to your product. If the catalog description is modified from the product details form, then it will no longer sync with the catalog - meaning if a Supplier updates the description, it will not stay in sync and receive any updates made by the vendor.
- Strain: check this box if you'd like to keep your products you've connected to the catalog with vendor's product strains. Meaning, if your product is connected to a catalog product and the vendor updates their product strain, then the strain will automatically update on your product as well.
- Lineage: check this box if you'd like to keep your products you've connected to the catalog with vendor's product lineage. Meaning, if your product is connected to a catalog product and the vendor updates their product lineage, then the lineage will automatically update on your product as well.
- Pack Size: check this box if you'd like to keep your products you've connected to the catalog with vendor's product pack size. Meaning, if your product is connected to a catalog product and the vendor updates their product pack size, then the pack size will automatically update on your product as well.
- Terpenes: check this box if you'd like to keep your products you've connected to the catalog with vendor's product terpenes. Meaning, if your product is connected to a catalog product and the vendor updates their product terpenes, then the terpenes will automatically update on your product as well.
- Effects: check this box if you'd like to keep your products you've connected to the catalog with vendor's product effects. Meaning, if your product is connected to a catalog product and the vendor updates their product effects, then the effects will automatically update on your product as well.
- Flavors & Aromas: check this box if you'd like to keep your products you've connected to the catalog with vendor's products flavors & aromas. Meaning, if your product is connected to a catalog product and the vendor updates their products flavors & aromas, then the flavors & aromas will automatically update on your product as well.
When the Manual management type is enabled, only Descriptions and Images can be updated. None of the other sync fields will be able to sync from the product catalog.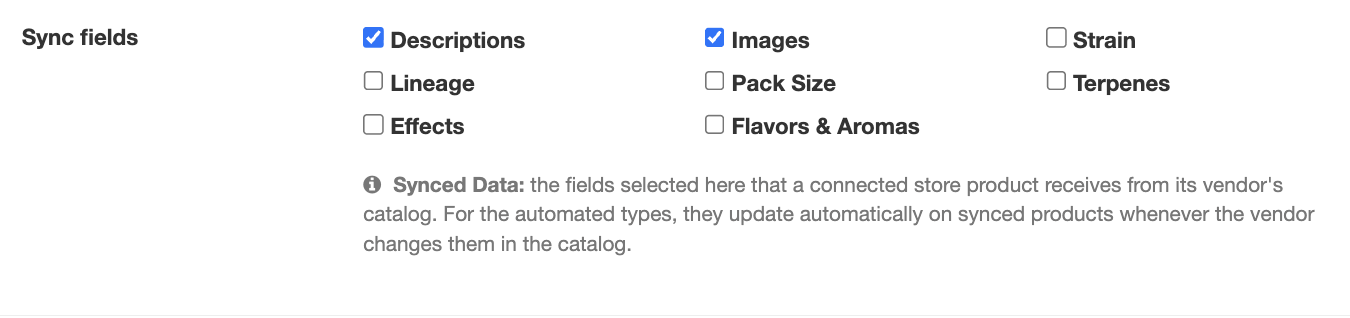
- Once the above Product Catalog Management settings are configured, click Save.
Custom Vendor Management Rules:
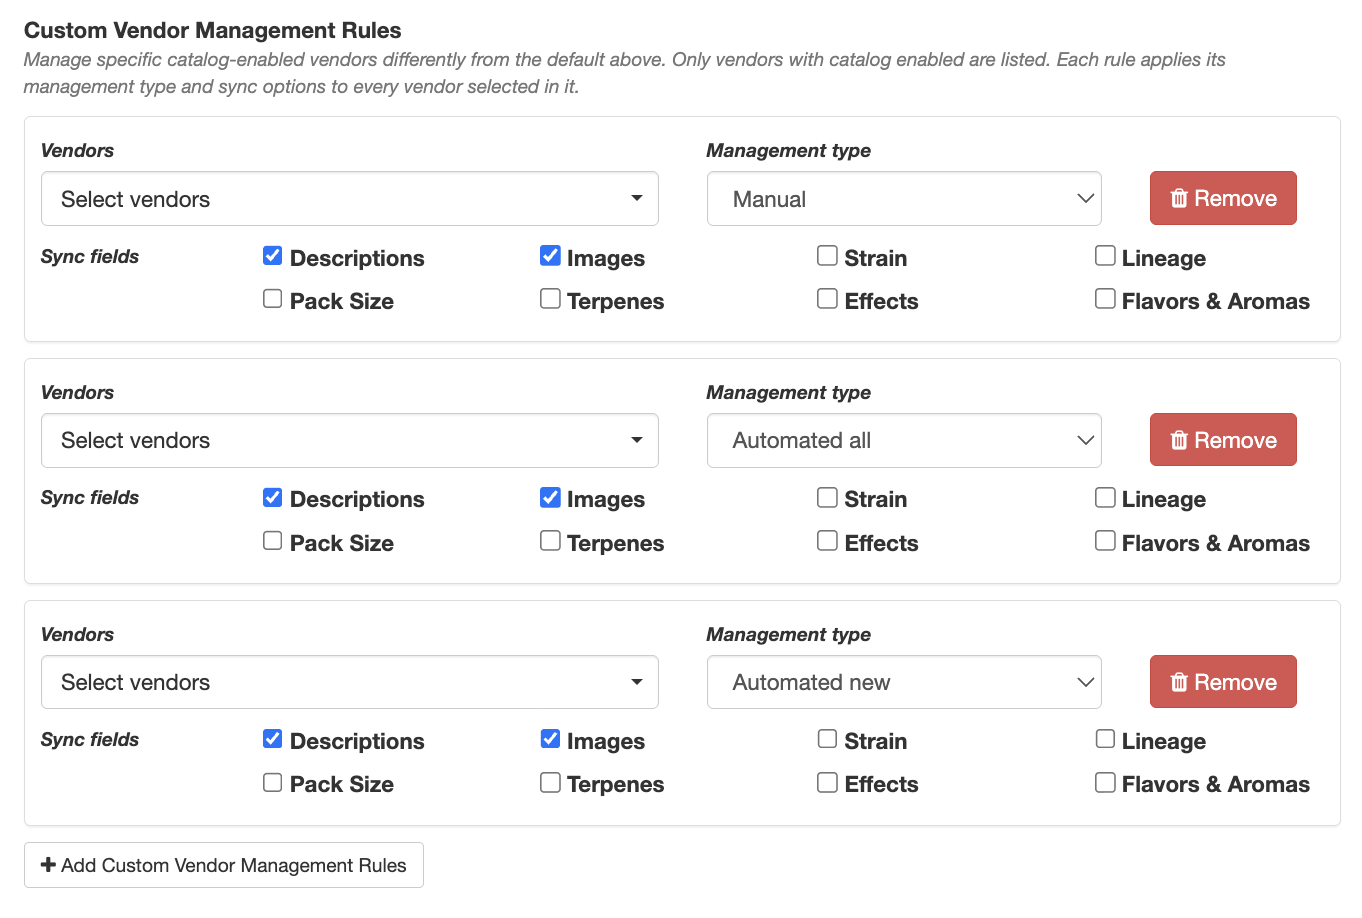
Below the Product Catalog Management settings, you will find a custom configuration for specific vendors. Only vendors with catalog enabled are listed. Each rule applies its management type and sync options to every vendor selected in it. See the steps below to get this configured:
- Log into your POSaBIT Merchant-level portal
- Go to the Settings tab --> General Settings
- Under the Custom Vendor Management Rules, click the Add Custom Vendor Management Rules button to create a new vendor rule
- A box with new fields will appear. This is where you can select a vendor, the management type, what fields you want to be synced from this vendor, and a remove option. These fields do the same thing as the management type and rules from above, but for a specific vendor and not all vandors.
Viewing the Product Catalog Management Settings at the Venue Level
- Log into your venue on the POSaBIT Portal.
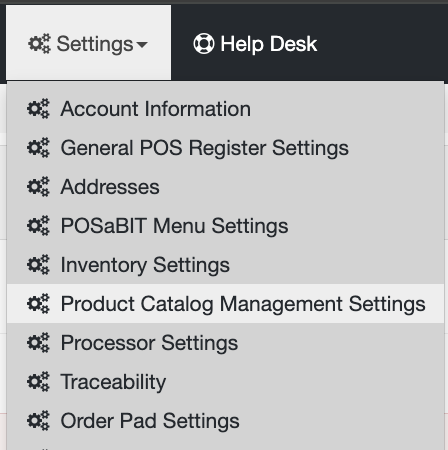
- Go to the Settings tab --> Product Catalog Management Settings.
- On the Product Catalog page, you can enable the Share product details with my other stores flag. When enabled, product details will be shared by default across all the stores within the same merchant. This allows for improved product data and inventory analysis at the merchant level.
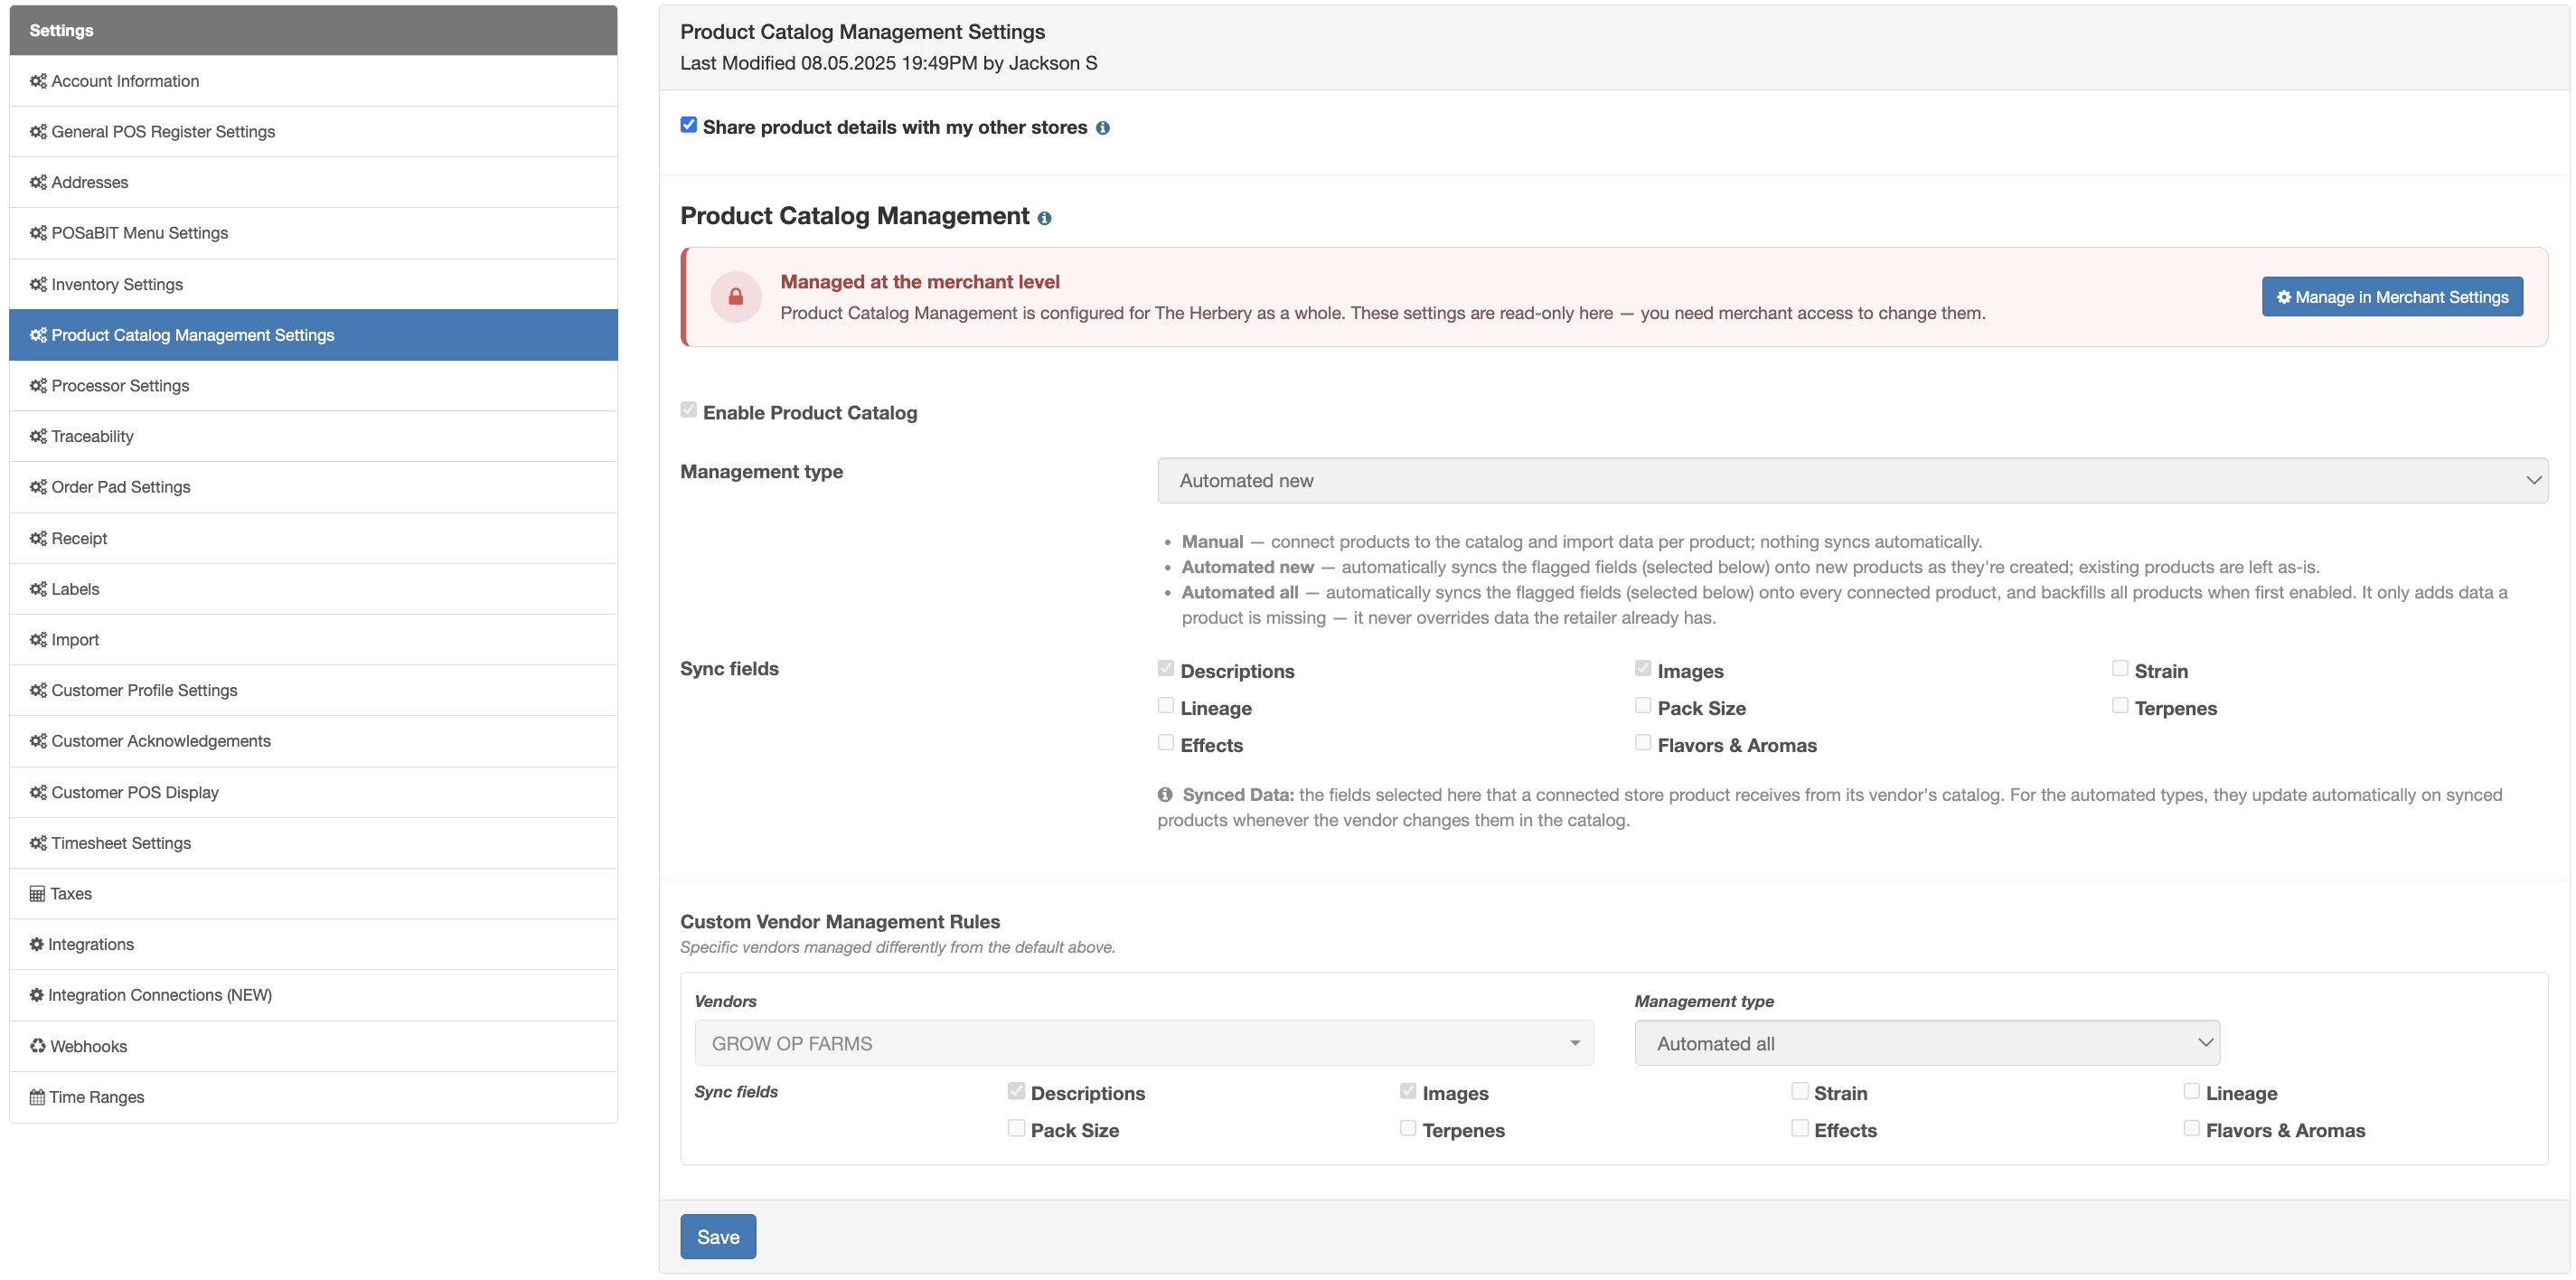
- Below, you can view the Product Catalog Management section. This is View Only on the venue-level. To edit these settings, the user must have Merchant-level access. Click the Manage in Merchant Settings button to be directed to the settings page for this feature.