How to Enable One-time Use Discounts (Coupon) to Specific Customers

How to Enable Customer-Specific One-time Use Discounts
In this article, you will learn how to set up customer-specific one-time use discounts that are rewarded (ex: customer gave a referral).
First, set up a customer tag:
- Log in to the POSaBIT portal
- Go to the Customers tab --> Customer Tags
- Type the name of the tag into the "Create Customer Tag" field and click the blue Create Customer Tag button.
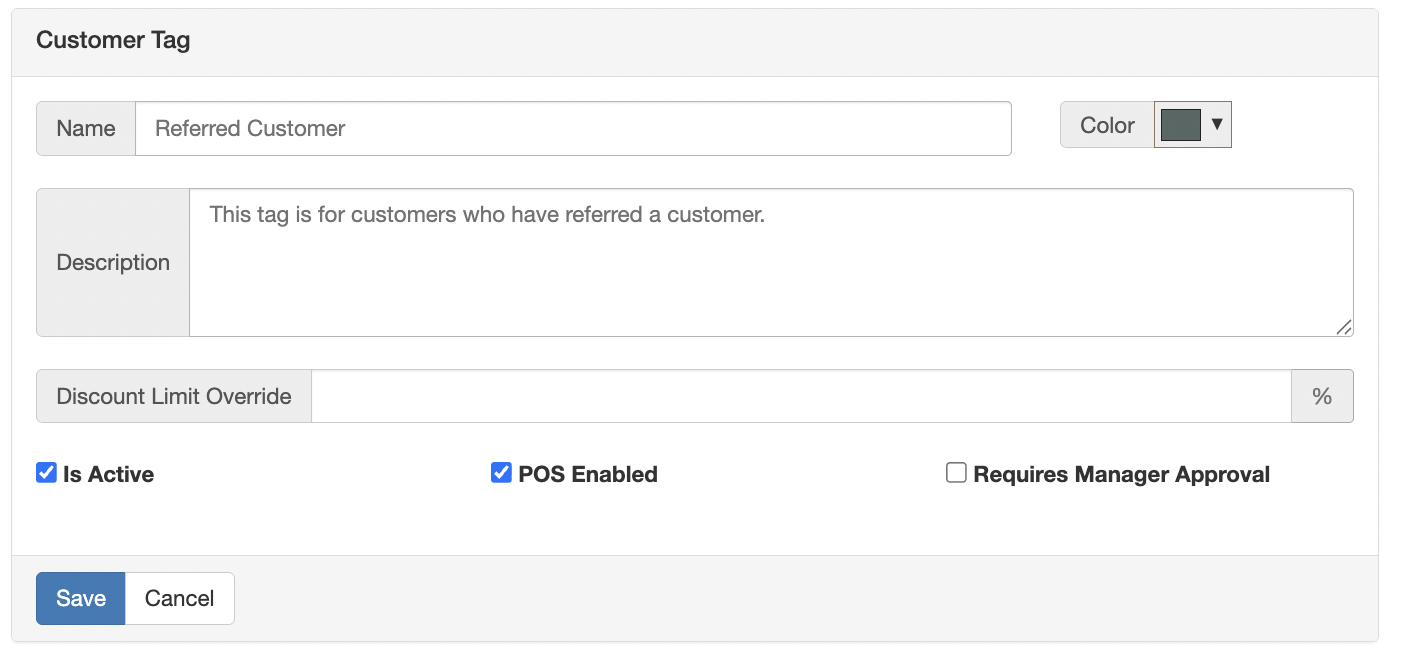
- Next, click Edit on the customer tag you just created, and the edit customer tag page will open. Set up the tag by filling out the information on the tag.
- Name
- Description (Optional)
- Discount Limit Override (Optional)
- Is Active (Enable or disable)
- POS Enabled: Allows this tag to be added from the POS if it's enabled
- Required Manager Approval: Enable if you want a manager to approve adding this tag to a customer.
- Click Save.
Second, create a customer segment:
- Log in to the POSaBIT Portal
- Go to the Customers tab --> Customer Segments
- Click the blue New Customer Segment button on the top right
- Set up your customer segment as you would like, based on what the one-time discount will be used for. If you are using it based on a customer tag, ensure you add that customer tag to the segment.
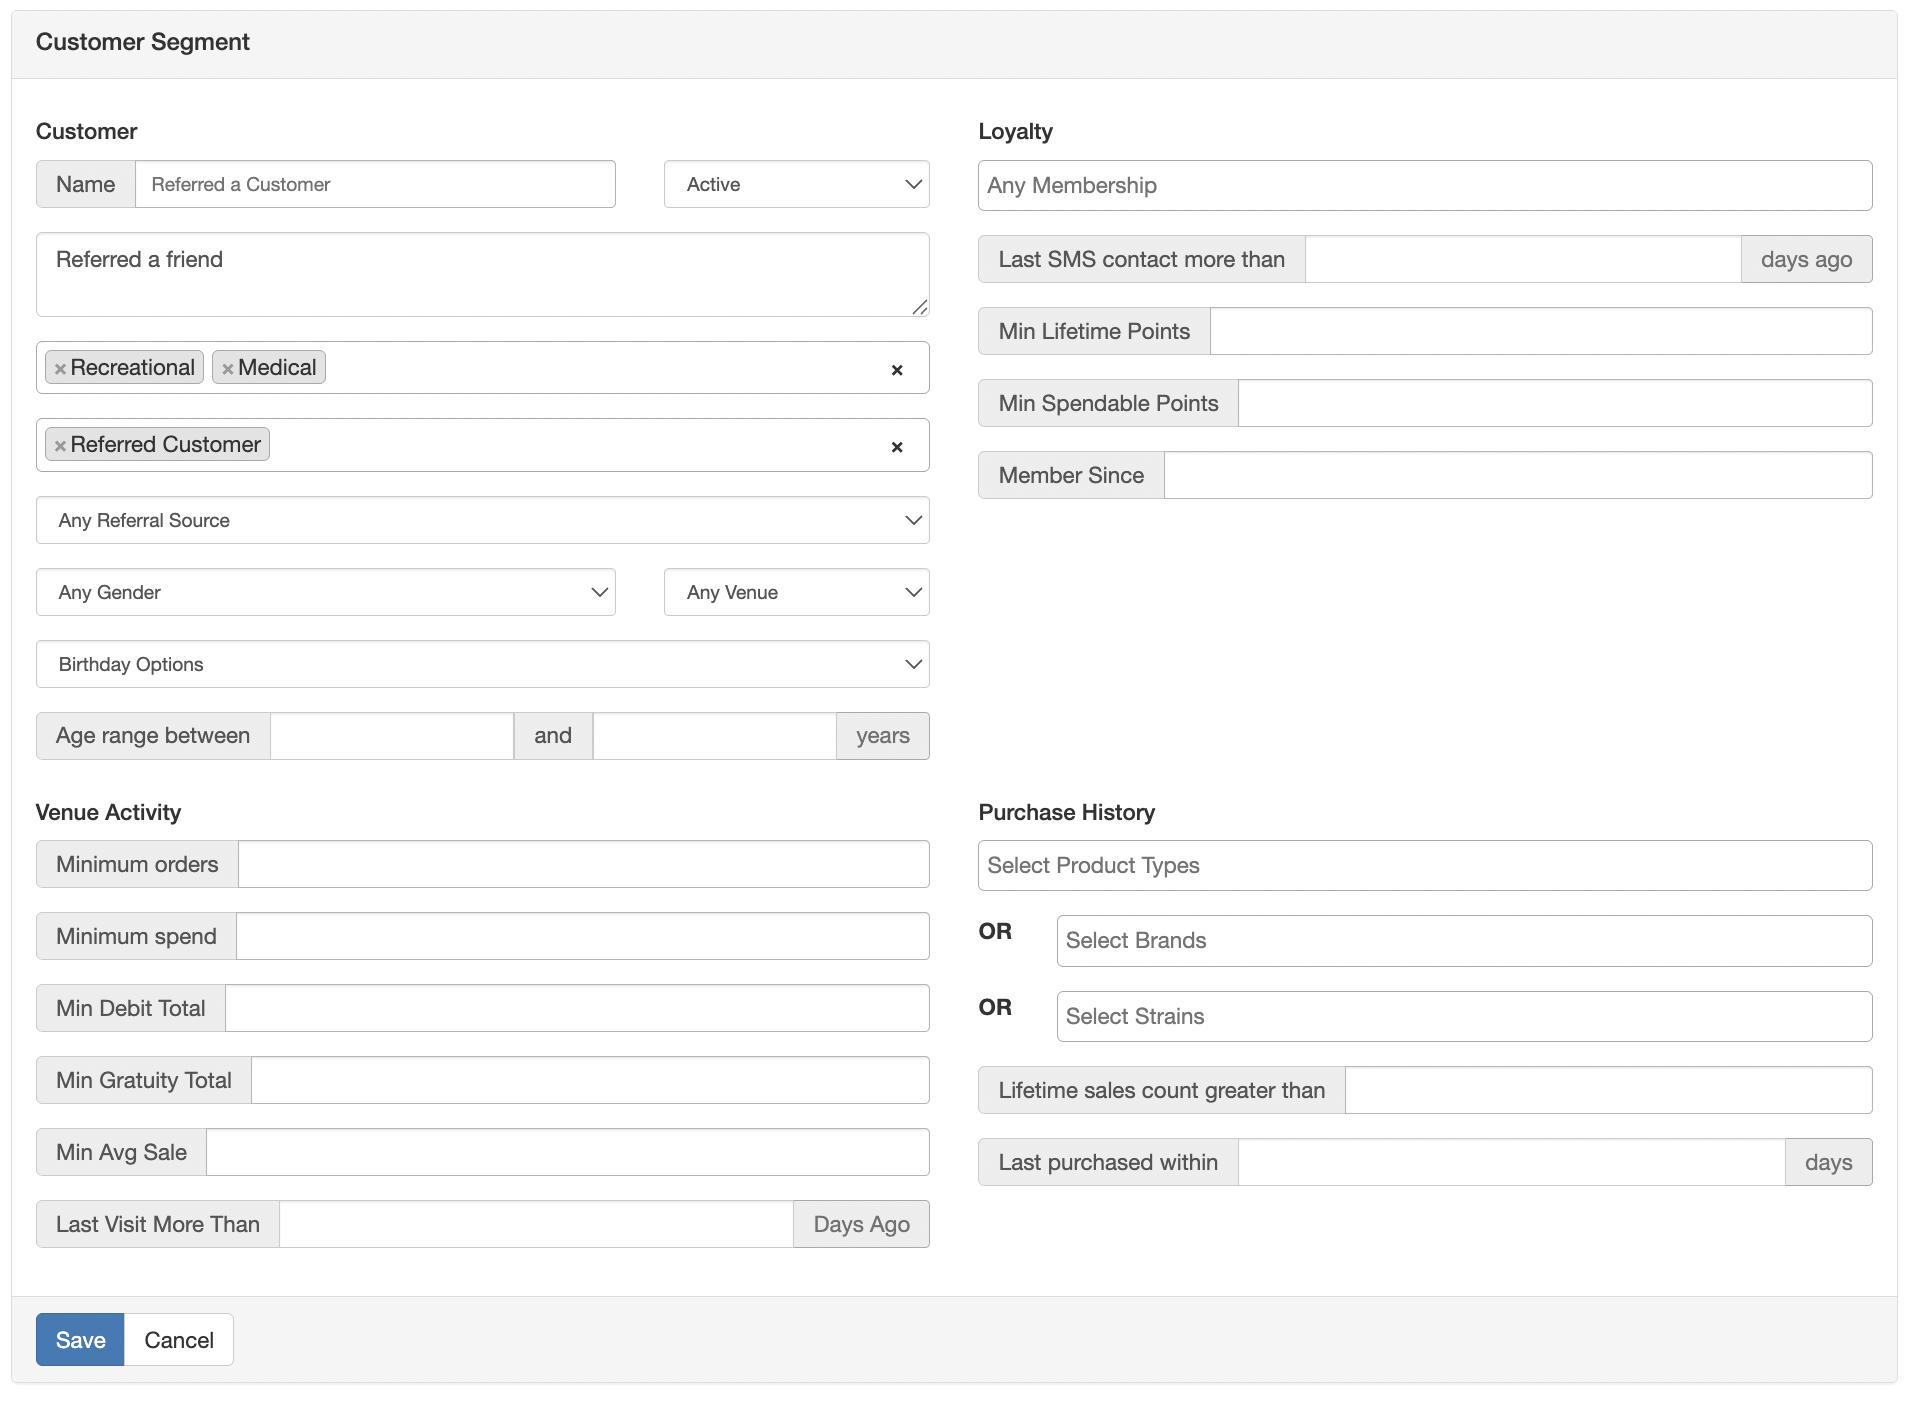
- Click Save.
Next, create the One-time discount:
- Log in to the POS Portal
- Go to the Marketing tab --> Discounts
- On the left side, below the filters, click the blue New Discount button
- Fill in your desired discount information.
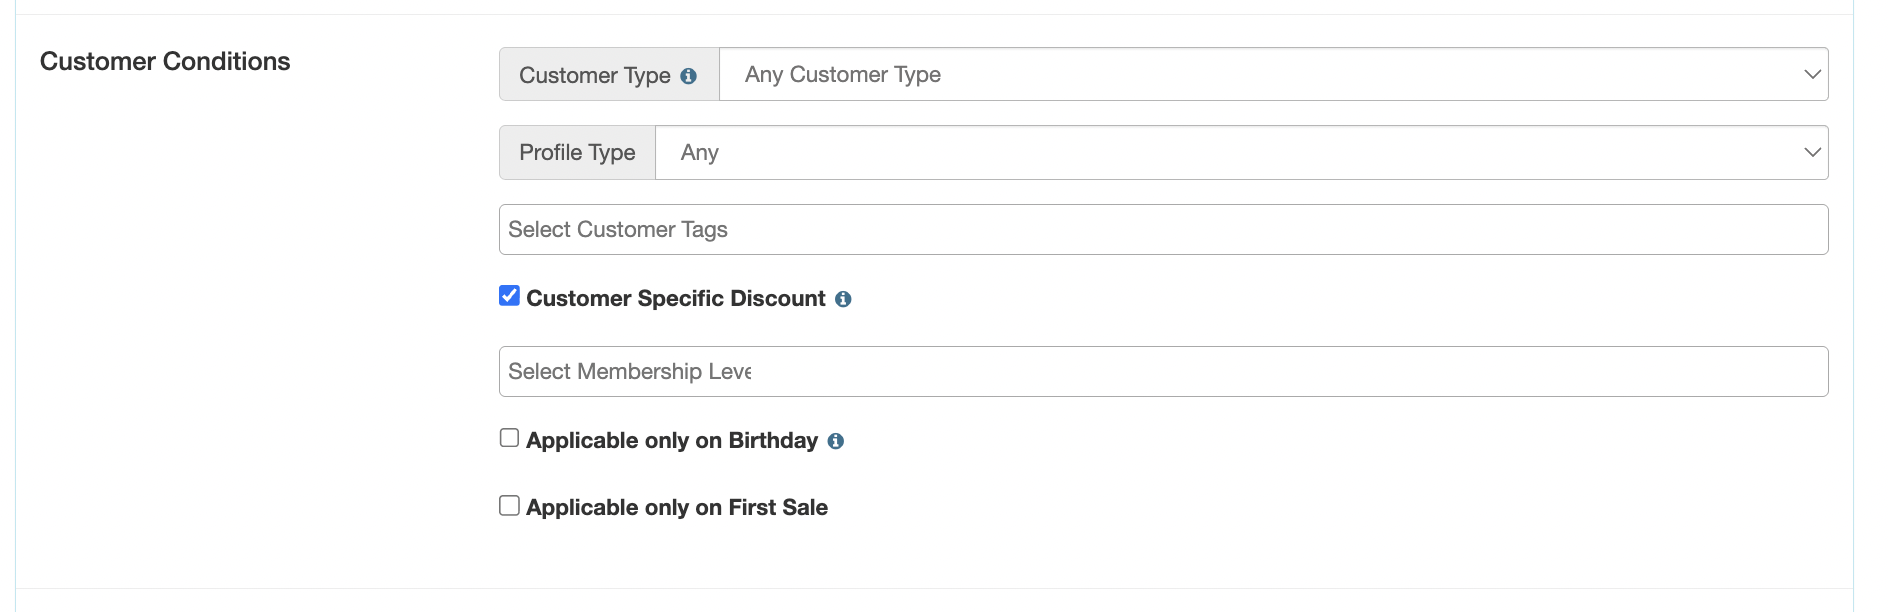
- Under the Customer Conditions portion of the discount, enable the Customer Specific Discount flag.
- Once you have the discount information filled out and the Customer Specific Discount flag checked, click Save.
- A new page will open where you can assign a Customer Segment. Using the dropdown, select the customer segment you would like this discount to be given to, and click the blue Assign to Segment button. You will be asked to confirm your selection.
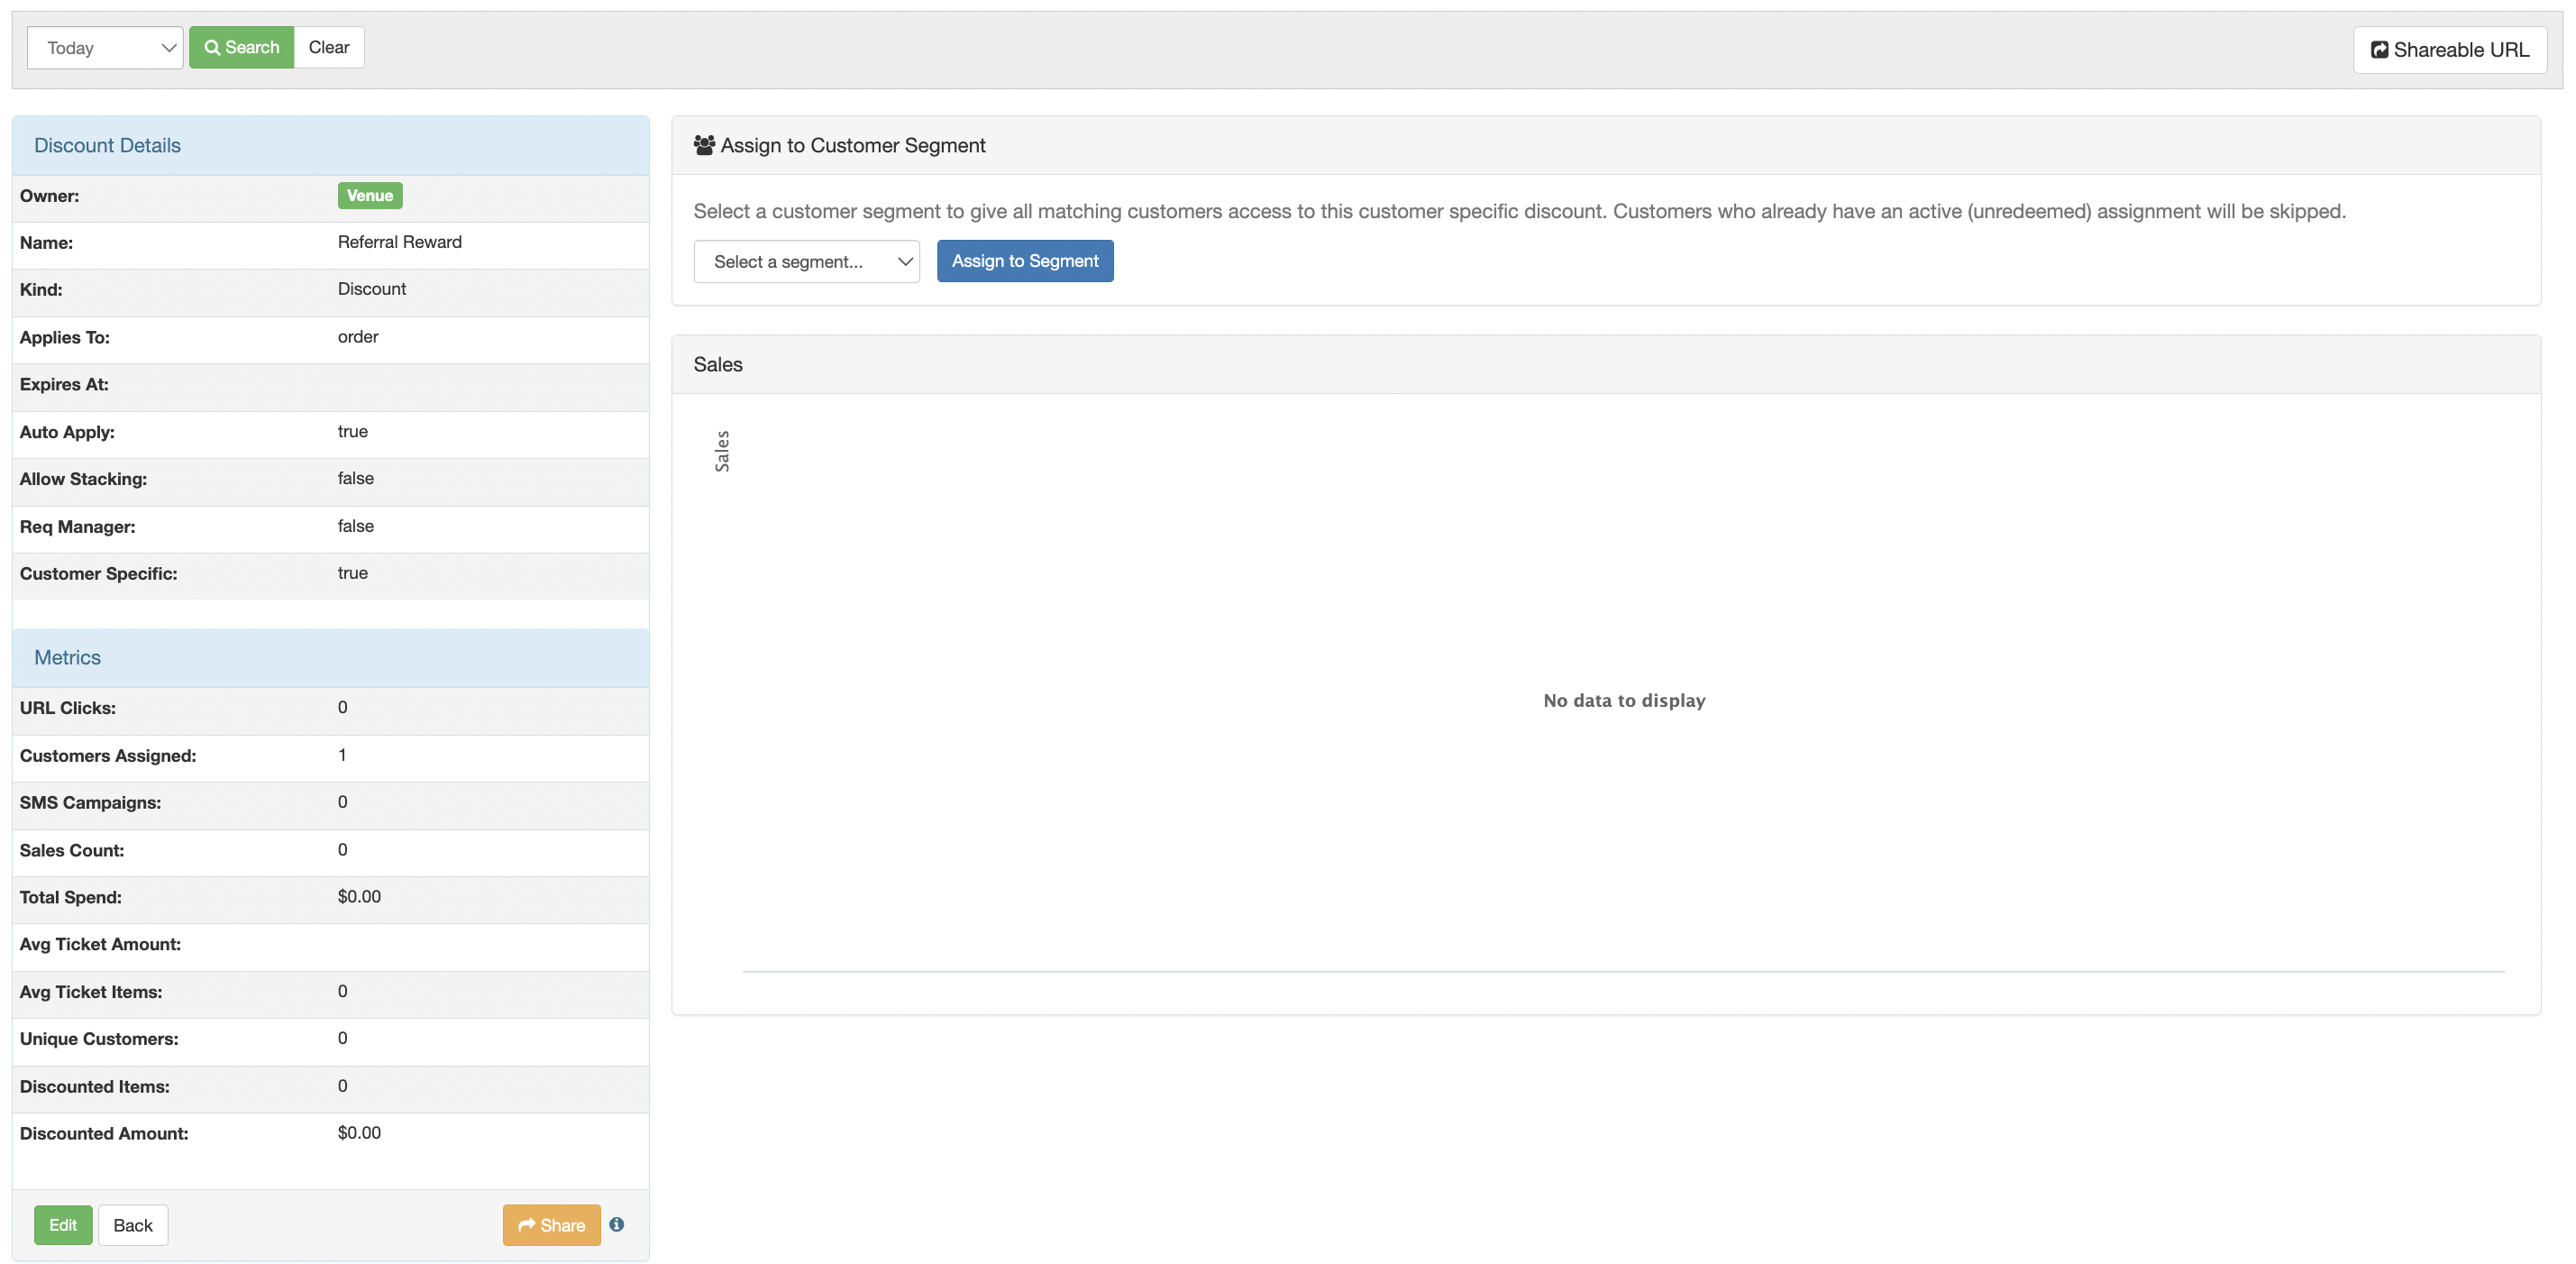
- You have now created a one-time use coupon for your selected customer segment.
Finally, how to give customers the discount:
There are two ways you could add the discount to customers. See below to learn more!
First - Add a discount to a specific customer through the portal:
- Log in to the POSaBIT Portal
- Go to the Customers tab --> Customers page
- Search for the customer you want to give the discount to
- Click on the customer's name to open their profile
- Locate the Customer Specific Discounts section. Click the Select a Coupon dropdown and select the discount you want to give this customer. Once selected, click the blue Assign button.
- This will be added to their list of customer-specific discounts shown on their profile. Once added, this discount will now be available to the customer.
Second - Add a customer to a customer segment using customer tags on the POS:
- Log in to the POSaBIT app on the POS
- Open a customer profile who you would like to give the discount to.
- Go to the edit customer page and add the customer tag that is connected to the customer segment.
- Save. This customer will now be added to the segment, and next time they shop in-store or make a purchase on your menu, the discount will be available.
Note: If you set the discount up to auto-apply, then the discount will automatically be applied to their next purchase.