Alpine IQ - How to Link Your Alpine IQ Account to POSaBIT


POSaBIT and Alpine IQ have joined forces to create a fully integrated loyalty and POS experience. This allows you to drive traffic to your store through groundbreaking marketing tools while ensuring a quick and compliant payment experience.
Follow the steps below to Enable the Alpine IQ Loyalty / POSaBIT POS Integration
Obtain your "UID", "API Key", and "Venue ID #" from your Alpine IQ portal
- Log in to your Alpine IQ web portal
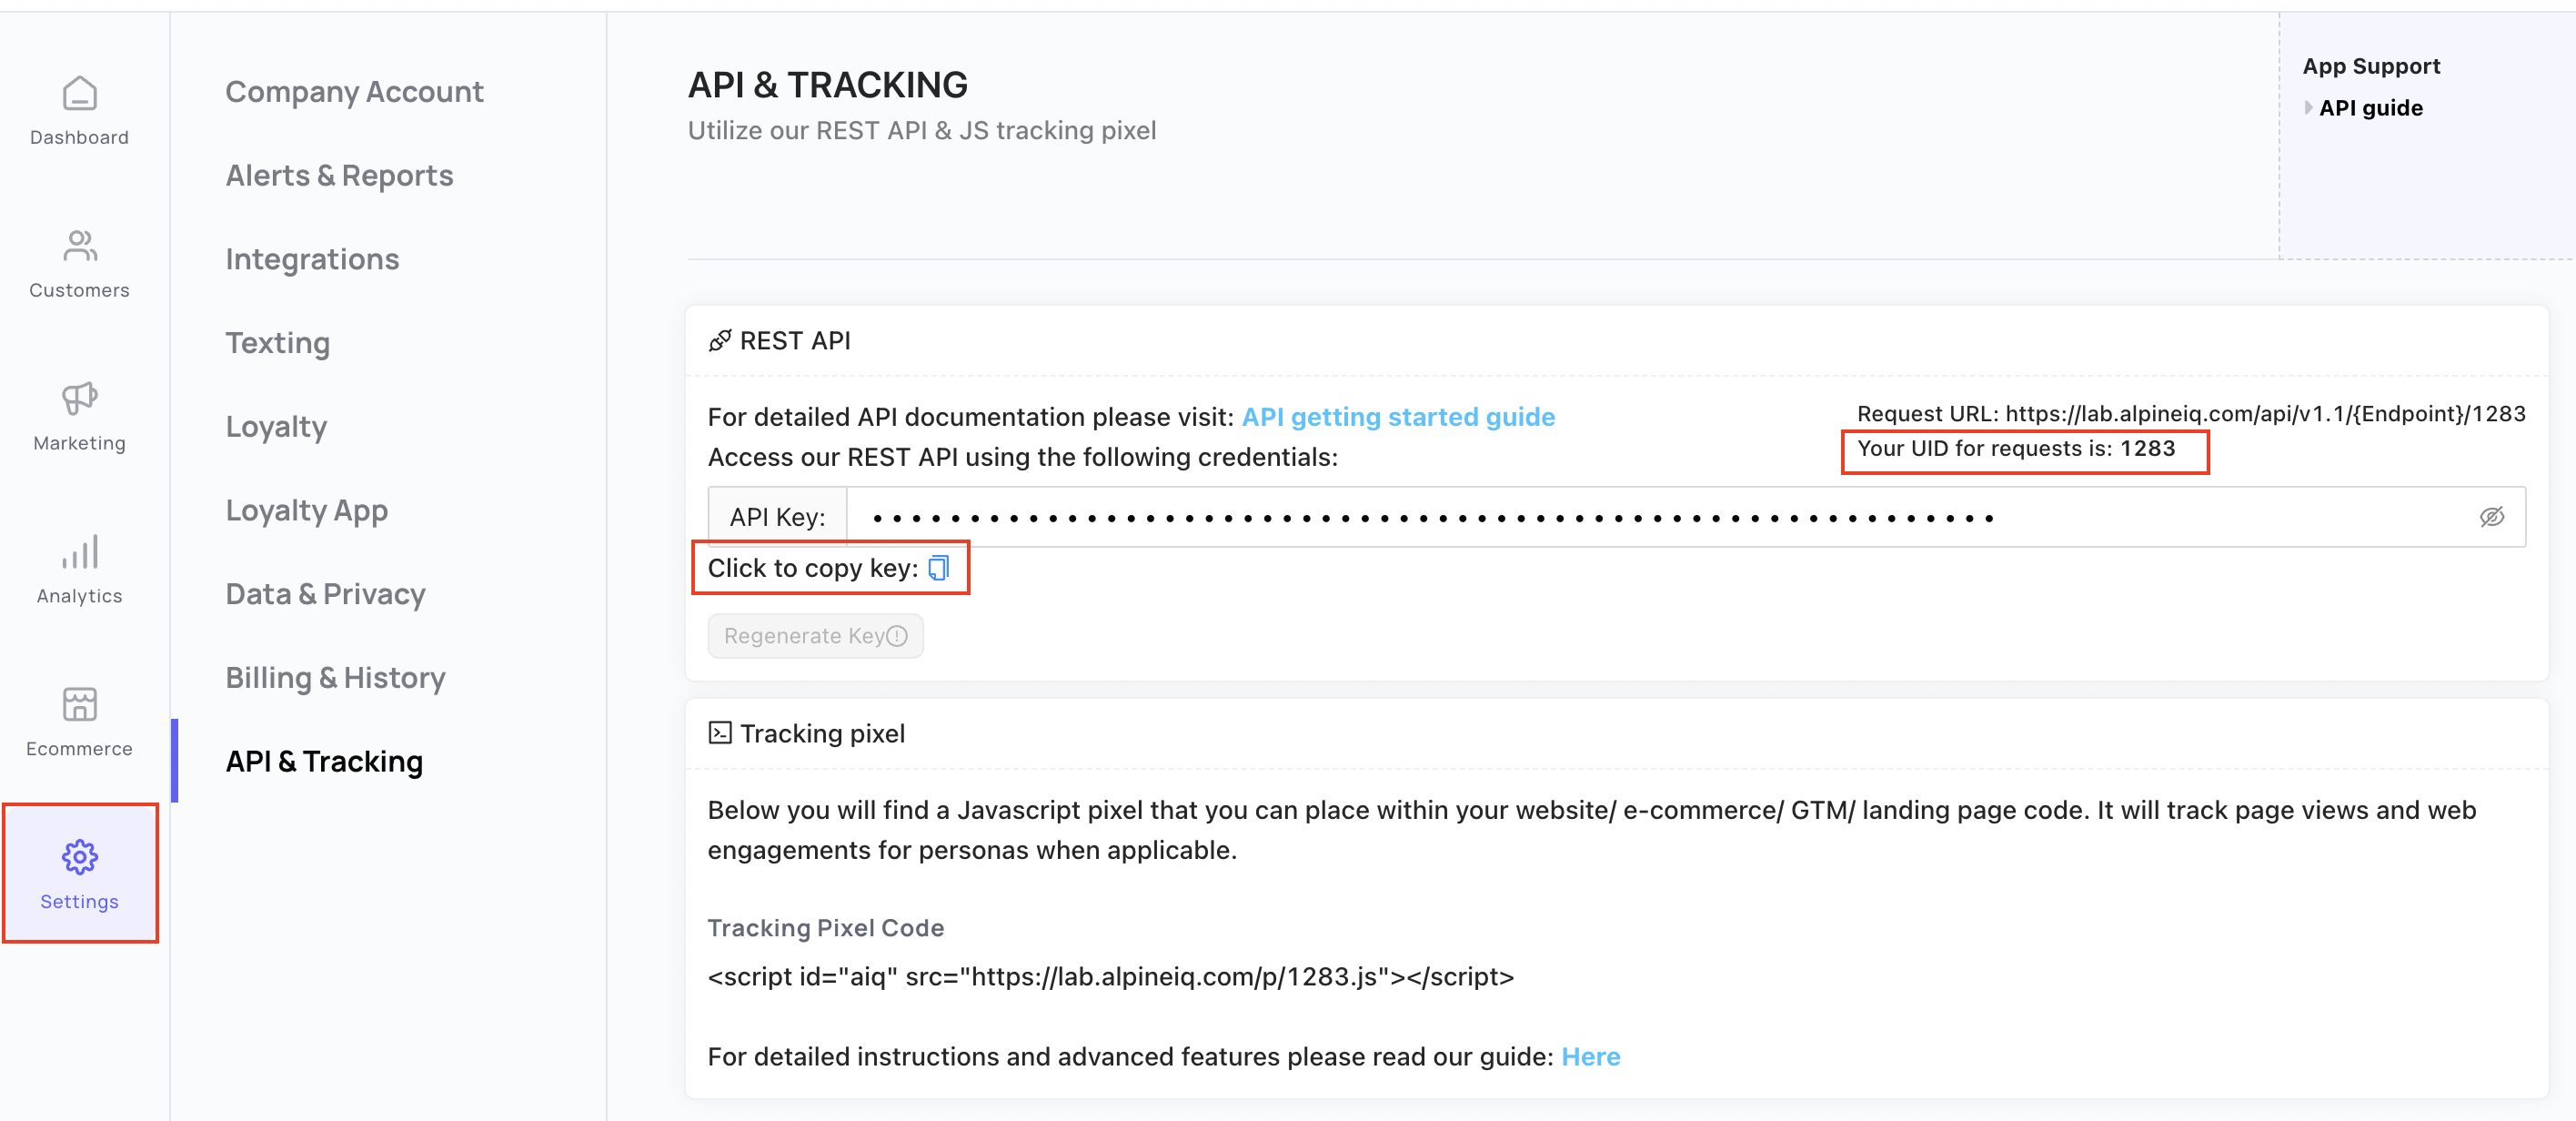
- Press the green button labeled "Settings" (1) in the top-left-hand corner of the screen
- On the settings page, select the "API & Tracking" (2) tab from the left-hand menu
- Next, locate and write down your UID number (3). This will be entered into your POSaBIT portal later in the setup process
- Additionally, COPY the API key (4) labeled "Your Key", this will be entered into your POSaBIT portal later in the setup process. See HERE for Alpine IQs guide to locating this information.
- Finally, you will need to locate your venue ID #, on the settings page, select the "Manage store(s)" tab from the left-hand menu.
- Scroll down to the bottom of the page and locate the section labeled "Your business addresses:"
- In this section, locate your venue and write down the "ID #" that matches your venue's name + address.
Loyalty Integration: Enter the UID, API key, and venue ID number from Alpine IQ into POSaBIT
If you are only using AlpineIQs Menu, skip this step and go to the "Menu Integration" section to continue.
- Log in to POSaBIT's web portal
- Select "Integration Connections" from the settings dropdown at the top of the page
- Locate the Alpine IQ - Loyalty option and click the blue Add button on the right side.
- Enter in the following information from your Alpine IQ account
- Active?: Check this flag to enable the integration.
- Data Sharing
- Share Customer PII Data: Enable this to share customer data
- Share Employee PII Data: Enable this to share employee data
- Loyalty Integration
- API Key: Paste the API key that you copied from Alpine IQ into the field labeled "API Key"
- UID: Enter the UID number from your Alpine IQ portal into the field labeled "UID"
- Use 3rd Party Loyalty Points: Enabling this will allow customers to accumulate points based on AlpineIQ's loyalty program setup
- Merchant Points: Enabling this will allow points to accumulate at all your locations.
- Store ID: Enter your venue ID number into the data field
- Integrator Token: Provide this information to AIQ to setup this integration.
If you are using both the Loyalty & Menu integration, the Integrator Token is the same for the Menu & Loyalty, so you only need to provide one of them on your AlpineIQ setup.
- Press the blue "Save" button to enable the POSaBIT / Alpine IQ integration.
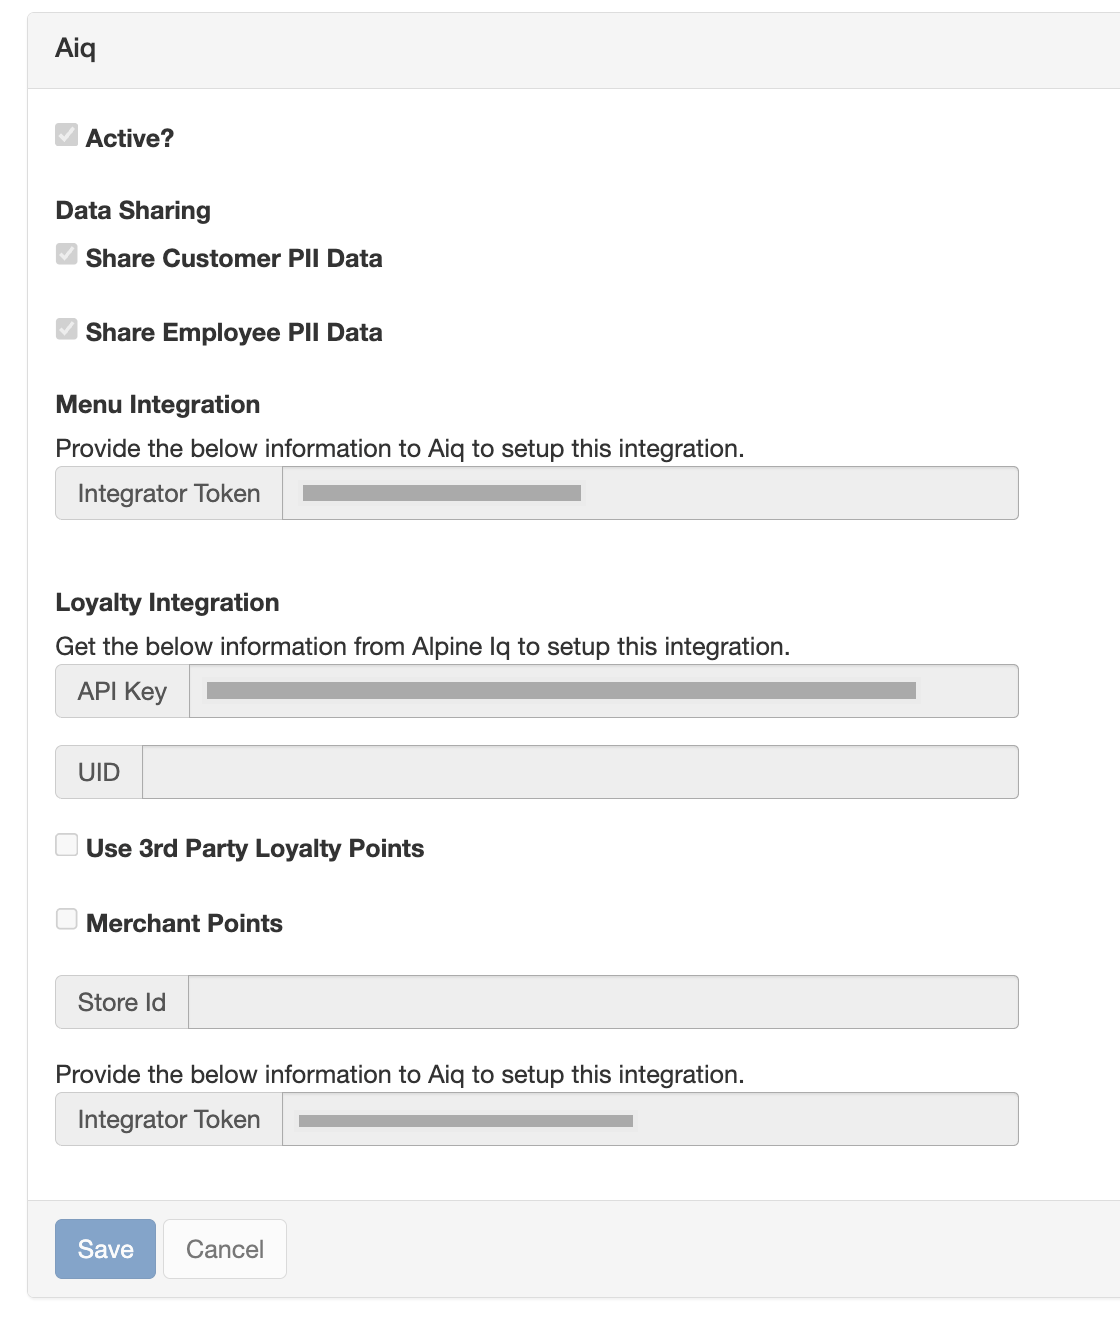
If you previously had an AIQ integration with our old API, the v3 integration will already exist but it will be inactive until they go in an activate it. It'll look something like this:

Menu Integration
- Log in to POSaBIT's web portal
- Select "Integration Connections" from the settings dropdown at the top of the page
- Locate the Alpine IQ - Menu option and click the blue Add button on the right side.
- Enter in the following information from your Alpine IQ account
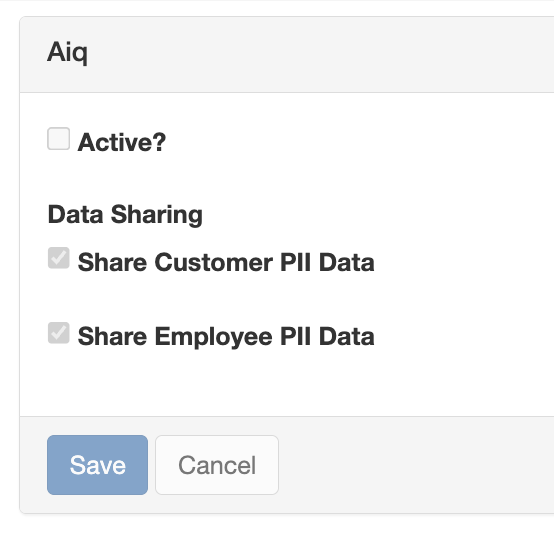
- Active?: Check this flag to enable the integration.
- Data Sharing
- Share Customer PII Data: Enable this to share customer data
- Share Employee PII Data: Enable this to share employee data
- Integrator Token: Provide this information to AIQ to setup this integration.
Generate an API token within POSaBIT to be entered within Alpine IQ for each venue
- Navigate back to Alpine IQ
- Click on the "Connect data" section, locate the "POSaBIT" card
- Enter the API token and store name, and click the Add stores green button
- Make sure you check off the box next to "Required All users from this source have passed an age gate compliant with my industry.":
- Next, click the green Connect button at the bottom
- Next, reach out to POSaBIT support to enable the integration. The support representative will be able to do this for you immediately.POSaBIT Support will need to enable an additional permission checkbox called Enhanced Customer Data Access for your API to work properly.
How to Map a Store in Alpine IQ
- Navigate to Settings -> Company Account > Retail Store
- Click Edit on the store you wish you map
- Under Store Mappings you'll see the POSaBIT symbol
- Click on the empty field to the right of the symbol and a dropdown will appear to "map" the key
- Click Save settings and you are done mapping the store. Keep in mind this must be repeated for any additional stores that you add to the account.
Note: The sync of loyalty points between POSaBIT & AlpineIQ will occur when the customer's profile is pulled up on the POS.
To learn more about this integration, see Alpine IQs Loyalty Integration Guide.
For additional assistance, please reach out to POSaBIT support @ 1 (855) POSaBIT OR SUPPORT@POSaBIT.COM