Alpine IQ - How to Create and Link Rewards

One of the most key aspects of POSaBIT's integration with Alpine IQ is the ability to redeem rewards directly from the point of sale! Once a reward is redeemed redemption details are then shared automatically with Alpine IQ in order to keep an accurate count of your customers loyalty points.
In order to display and track rewards/promos between both POSaBIT and Alpine IQ, these will need to be build in both systems. Then they will then automatically map together based on their name!
How to Link Rewards Between POSaBIT and Alpine IQ:
Step 1) Creating the Reward within Alpine IQ:
*Please note that all NEW rewards must be created in Alpine IQ FIRST, then mirrored and created in POSaBIT
- Log in to Alpine IQ's web portal
- Select "Discounts" from the marketing dropdown within the left-hand menu
- On the discounts page, select the purple button labeled "New Discount" in the top left-side of the page.
You should now fill out all discount details within the discount builder to properly generate the discount you would like to create:
- Discount Information
- Name: Name of the discount. You can name it whatever you want.
- What type of discount is this?: Select Normal or Tier Reward
- Available To:
- Personas at: Select the stores this should be available at.
- Personas in: Select the audiences this reward should be available to.
- Timing:
- Select a Start and End time, or leave it blank if there is no expiration date on this reward.
- Click the "Continue to Design" to continue.
- Design
- What are you discounting?: Important. Ensure that you enter a unique reward name (Ex. "25% OFF"). This must match exactly with the "Name" field in the POSaBIT 3rd Party Reward.
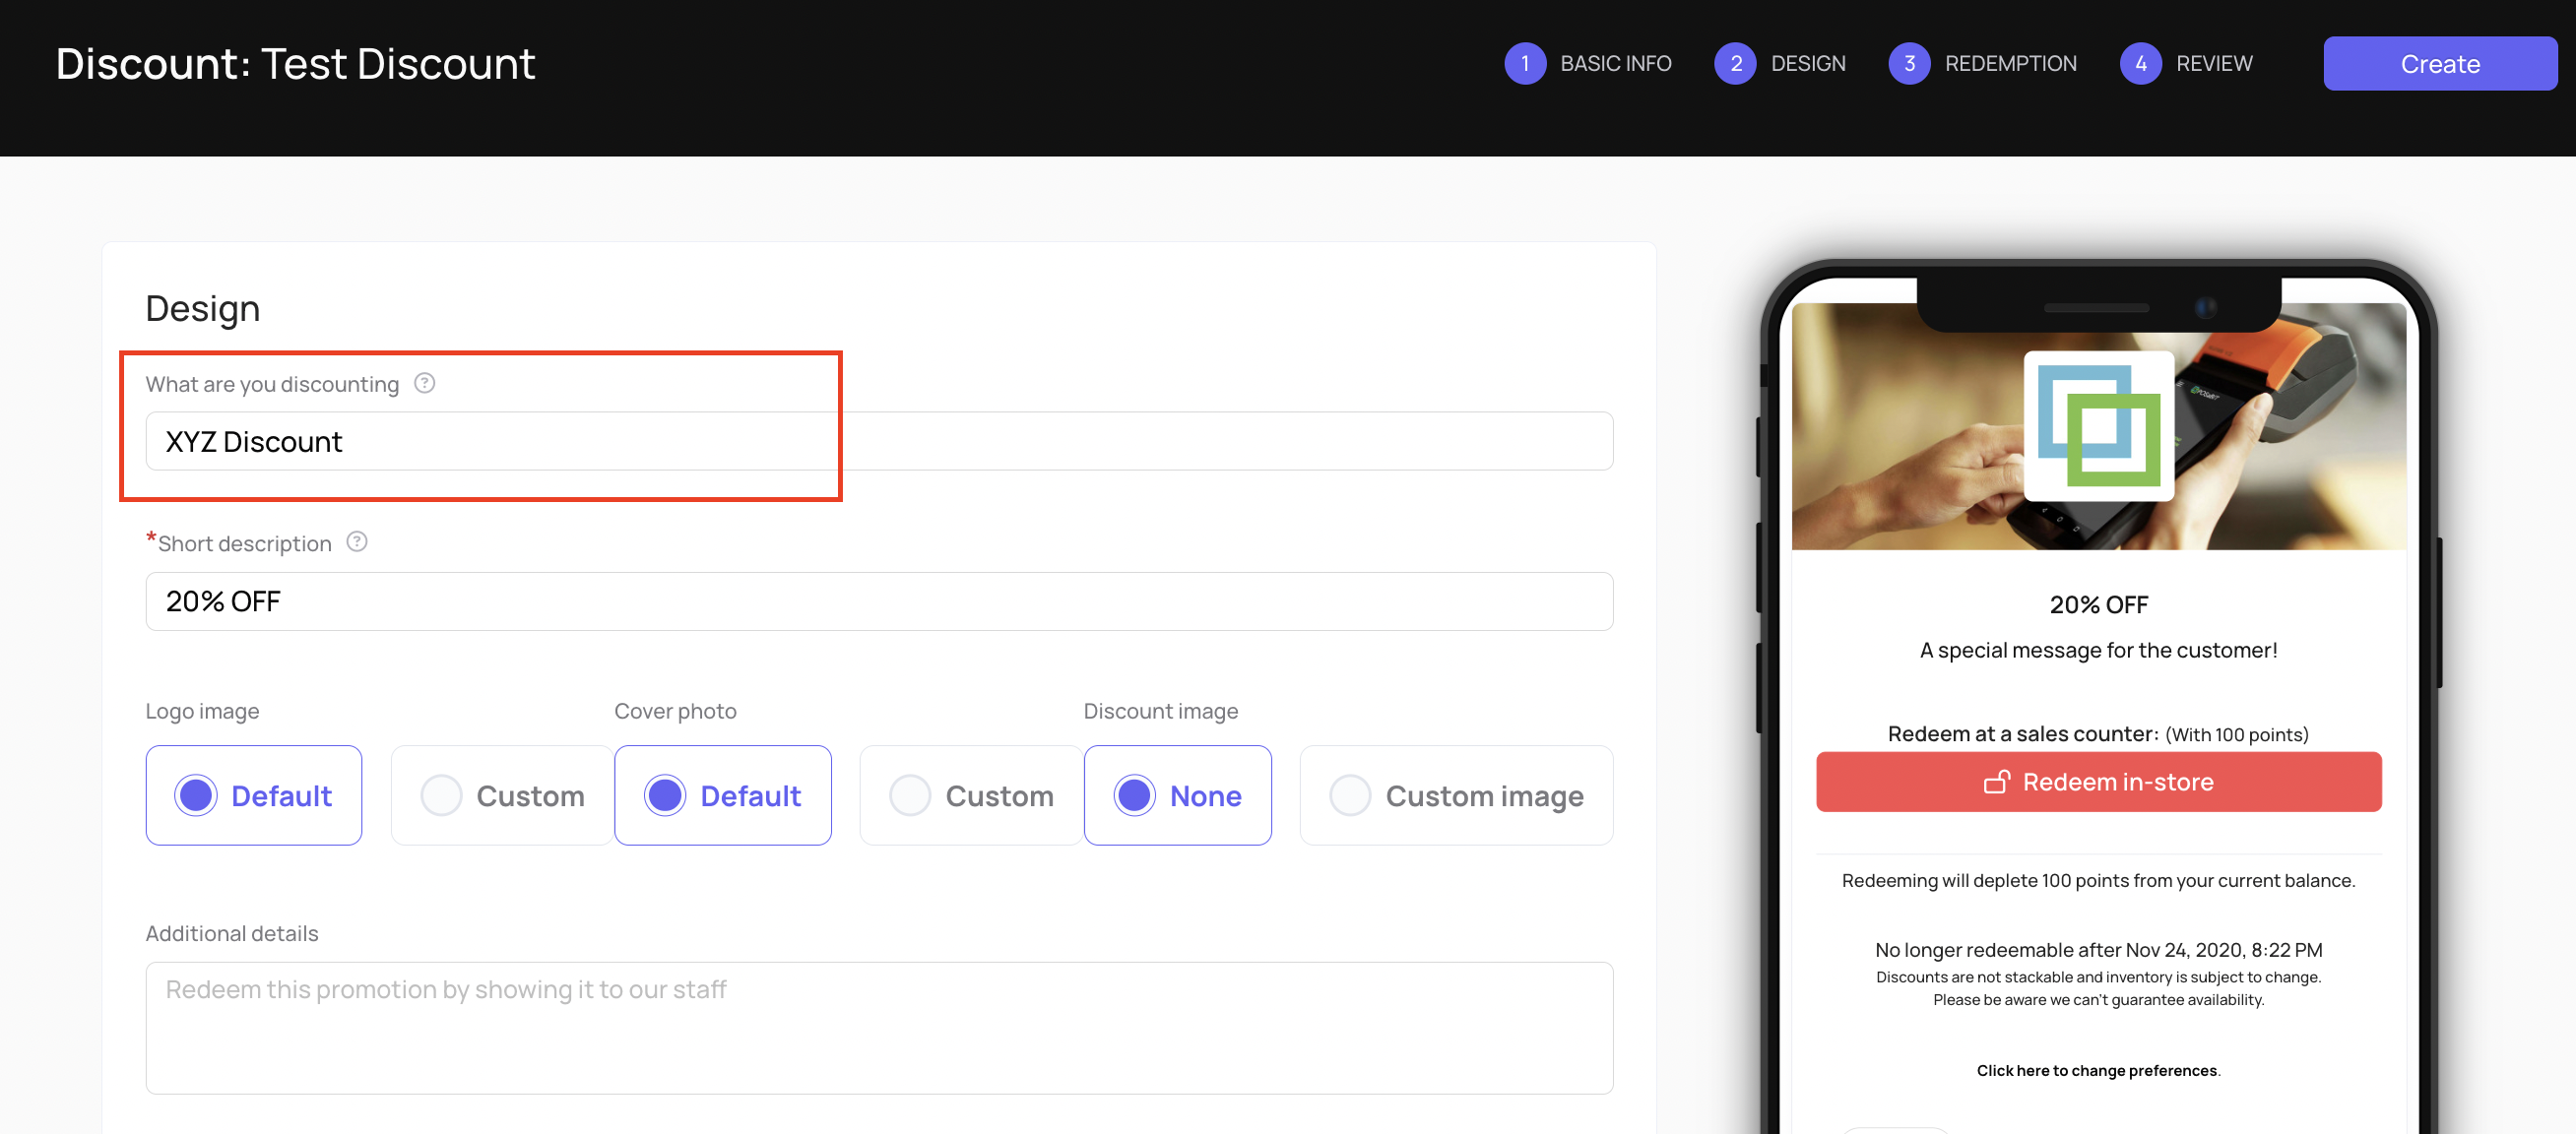
- Short Description: Give a short description of what the discount is. This will be shown to customers.
- Logo Image: Default or add a custom logo.
- Cover Photo: Default or add a custom cover image.
- Discount Image (optional): Enhance customer impact by adding a photo to your discount (Note: This image will only be used through Alpine IQ, POSaBIT currently does not support images with rewards)
- Additional Details: Add an option description or any extra details you want to inform your customers.
- Additional Options:
- Redemption Confirmation: Shown within a confirmation pop-up when the user clicks the redeem button.
- Double Confirmation: Double confirm with the customer before redeeming the discount.
- Pre-Title Text: Text to be shown before the discount title.
- Fine Print: Text to be shown at the bottom of the discount, i.e, the fine print/disclaimer
- Click the "Continue to Redemption" button at the bottom to continue
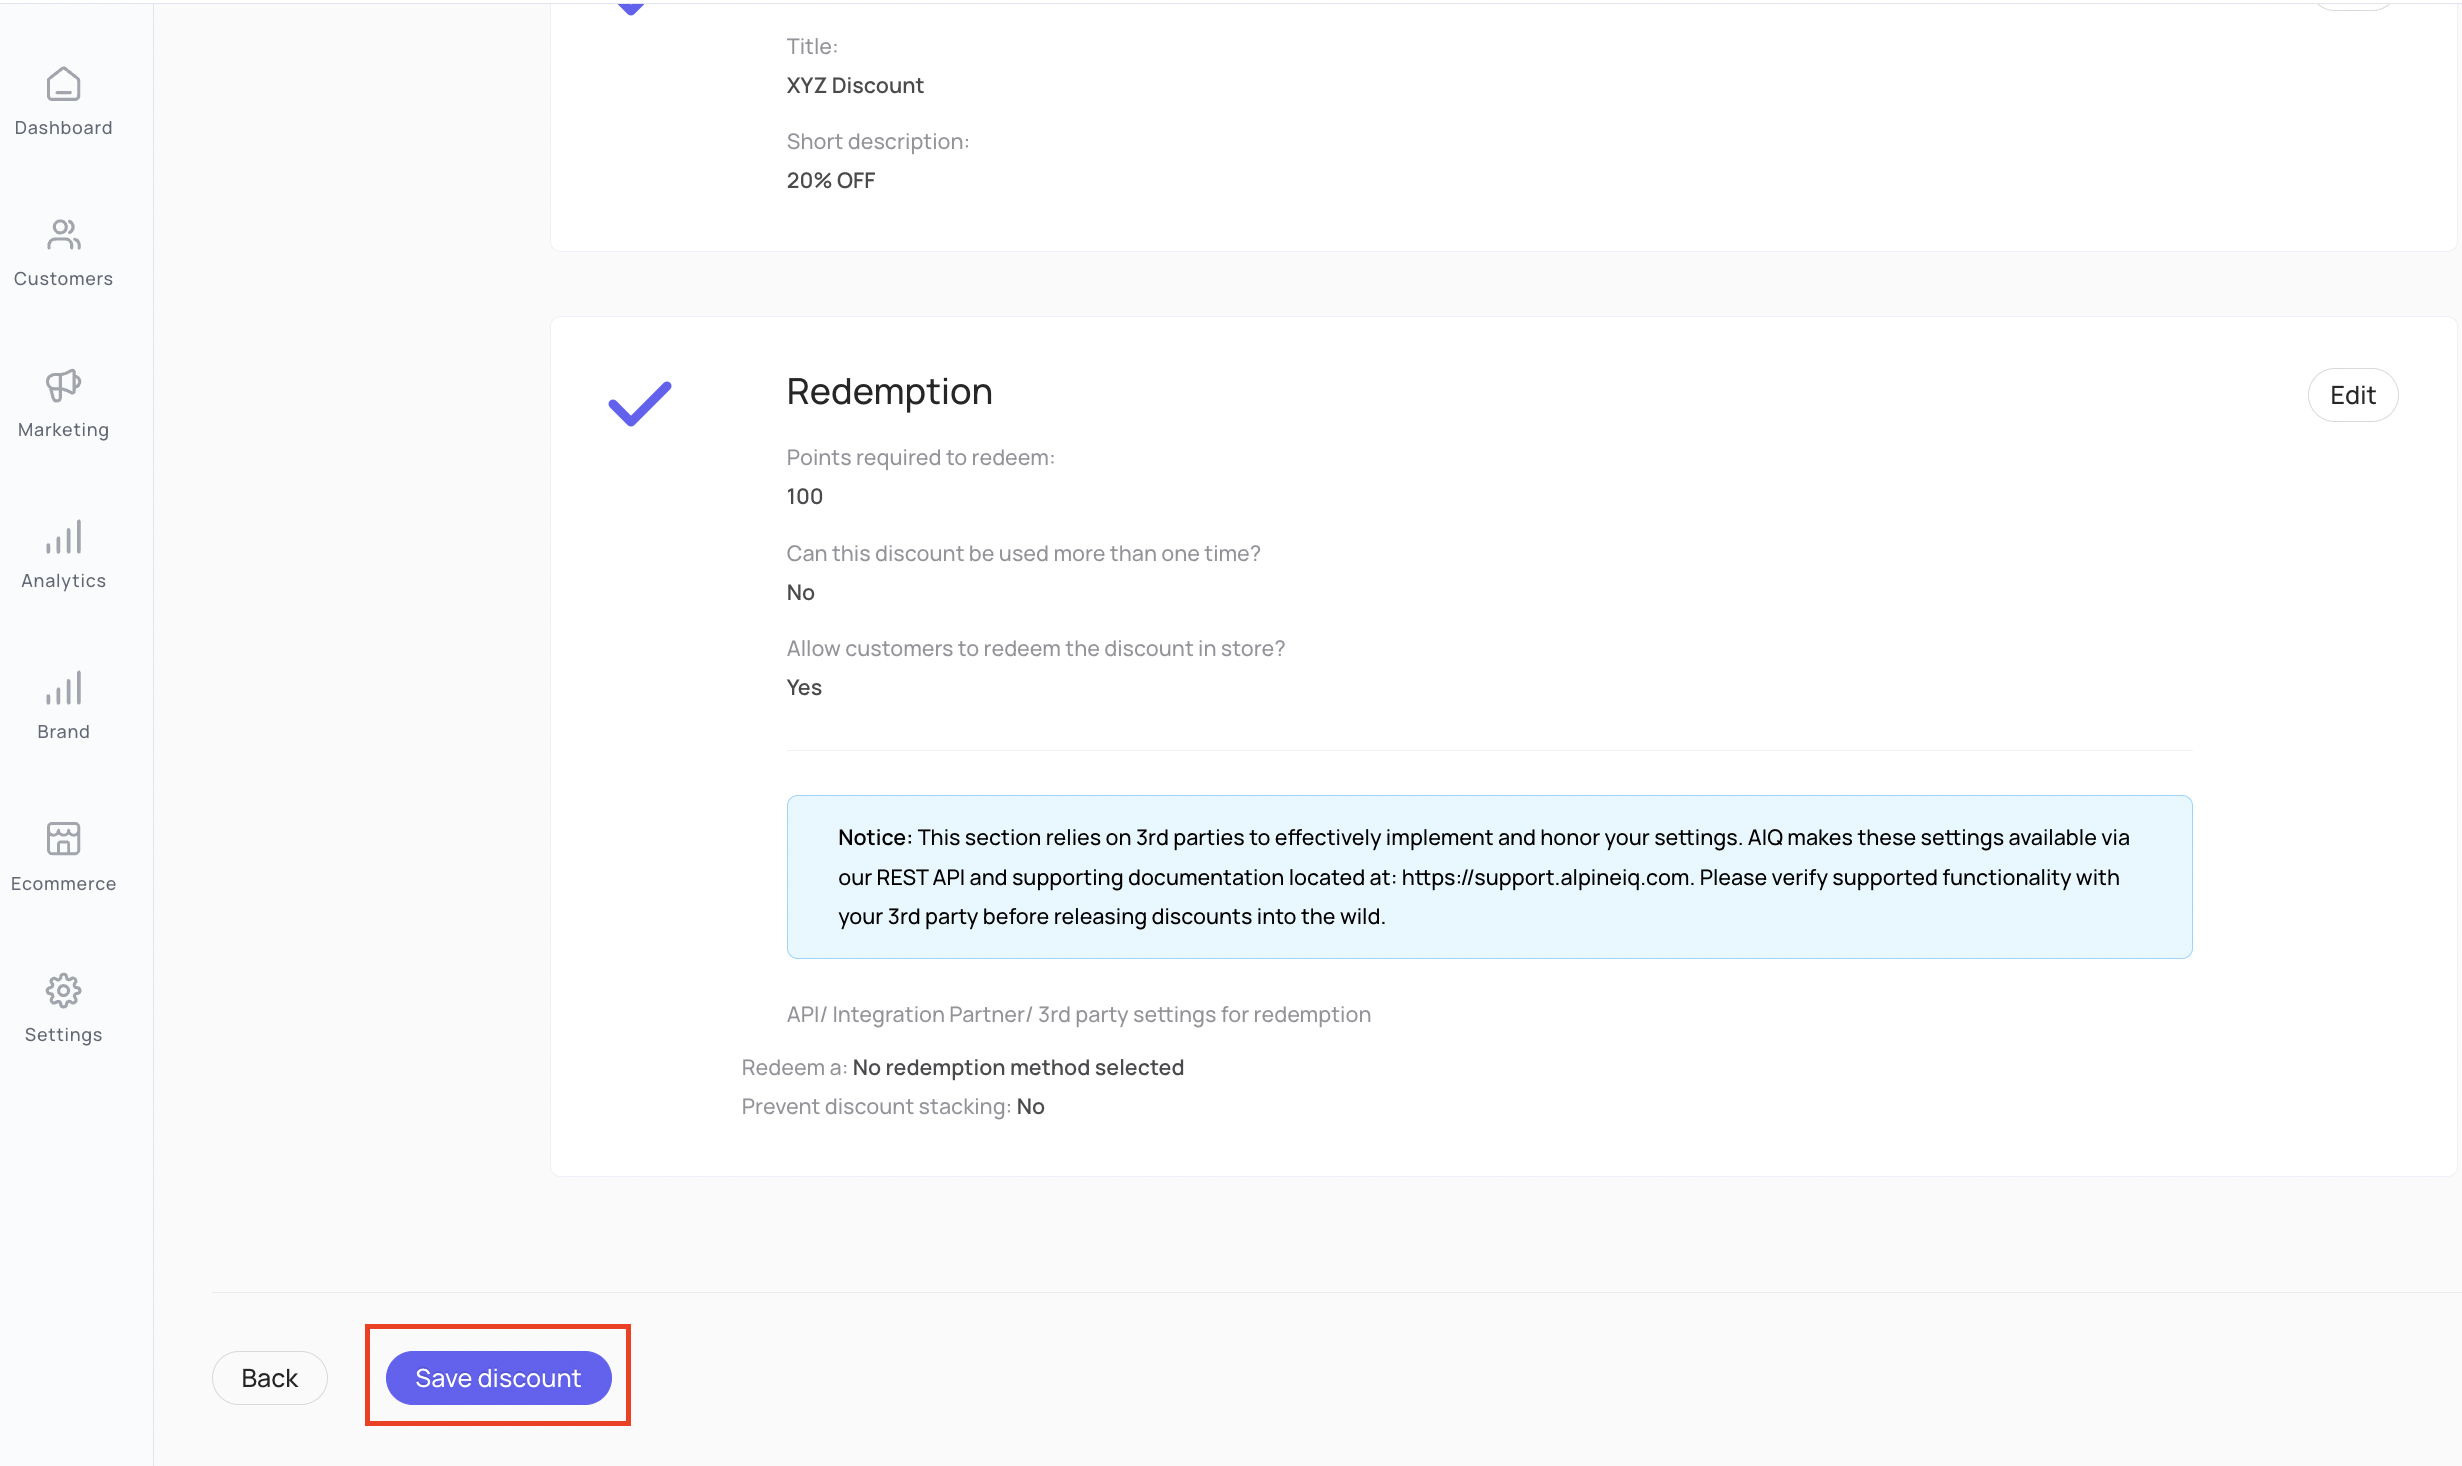
- Redemption Options:
- Points required to redeem:
- Important. Use this field to set a loyalty point cost on this discount.
- NOTE: If you set a loyalty point cost on a discount then it will be considered a "Reward" via POSaBIT. However, if no loyalty point cost is set, then the discount is considered a "Promotion".
- If this discount can be used more than once, make sure "Can this discount be used more than one time?" is set to Yes.
- Hide the "Redeem in-store" button: This will hide the "Redeem in Store" button on the reward within the Apline IQ app.
- How should your integrated partners redeem this discount?: Select one of the options and fill in the required fields based on your selected method.
Select the "Continue to Review" button at the bottom to continue.
- Once you have reviewed all your discount information, press the purple button labeled "Save Discount" at the base of the screen to create the promotion.
Step 2) Creating a Promotion within POSaBIT:
- Login to the POSaBIT web portal
- Select "Loyalty Rewards" from the Marketing dropdown at the top of the page
- Press the blue "New Point Reward" button located in the top right-hand corner of the page
- Set up the custom reward using the settings/options described HERE
- Ensure that this name exactly matches the "What are you discounting?" field you entered when creating the reward within Alpine IQ! For the example above this would be "25% Off"
- POSaBIT 3rd Party Reward Example Screen Shot
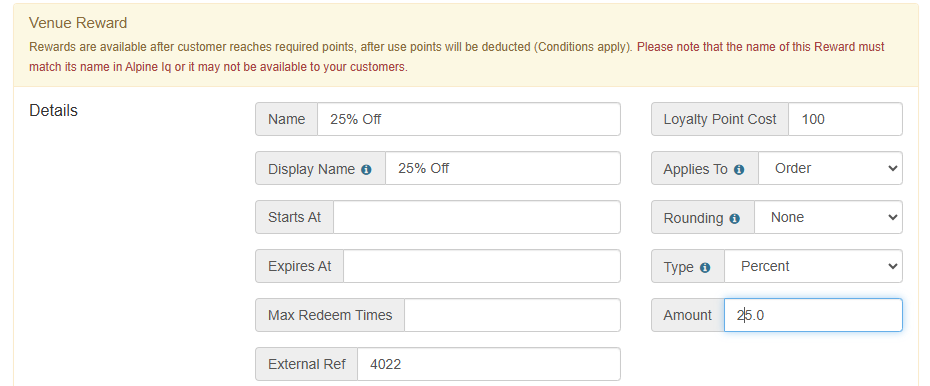
- Once you have completed the form, press the blue "Save" button to create the promotion (specialized discount)
Congratulations, on setting up your first shared reward between POSaBIT and Alpine IQ. For any further questions please reference the POSaBIT knowledge base or contact your POSaBIT account manager!
For additional assistance please reach out to POSaBIT support @ 1 (855) POSaBIT OR SUPPORT@POSaBIT.COM