Incoming Manifest Acceptance Automation

We have added the ability to scan product barcodes when accepting an incoming manifest. See below to learn how to use this functionality.
NOTICE: This will only work on paraphernalia items.
- Log in to the POSaBIT portal.
- Go to the Inventory tab --> Incoming Manifests
- Click the New Manifest button in the top right corner of the page.
- Fill out the information based on which brand this manifest is coming from, and click Save.
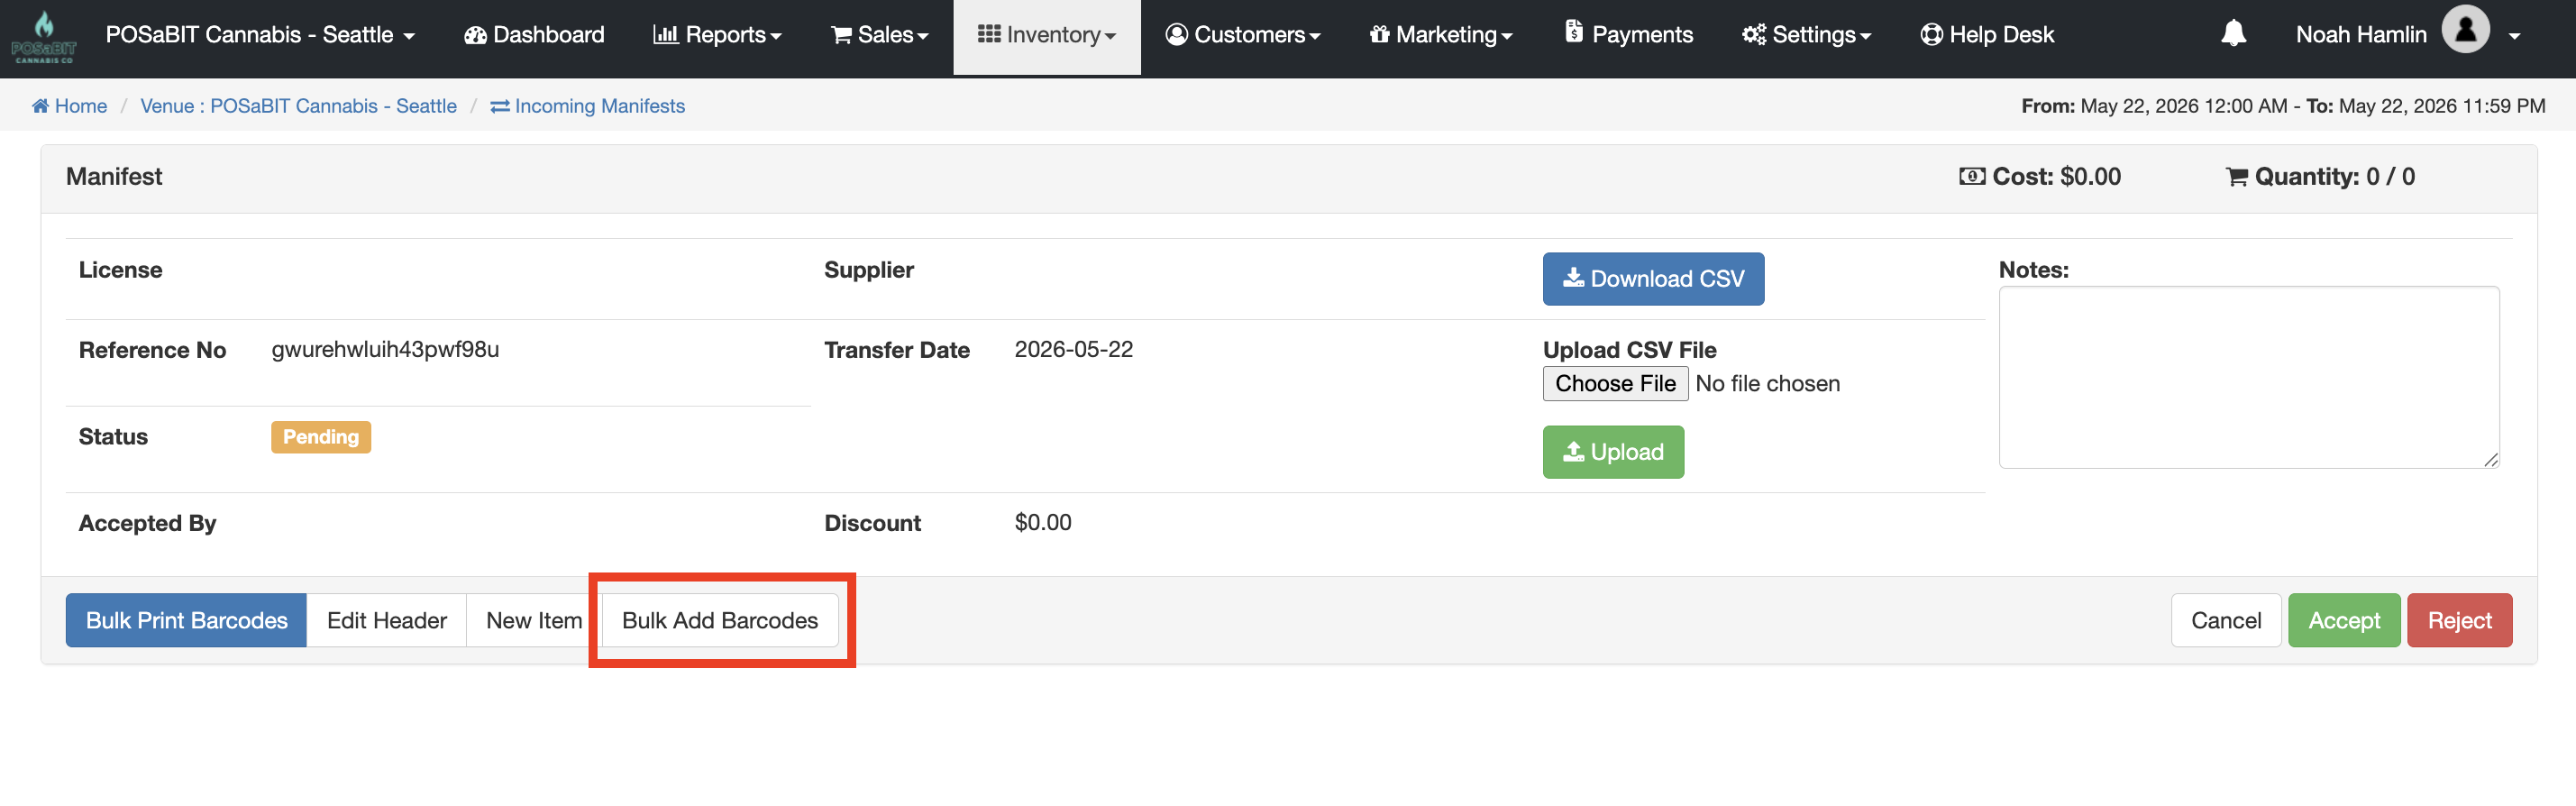
- Now you should see a blank manifest. To bulk scan barcodees in, click the Bulk Add Barcodes button.
- Once you click the button, a pop-up will appear. This is where you can start scanning product barcodes using the scanner connected to your computer. You can also manually enter each of the barcodes and click Add Barcode to add more.
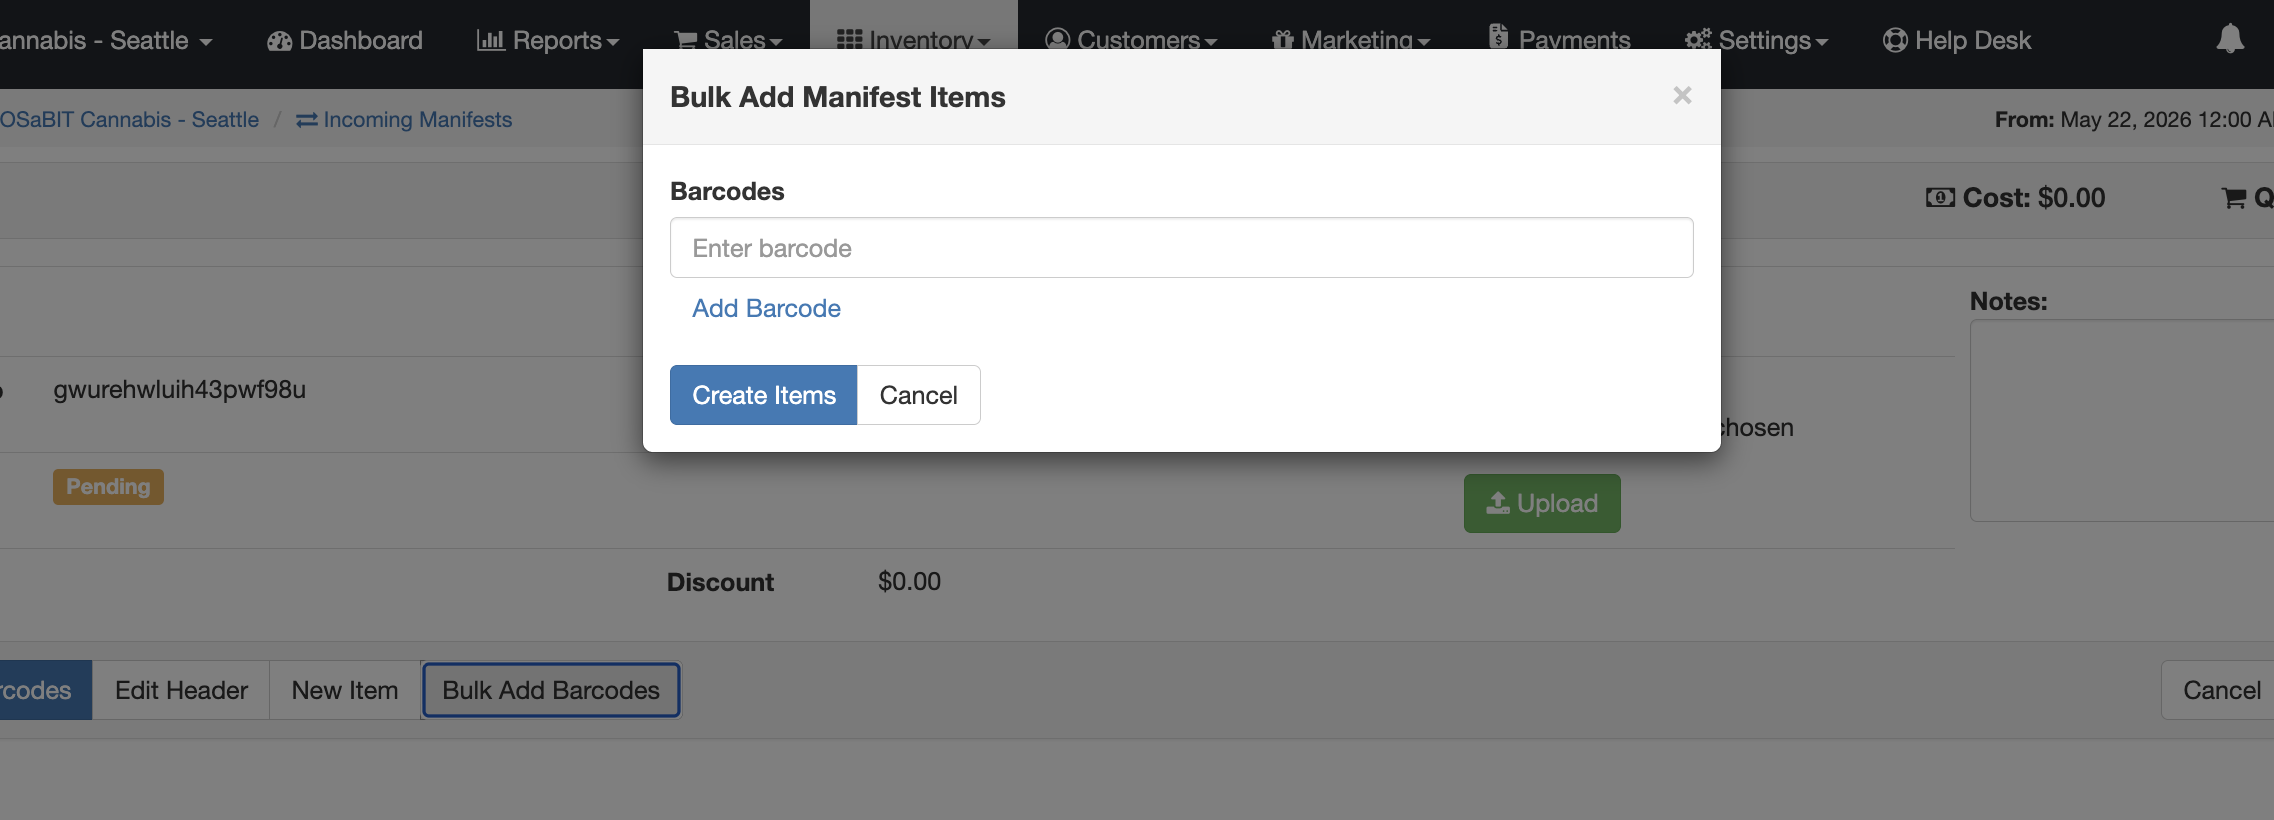
- Once you have scanned in all the barcodes, click the Create Items button, and the barcodes will be added to the manifest as separate products.
- Barcode exists: If the barcode matches an existing product, then that product will be automatically assigned.
- New Barcode: If it's a new barcode that the system doesn't recognize, then the lot will be added to the manifest without a product. You will need to select the product it matches or create a new one, like you normally would on an incoming manifest.
- Fill out the necessary details for each lot and accept the manifest.