How to Accept, Fulfill, and Complete a POSaBIT Online Order using POSaBIT Pay and Consumer Adds More Product once in Store

How to Accept, Fulfill, and Complete a POSaBIT Online Order using POSaBIT Pay and Consumer Adds More Product once in Store
Accepting & Filling the Order
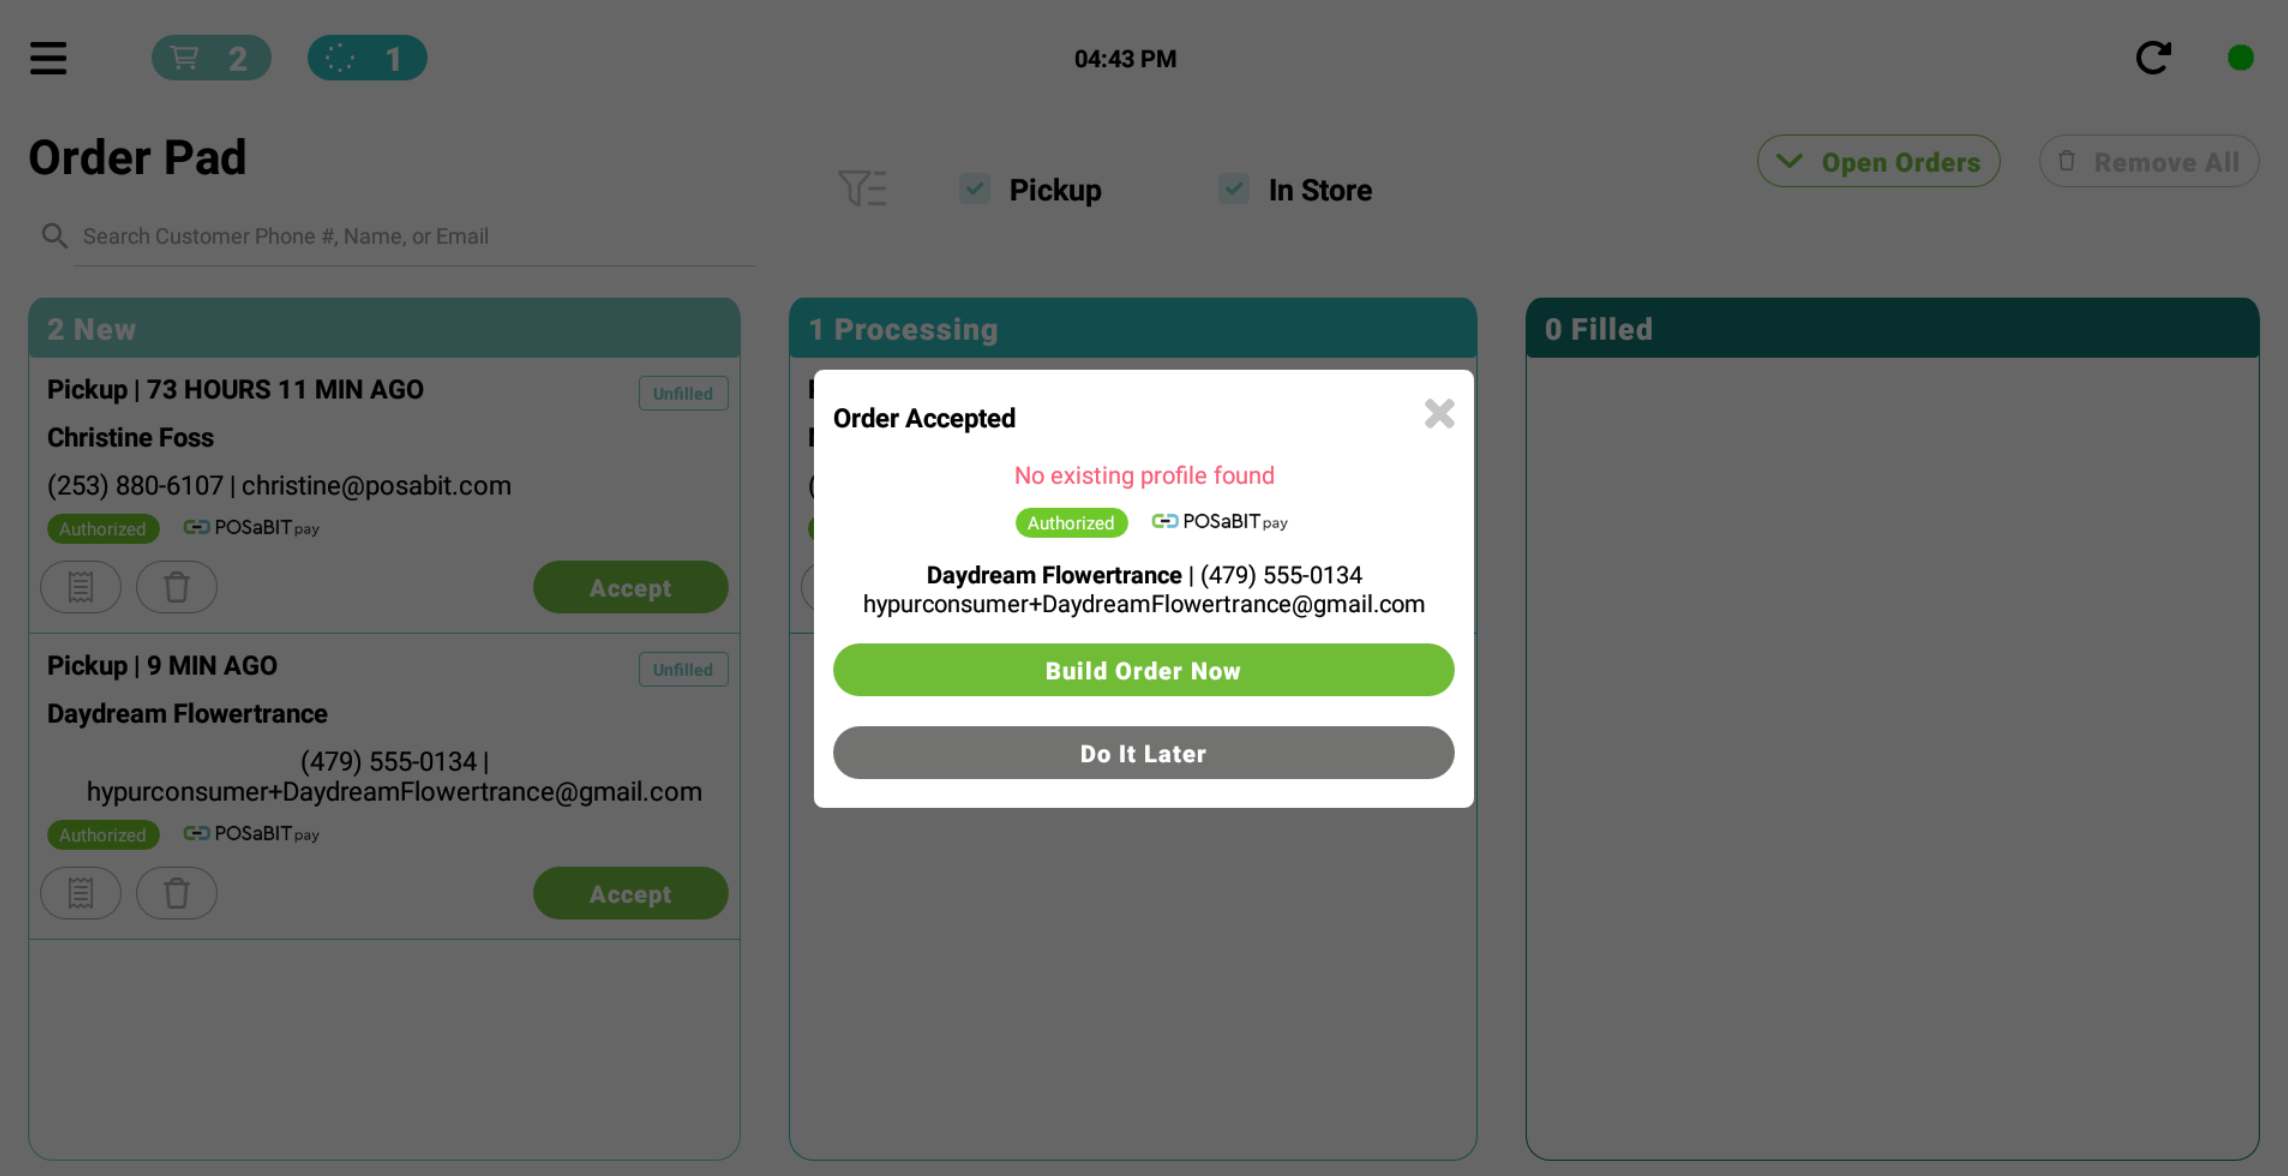
- First, you will log in to the POS, go to the Order Pad, and click Accept on the order.
- A popup will display asking to confirm you'd like to build the order. This popup also shows that the customer used POSaBIT Pay as their payment method.
- Once you have opted to build the order, you can now fill the order like you normally would for any other online order. Once it's filled, save it as a Filled Order. This will initiate a notification to the customer informing them that their order is ready for pick up.
Completing the Order
Once you have completed filling an order and saving it as filled, you will be taken back to the Order Pad screen. Below are the final steps to completing an order once the customer arrives to pick it up and would like to add additional products to their order.
POSaBIT Pay Profile Linked to POS Profile:
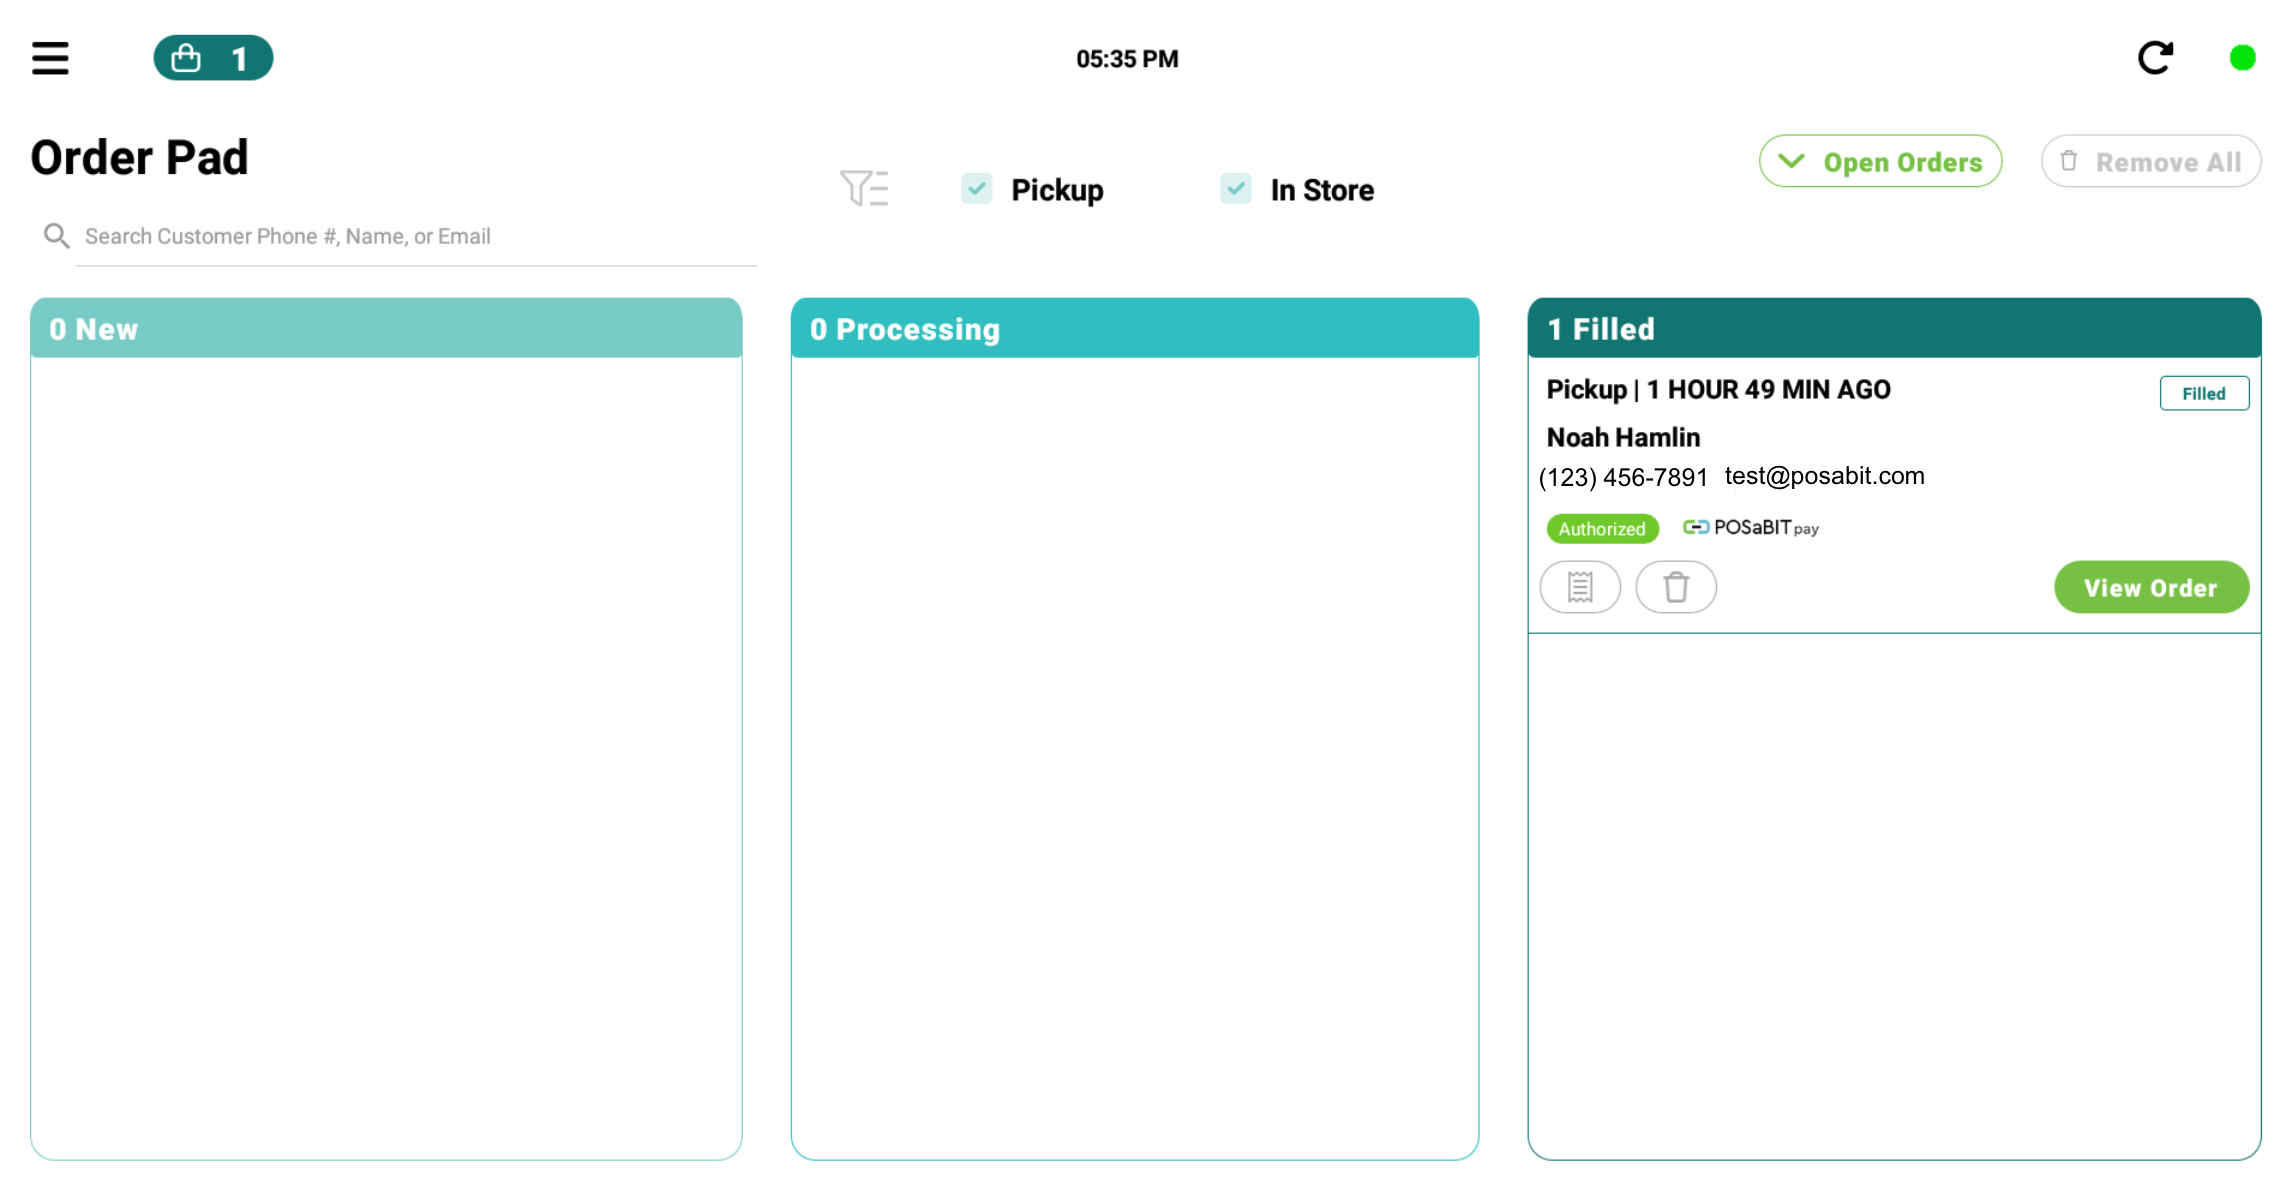
- When the customer arrives to pick up their order navigate back to the order pad tab in the POS and locate the filled order in the filled column on the right side of the screen.
- Once you have located the order, click the green View Order button. This will take you directly to the filled cart where you can complete the rest of the order.
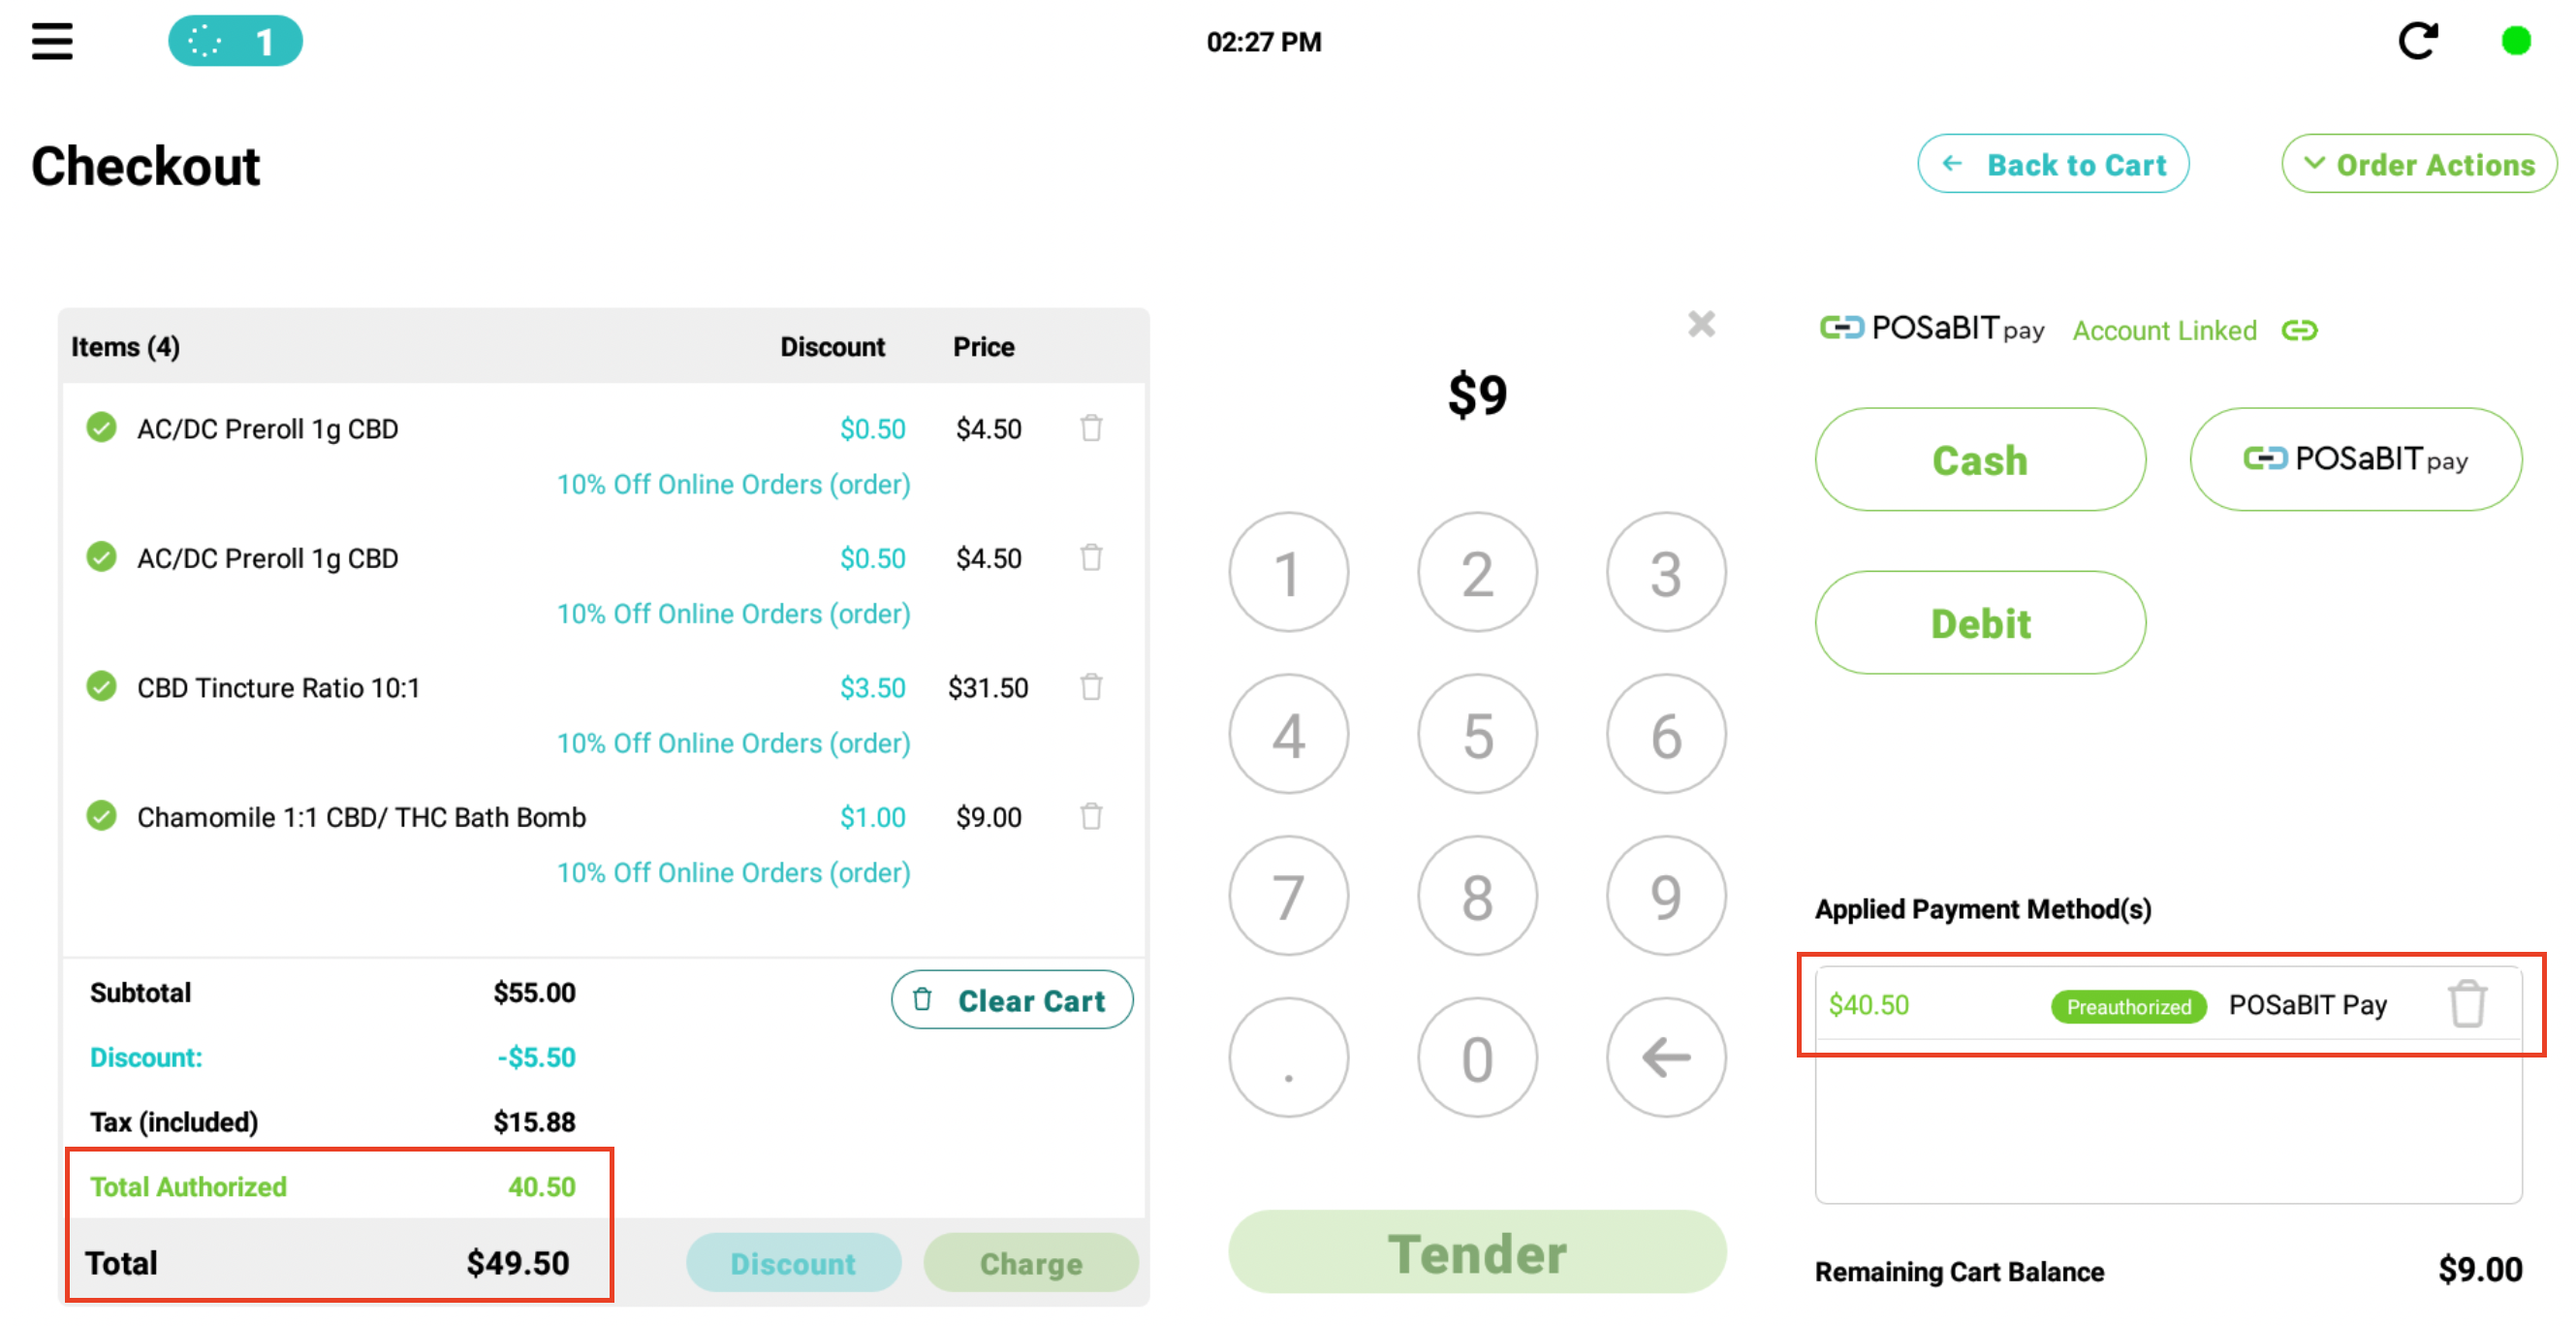
- Add any additional product the customer would like.
- The budtender will confirm the order with the guest and click Charge. This will then pull up the payment screen where the budtender will ask the customer if they'd like to pay with a different payment method or POSaBIT Pay. If they opt to use a different payment method, simply proceed as you would with the remaining tender amount to complete the transaction. If the customer would like to still pay using POSaBIT Pay, continue to the steps below.
- Click the gray garbage bin next to the existing "Preauthorized POSaBIT Pay" payment method. In the image below, you can see on the bottom left what the customer was previously authorized to purchase using POSaBIT Pay, but they added an item and the total is now higher than the preauthorized amount. In the bottom right of the photo is where the trash bin is to remove the original authorized amount.
- Once you have removed the preauthorized POSaBIT Pay amount, reinitiate POSaBIT Pay by clicking on the POSaBIT Pay payment option.
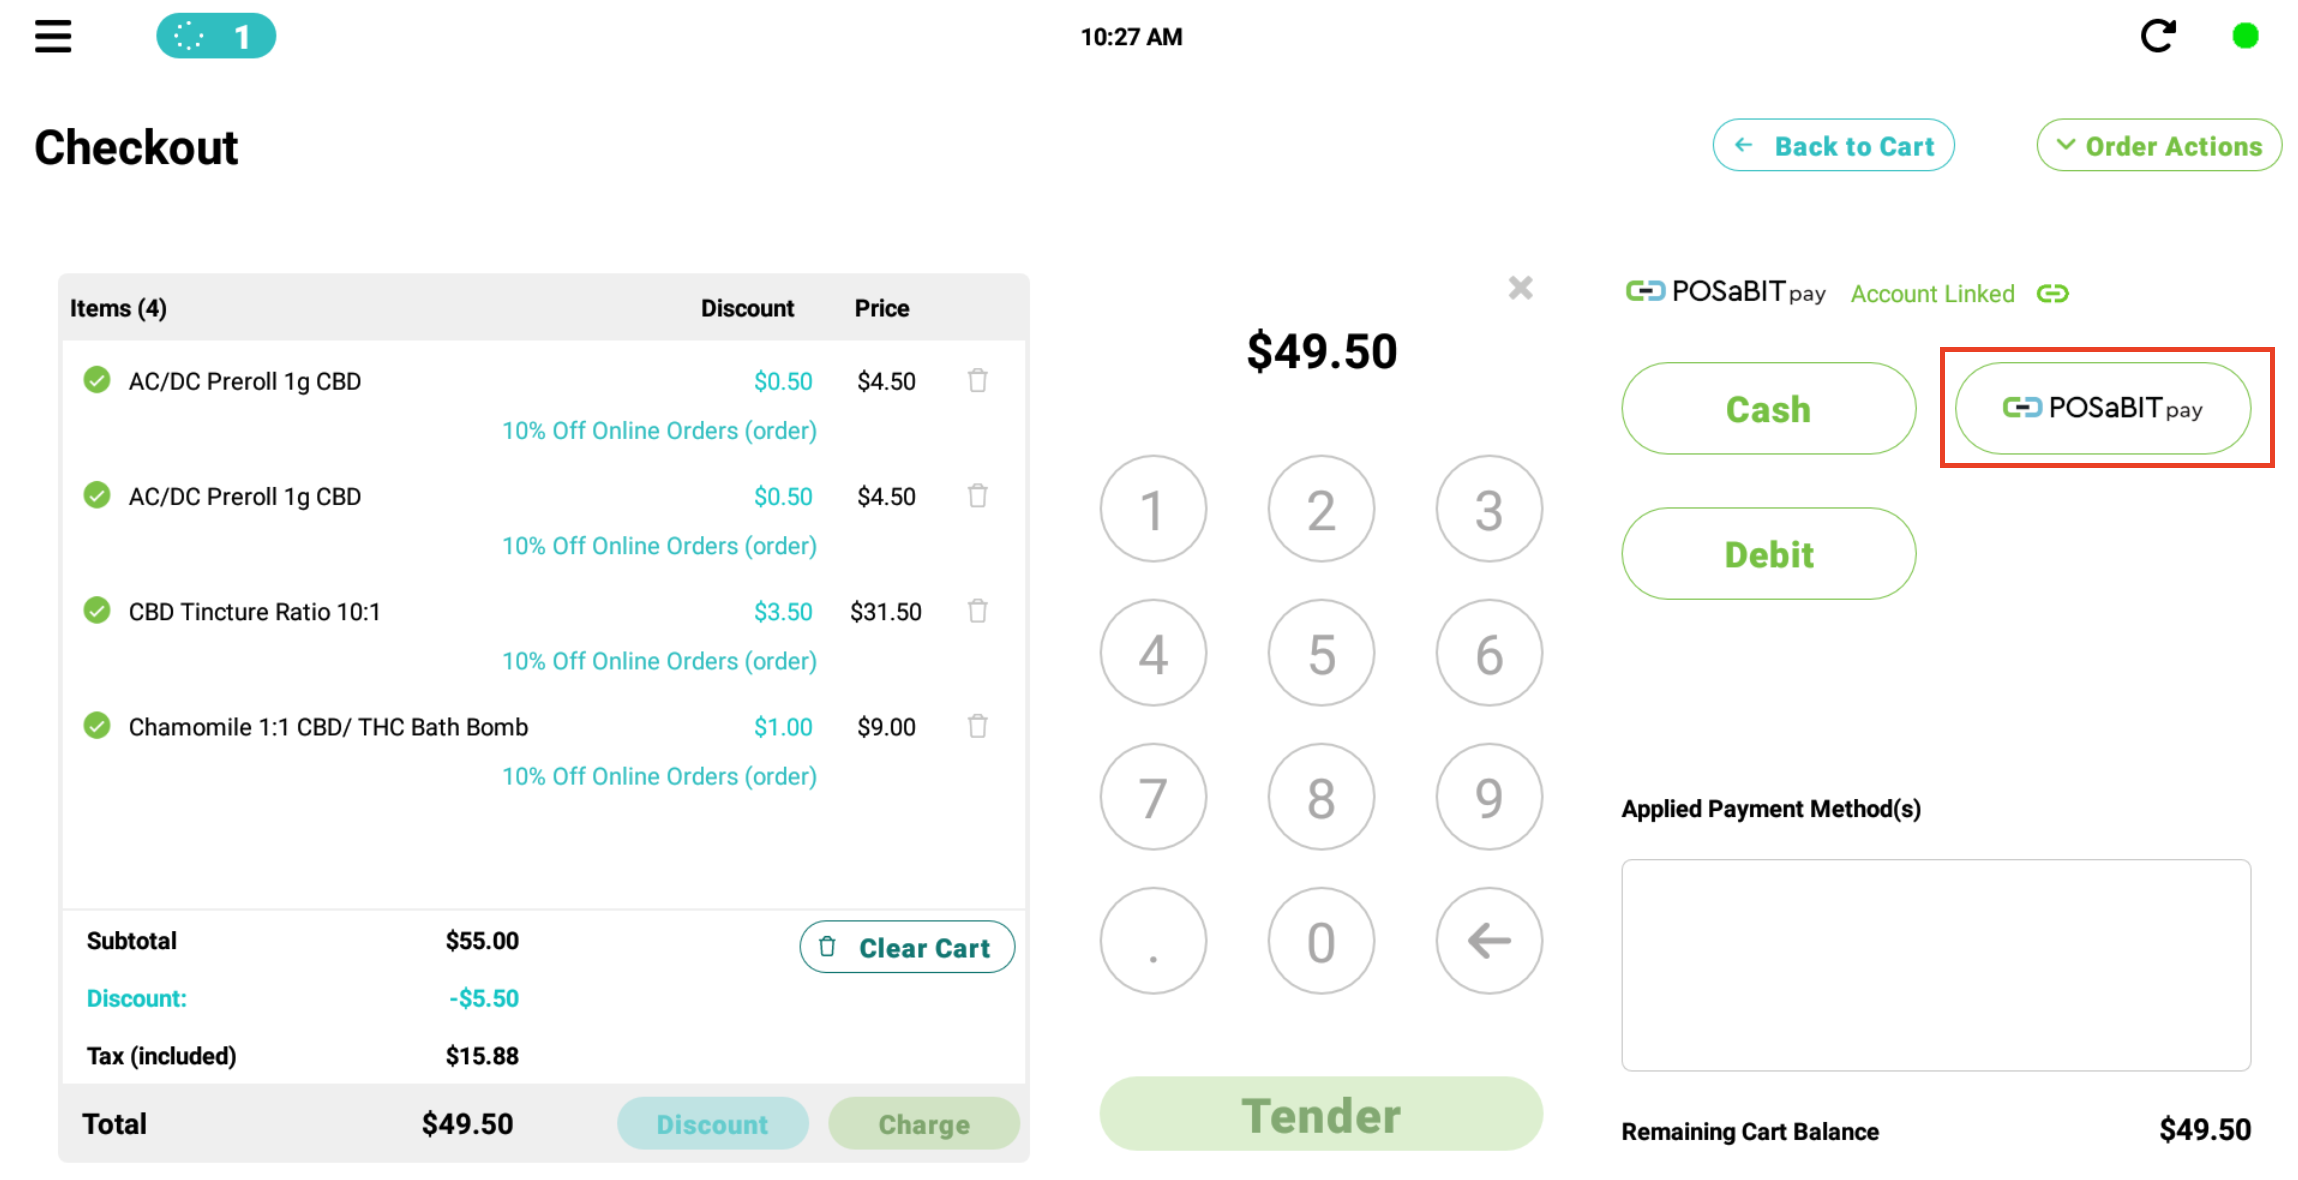
- Flip the screen the customer's way to fill out a few steps. Once they have completed the necessary steps, click Tender to finalize the transaction.