How to View Pre-Built Employee Groups

When first starting with POSaBIT, we provide several preset access groups. These groups are created automatically and unable to be customized. Before assigning any employees, make sure to examine each preset group to ensure the employee is gaining access to the right portal features.
To view the preset employee groups, follow the steps below.
- Log in to the POSaBIT web portal
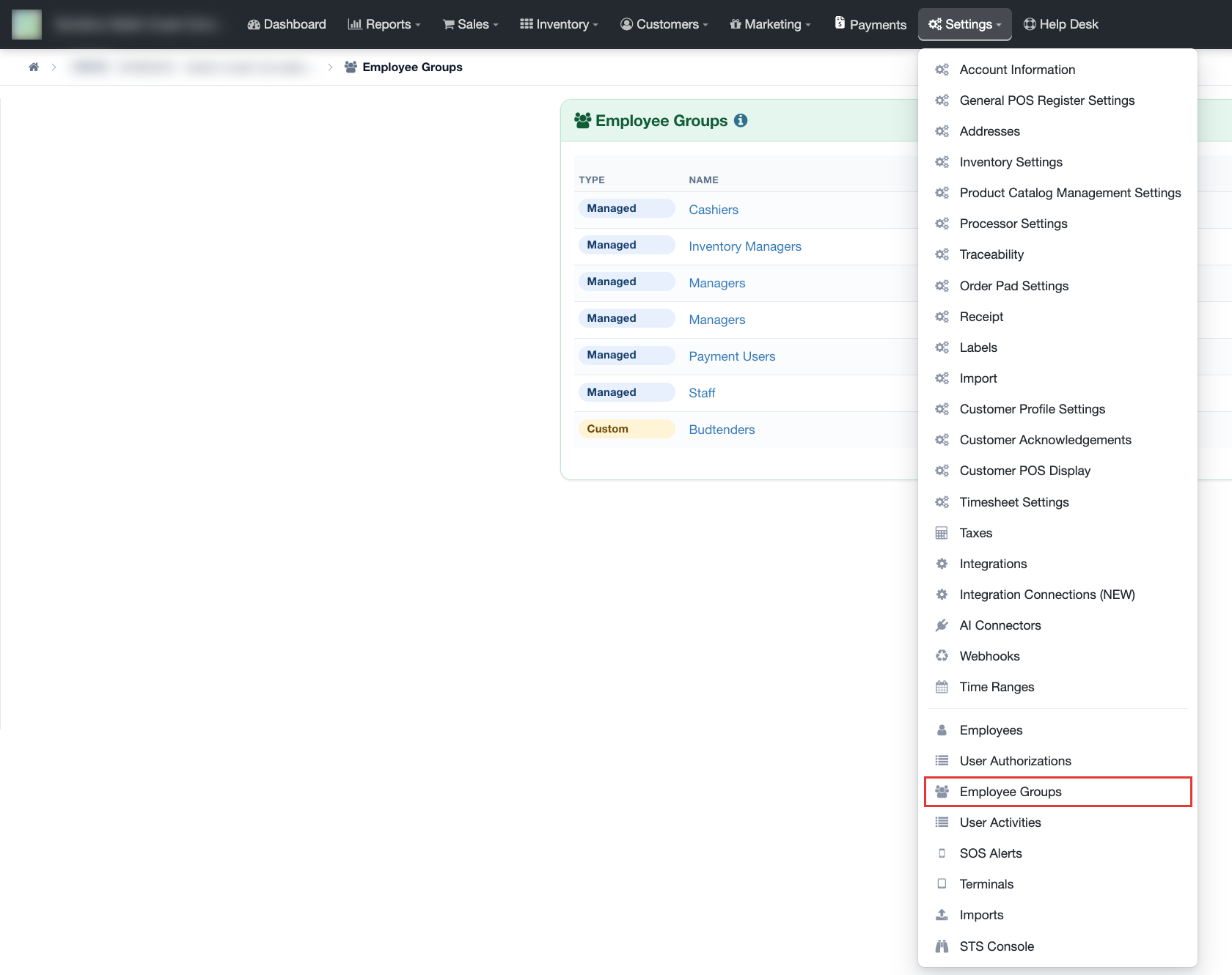
- Select Employee Groups from the settings drop-down at the top of the screen
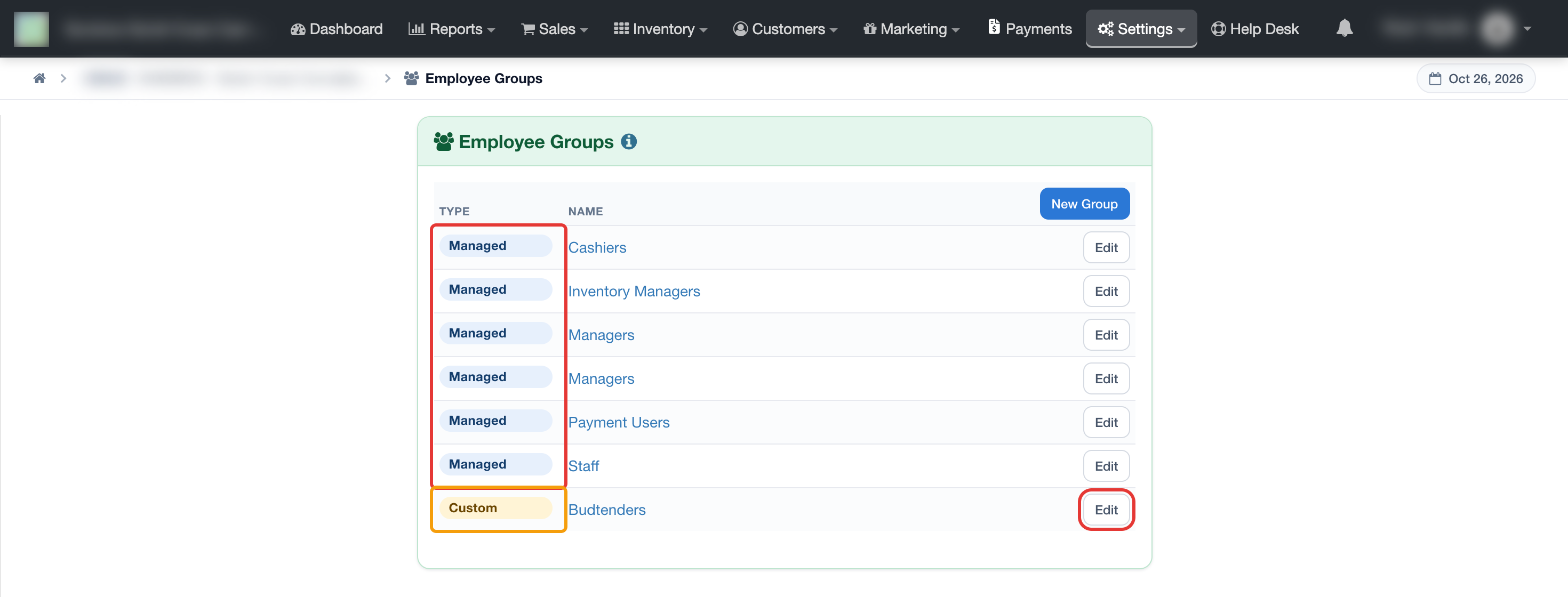
- In the Type column on the left side of the list, the rows marked with the blue Managed type are the preset employee groups that POSaBIT creates for you (for example, Cashiers, Inventory Managers, Managers, Payment Users and Staff). If you have made any custom employee groups, these will also appear on this list, marked with "Custom" highlighted in orange.
- To view the access levels that each managed employee group has, click the Edit button on the right side of each row.
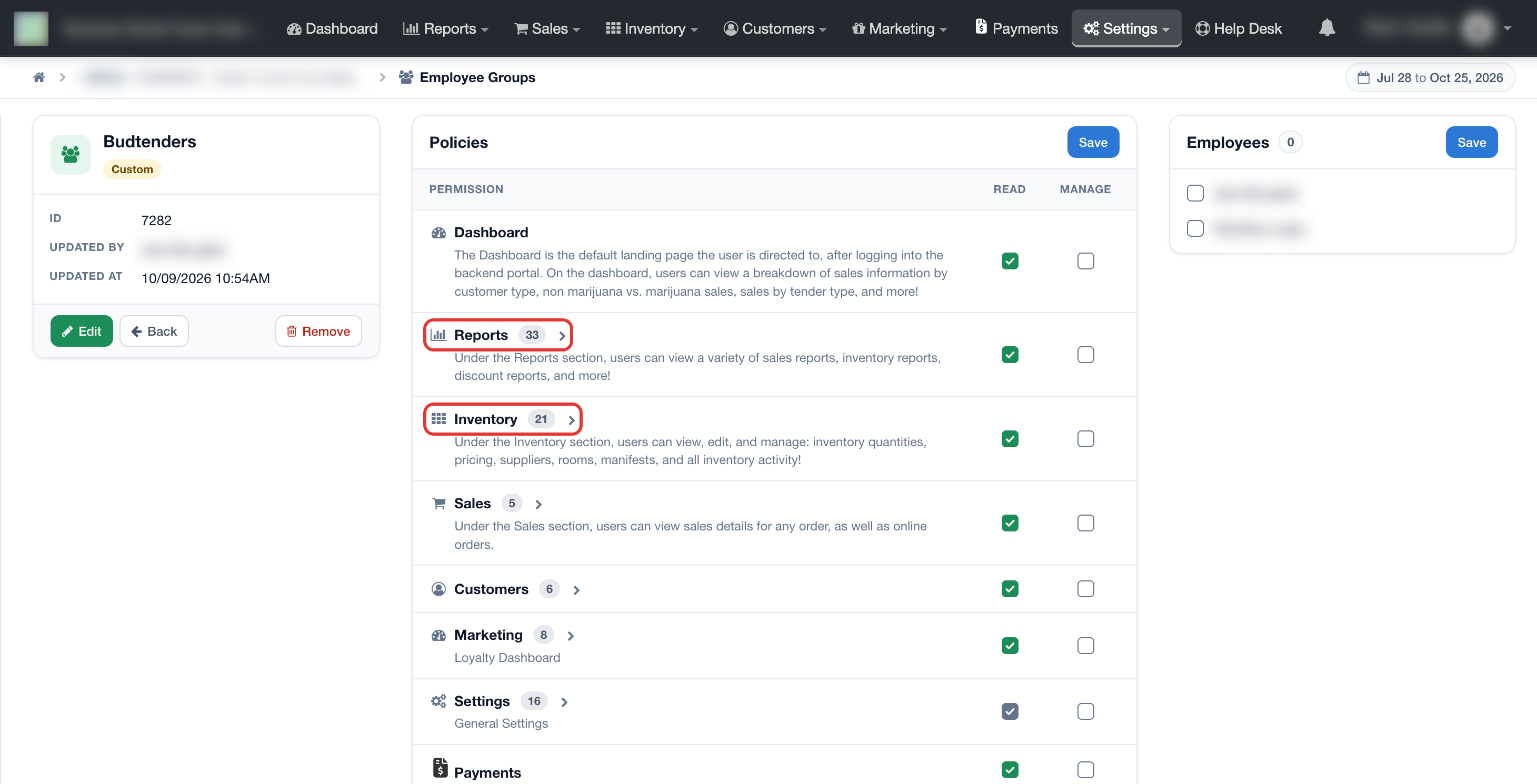
- Once you have selected edit, you will see an expandable section for each tab available in the portal in the Policies panel. When you click on each section, notice the check boxes that specify if that employee group has access to read, manage or no access to each page.
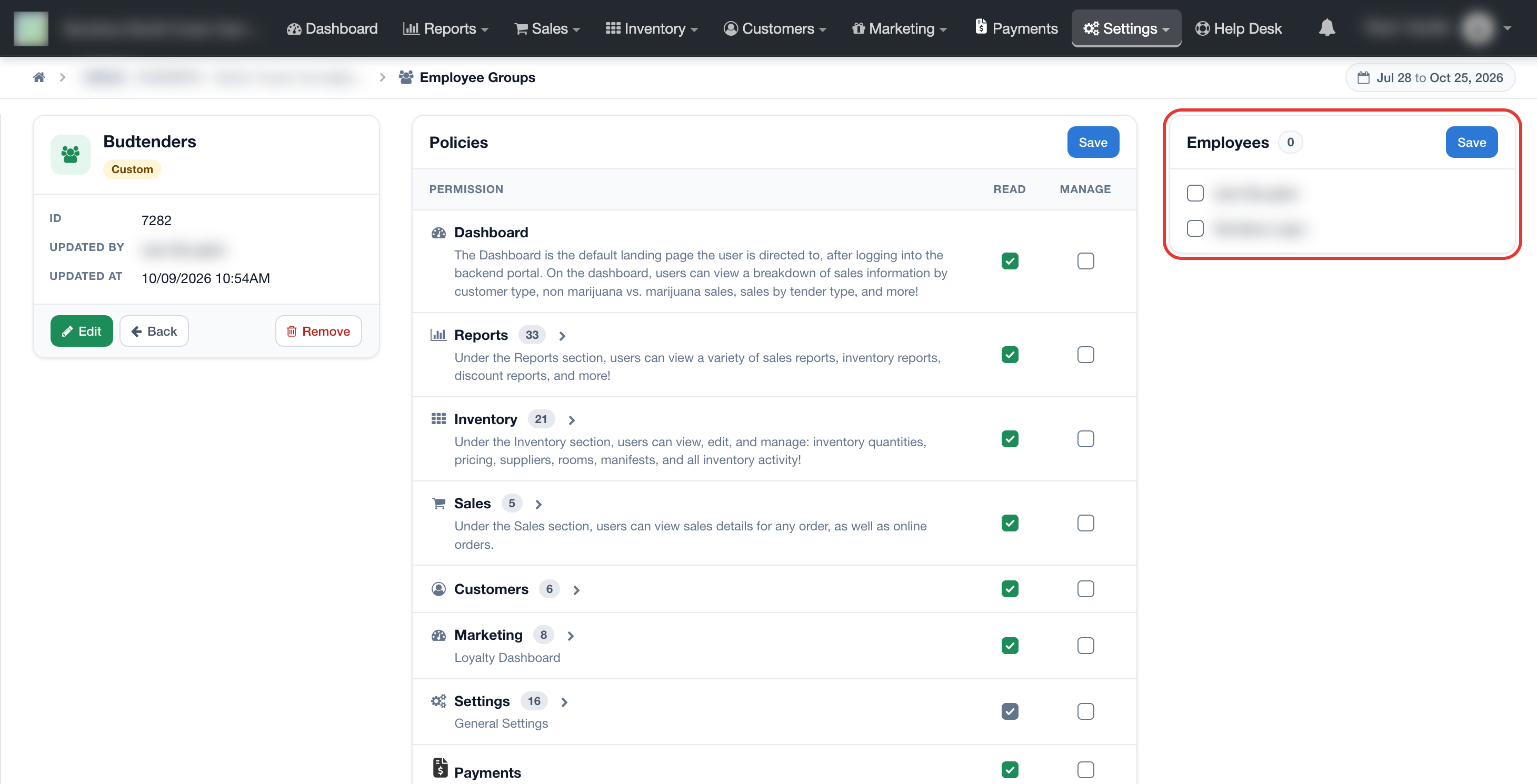
- Additionally, you can see exactly what employees are currently assigned to each employee group in the Employees panel on the right side of the screen.
For additional assistance, please reach out to POSaBIT support @ 1 (855) POSaBIT OR SUPPORT@POSaBIT.COM