How to Enable Delivery
POSaBIT fully integrated delivery solution helps you closely monitor your delivery orders by tracking them from the moment the order is submitted all the way until the products are delivered to your customers. Whether the delivery order was received through an online order or a customer calling into your store, POSaBIT's compliant solution helps you manage every step in one convenient location.
Note: When enabling delivery for your venue there are two main settings that need to be changed. First, you will need to allow deliveries from your POSaBIT portal. This setting will enable you to generate new delivery orders directly from your POSaBIT POS. Second, if you would like to allow your customers to submit delivery orders directly from your website you will need to enable delivery under your HTML embed. This article walks through each of these settings and how to enable them below.
How to enable delivery for your store: Follow the steps below to start using delivery in your store now!
- Login to the POSaBIT POS portal
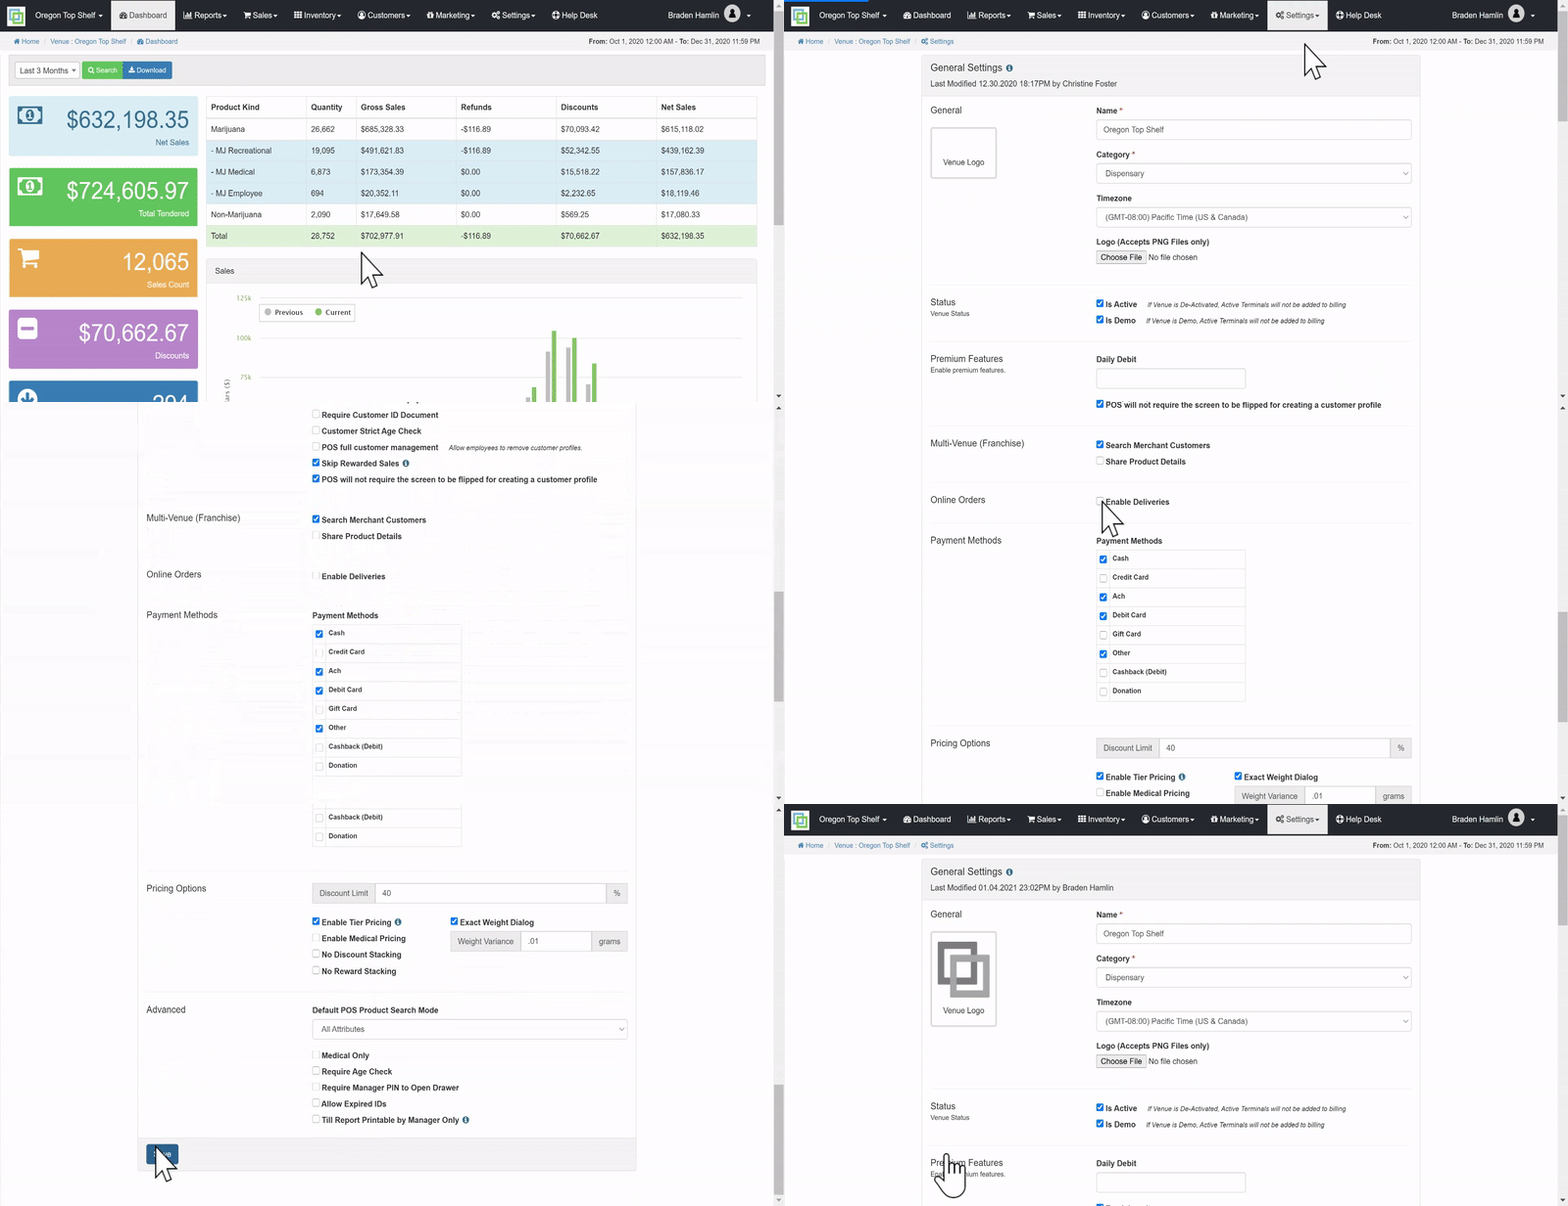
- Select General Settings under the settings drop down located at the top of the screen
- Scroll down until you see the section labeled Online Orders
- Under Online Orders select the Enable Deliveries check box
- Once "Enable Deliveries" has been selected, press the blue Save button at the bottom of the screen

Enabling Delivery Orders on your POSaBIT online menu:
Note: If you are already using POSaBIT as your online menu provider skip to step 6
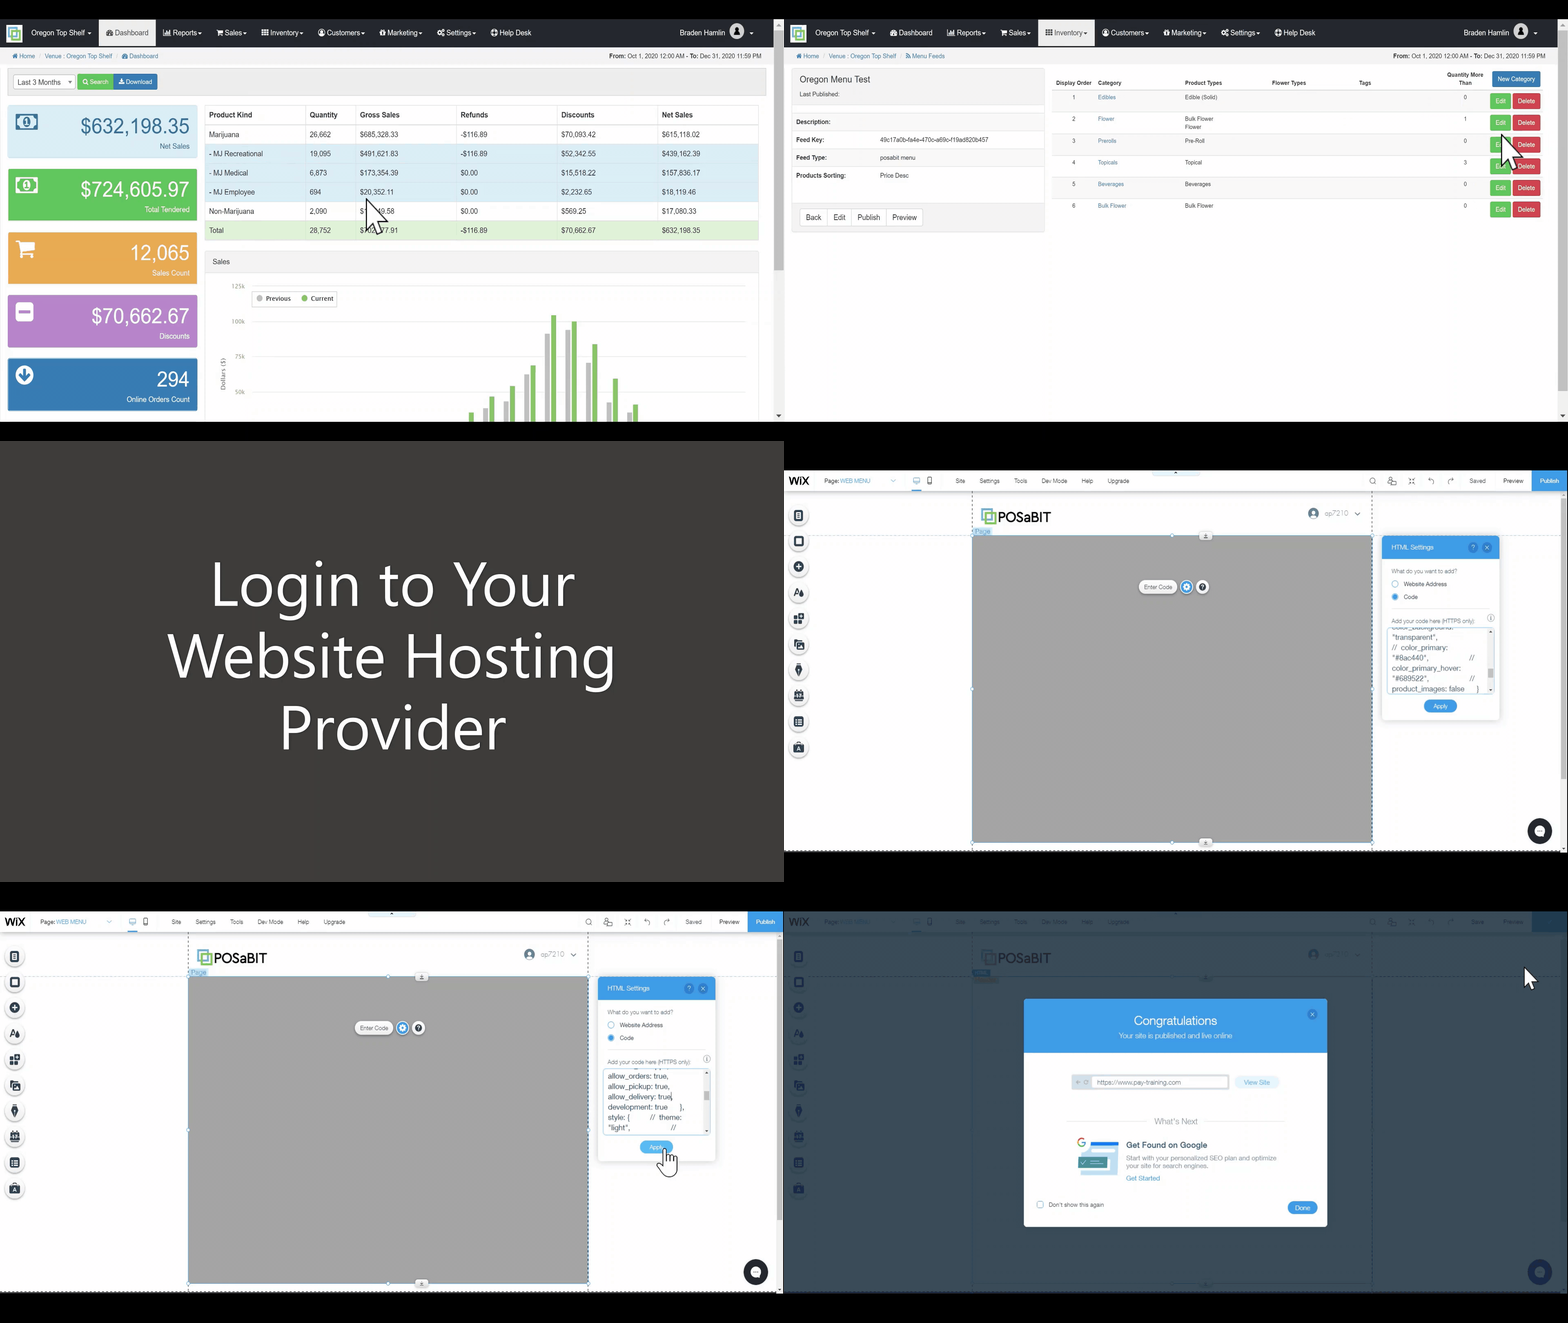
- Login to the POSaBIT POS portal
- Select Menu Feeds under the inventory drop down located at the top of the screen
- Press the green "Edit" button on your current online menu feed
- In the box on the left hand side of the screen, select the button labeled "Publish"
- You should now see a pop-up box containing some code. At the bottom of the screen press the button labeled "Copy to clipboard" to copy the code.
- Once you have copied the code from POSaBIT, you will need to login to whatever you are currently using to host your venues website. If you built your own website and don't have access to a UI to edit content please reach out to whoever helped you build your site for assistance.
- After logging in, navigate to the screen that contains your POSaBIT online menu.
- Once you have found where your online menu is currently embedded, click on the eye frame to view the HTML code.
- If you are currently not using POSaBIT as your online menu you can now paste in the code that was copied in step 5 above. If you are already using POSaBIT as your online menu provider skip to the next step.
- As soon as the code has been entered into the eye frame, you will need to make one change. In the code locate where it says " allow_delivery: false ". Once you have located this, simply change it from saying "false" to say "true". Note: Ensure you do not use any capital letters when entering in "true". Additionally, careful not to make any additional changes to this code as it can lead to an error.
- Finally, you will need to re-publish your website in order to save the changes that have been made.

For additional assistance please reach out to POSaBIT support @ 1 (855) POSaBIT OR SUPPORT@POSaBIT.COM
