How to Complete a Delivery Order
Using POSaBIT's online menu in association with delivery, enables you to accept online delivery orders directly from your point of sale. This allows you to have constant insight into an orders status and ensures that no order goes undelivered.
Walkthrough for accepting and completing an online delivery order on the point of sale:
- Enter in your employee PIN on the POSaBIT point of sale device
- Press the grey hamburger menu located in the top left hand corner of the screen
- On the side menu, press the tab labeled "Order Pad"
- Under the "NEW" column of the Delivery Orders, locate the delivery order you wish to accept.
- Once you have located the order press the green "Accept" button
- You will now see a pop-up informing you if this customer has a loyalty account set up. In order to build the customers order press "Build Order Now" to continue. If you want to go back and build this order another time press "Do It Later" to go back to the order pad
- Now that you have accepted the online delivery order, you may now save this order back to the Order Pad in processing or start filling the order directly from the cart screen
- You should now see the customers cart containing all products that the customer had ordered. Located each product that is found within the customers cart in order to link up their lot/package number with the purchase. If this delivery order was manually built from the point of sale and already has matched each product with a lot/package number, skip to step 9. If not, you can use one of two methods for associating each product in the cart with a lot/package number.
- Click on the orange icon of the three boxes for each product found in the cart. Once clicked you will see a list of all lots/packages that contain the requested product. Find the product in your store and press on the matching lot/package number to ensure that your inventory is tracked correctly.
- Using the attached scanner on the point of sale or built in scanner on the Pocket POS, scan each product that is seen within the cart. As you scan each product POSaBIT will automatically associate that products lot/package number with the products in the cart.
- After you have linked each product in the cart with the correct lot/package number, scroll down and press the orange button labeled "Save Delivery Order"
- Another pop-up will now appear. Here you can add any notes you with to link to this order, then press "Save Filled Cart" to mark the cart as filled.
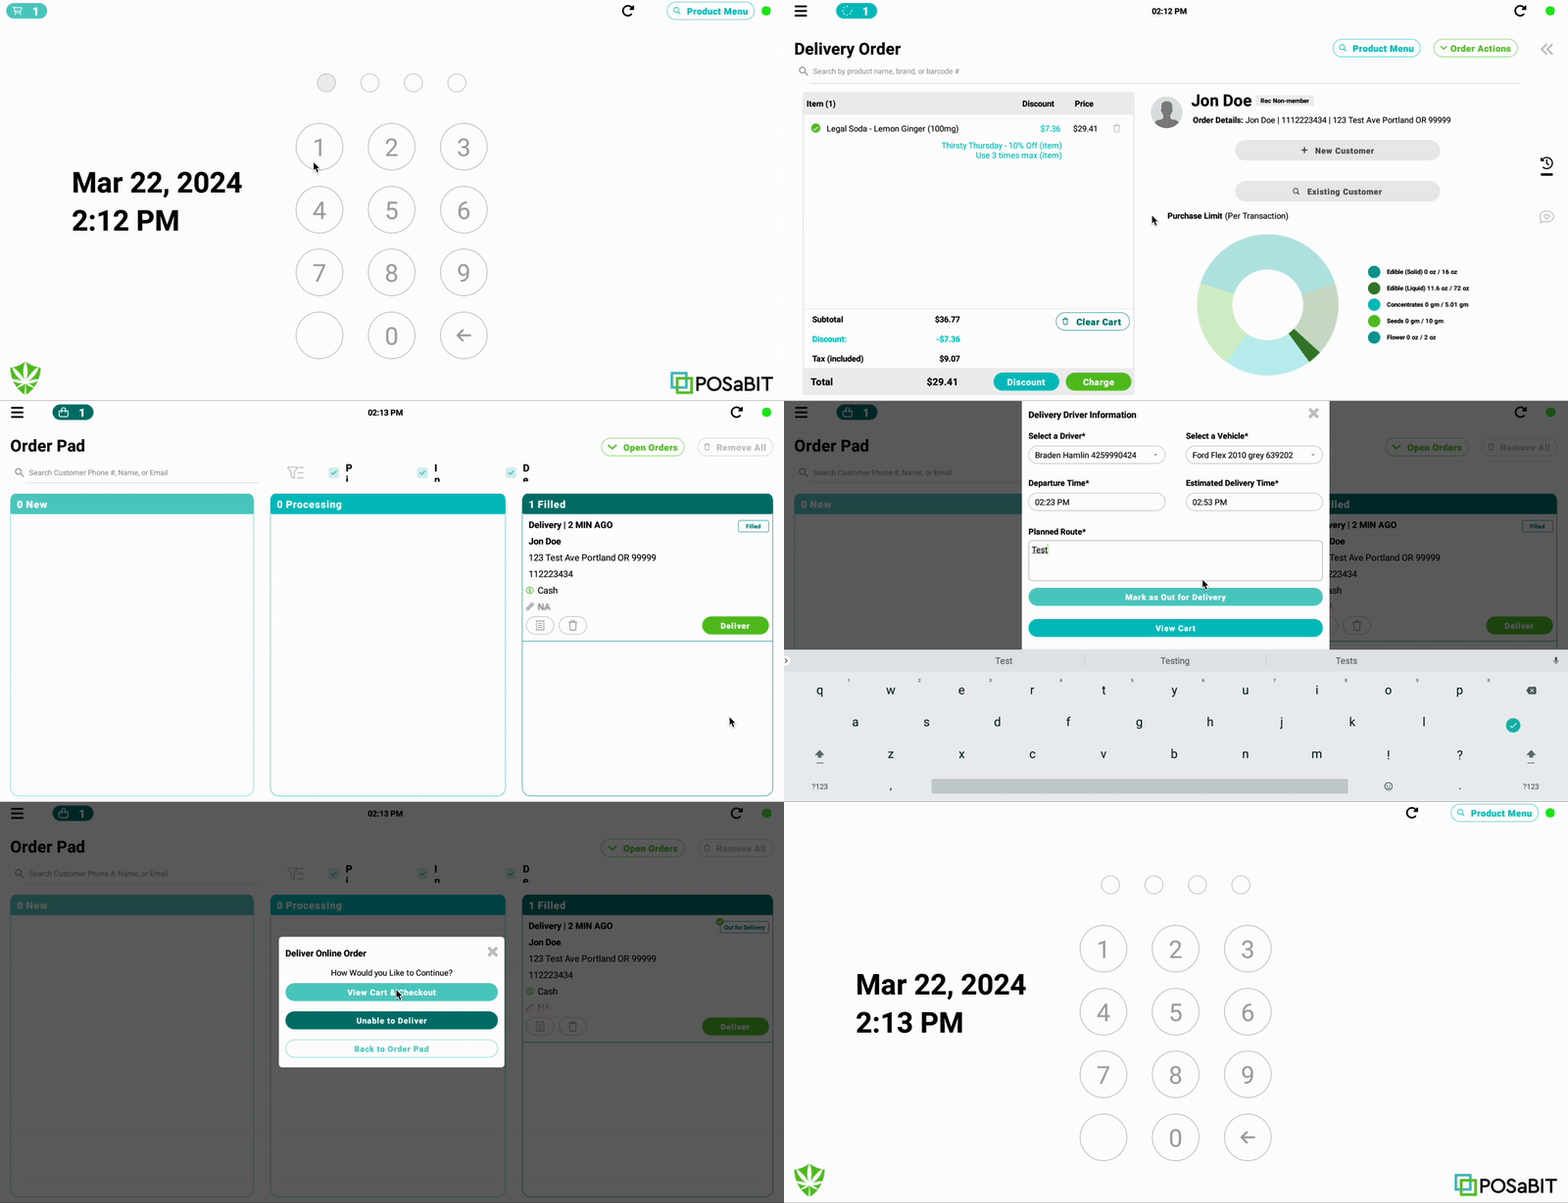
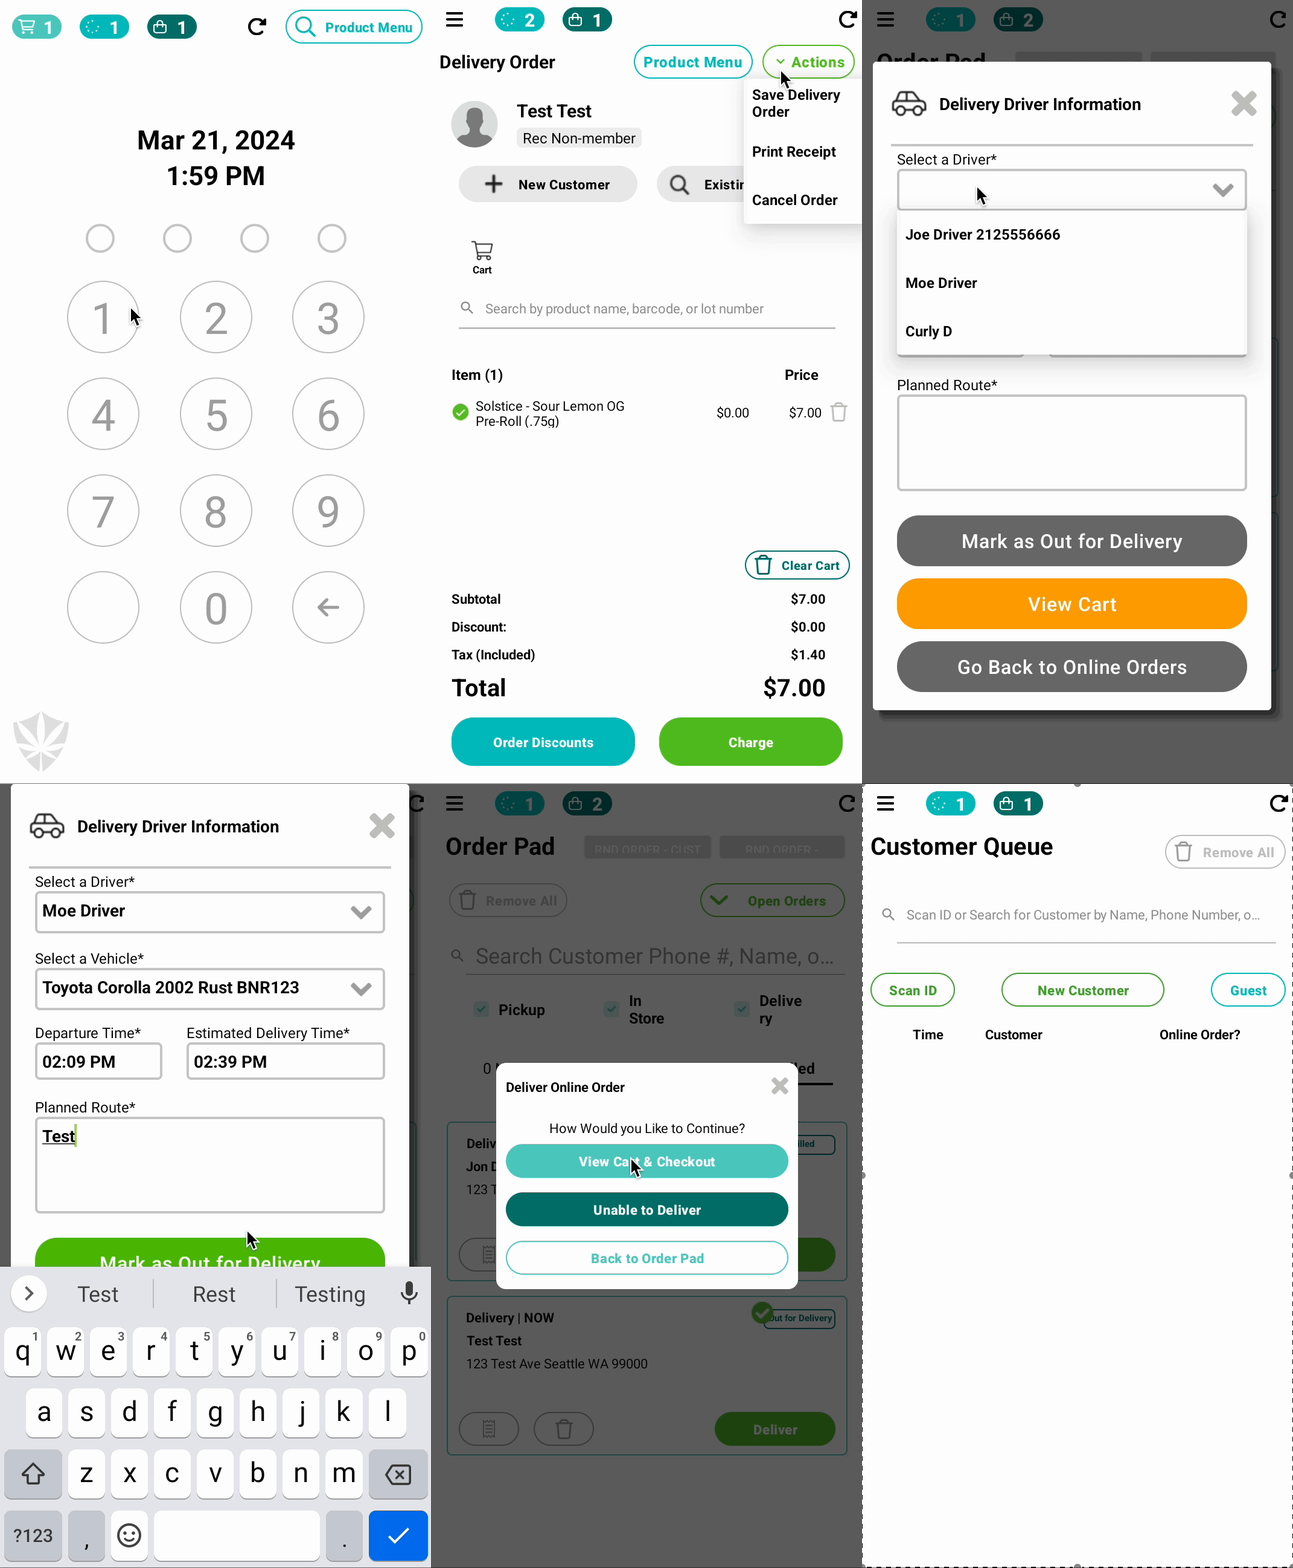
- Once you are ready to make your delivery, locate the order within the "Filled" section of the Delivery orders tab and press the green "Deliver" button.
- Before heading out to deliver the order you must link this delivery with a pre-build driver and vehicle. Learn how to create a driver and vehicle account HERE. Additionally, you will be asked to select a departure time, estimated arrival time and planned route. The planned route should be used as a general notes box for you to explain if you are performing multiple deliveries and what route you will be taken for the delivery.
- Once every required field is complete, the buttons at the bottom of the screen will be enabled. To mark an order as out for delivery simply press the button labeled "Mark As Out For Delivery"
- Your order has now been marked as out for delivery (Notice the status changes in the Order Pad). Once the order is marked as out for delivery you can now login to Metrc and print out your delivery manifest.
- Once you arrive at the customers house to make the delivery, simply head back into the Order Pad and locate the customers order. Press the green "Deliver" button and select "View Cart & Checkout" to view the customers cart.
- After applying any desired discounts / loyalty rewards, press the blue "Charge" button at the bottom of the screen to complete the purchase using one of the provided POSaBIT payment solutions.
Video Walkthrough using the Point of Sale:

Video Walkthrough using the Pocket POS:

For additional assistance please reach out to POSaBIT support @ 1 (855) POSaBIT OR SUPPORT@POSaBIT.COM
