Image Gallery Page Basics

Image Gallery Basics
Welcome to Image Gallery Basics with POSaBIT! We're excited to introduce our new image library, designed to elevate your product management experience. In this article, we'll walk you through the essentials of navigating and optimizing your image gallery. Our goal is to enhance both merchant and customer experiences by providing seamless image management capabilities.
Let's dive in!
- Login to the POSaBIT POS Portal (venue level)
- Navigate to Inventory --> Image Gallery

Here's what you'll find:
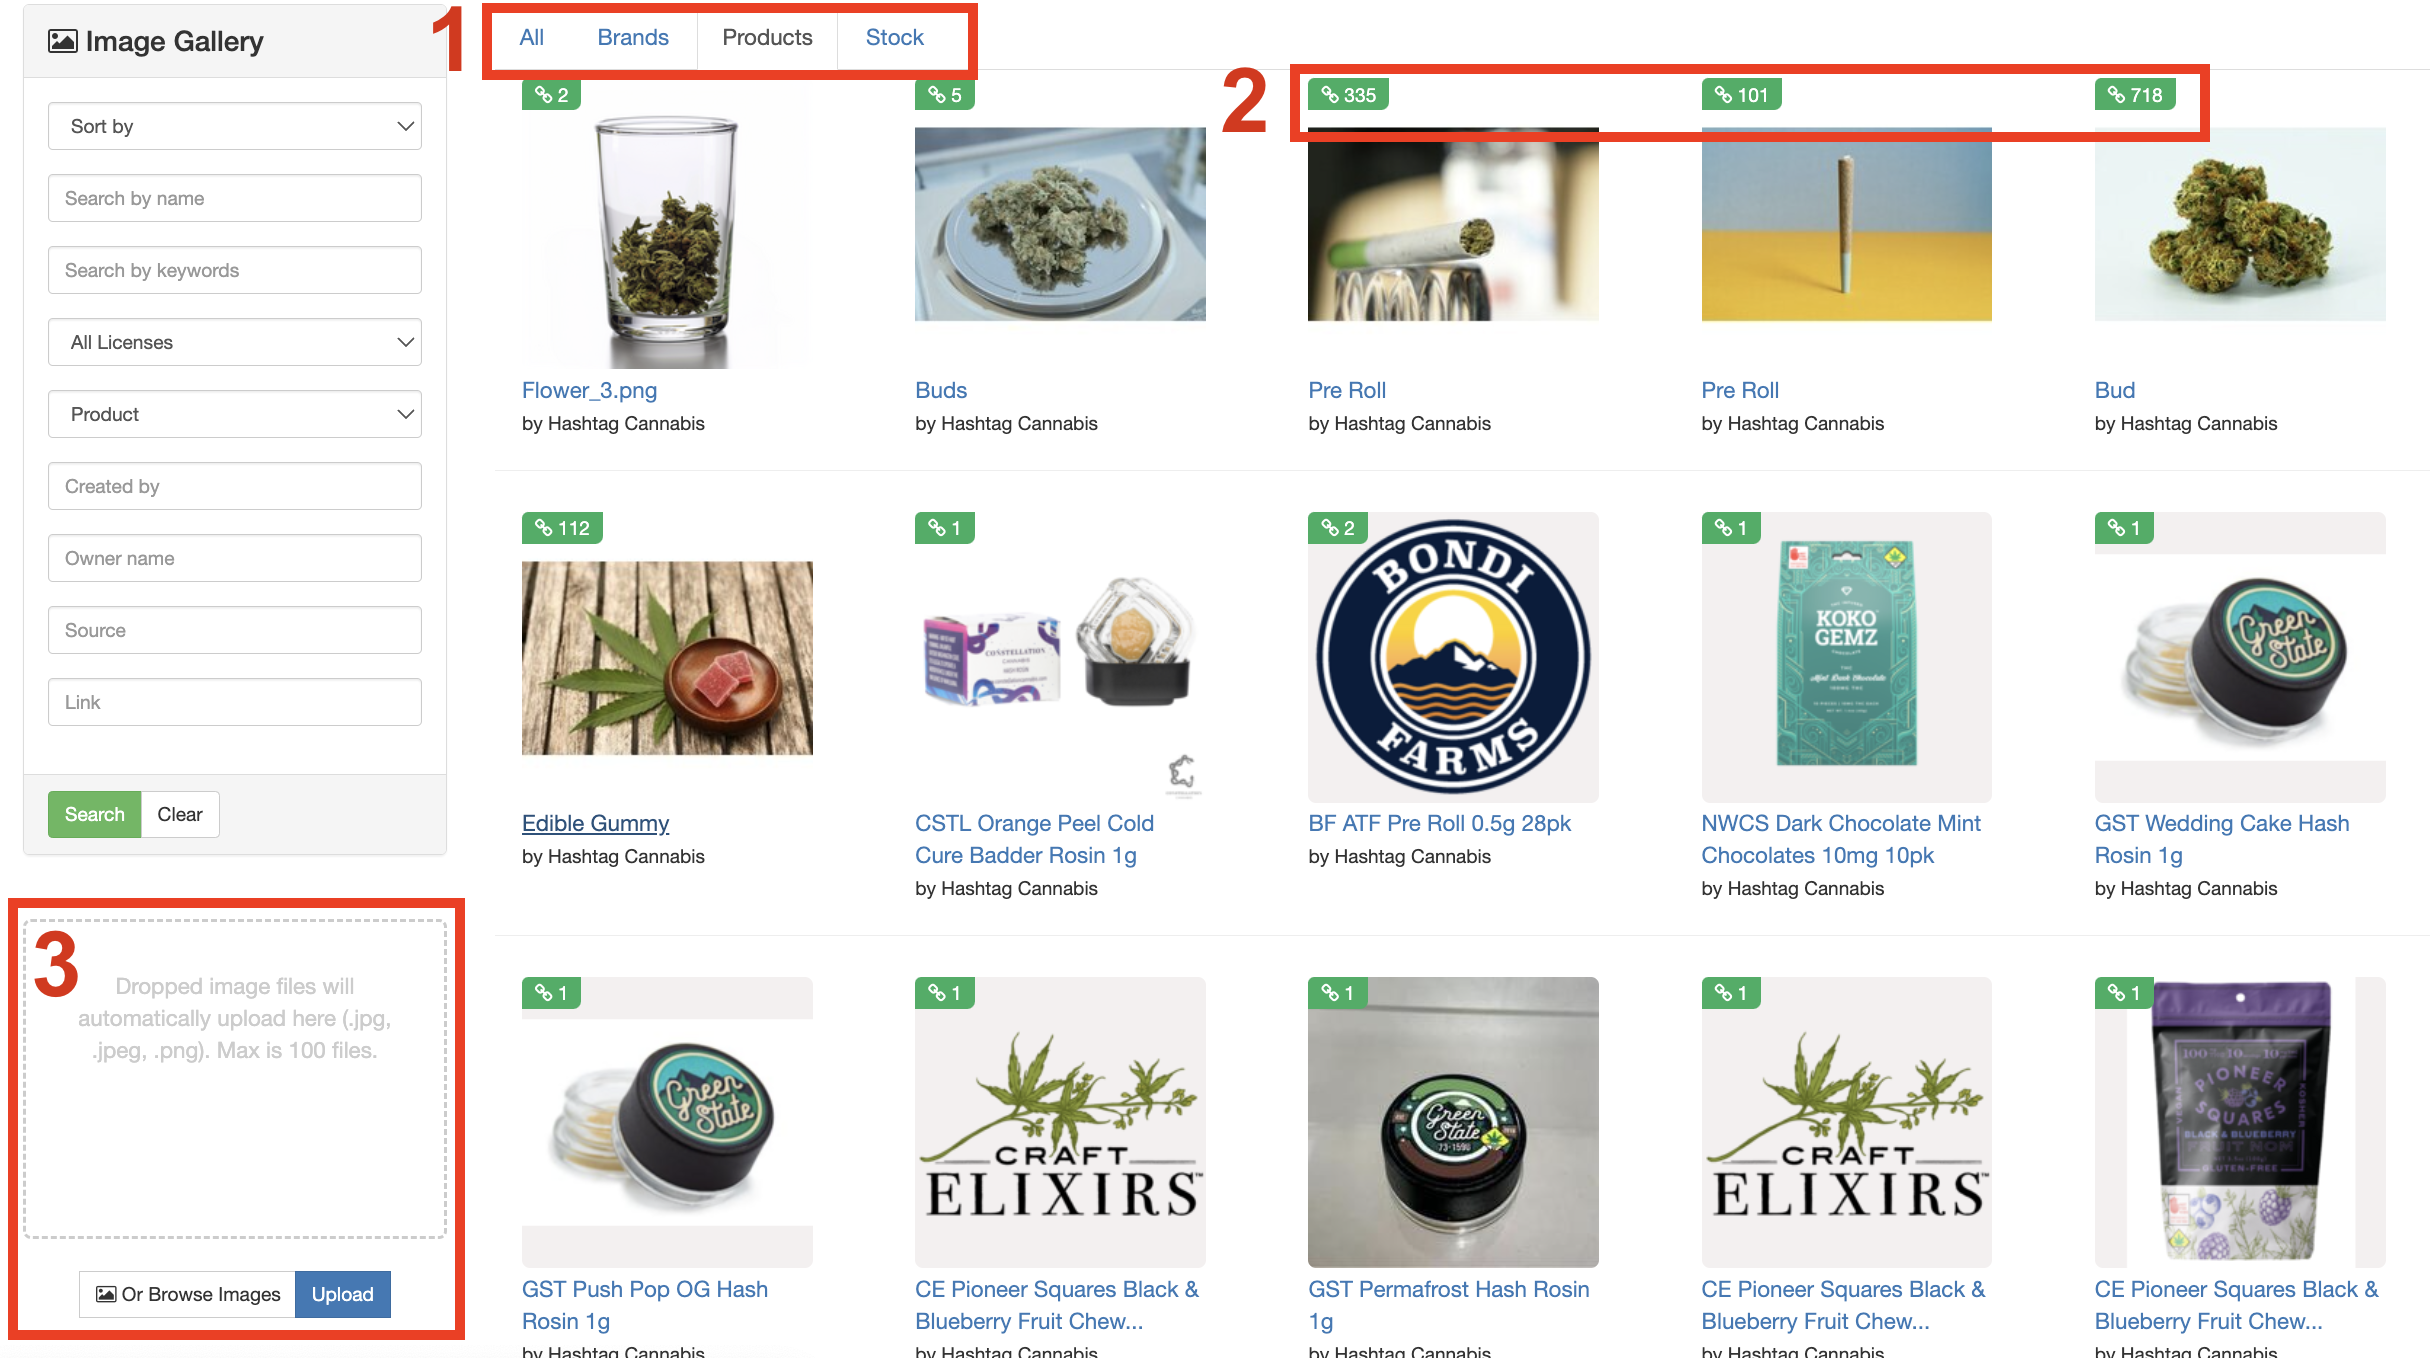
- Sorting Options:
- All: View all images in your gallery.
- Brand: Filter images you and POSaBIT have uploaded for brands (across all stores).
- Products: Filter images you've uploaded for your products (across all stores).
- Stock: Filter images POSaBIT provides as 'stock' images by product type.
- Product Assignments:
- Identify the number of products associated with each image using the green link icon.
- Uploading New Images:
- Easily add images to your library by dragging and dropping them or selecting "Browse" to upload from your computer.
- Max upload recommendations:
- 50 files or less per batch upload.
- Images should not be larger than 1MB.
- File sizes between 100-500KB are preferable.
With these basics in hand, you're equipped to efficiently manage your image gallery, showcasing your products, brands, and product types with ease. Enhance your customers' browsing experience and streamline your image management process today with POSaBIT's Image Gallery feature.