Image Gallery Page Overview

POSaBIT has recently developed a new image library that gives you more ways to manage your image library for your products, brands, and product types. In the list below, you will learn the basics of managing your image gallery. We decided to add this new feature because we wanted to improve you (the merchant) and your customers' experiences. For the merchants, it will be easier to manage your images for products, brands, and product types.
How the Image Gallery Works
When you first enable the image gallery, all your existing images will automatically be included. Each image will be linked to the respective product it was previously assigned to. For products without an assigned image, a default image will be assigned. The selection of this default image follows a specific process:
- If a product has an image, that image will be assigned as the primary image displayed on your POSaBIT POS or Online Menu.
- If no image is assigned to a product, the system will check to see if there is a brand image available. If so, that image will be assigned as the main image displayed on your POSaBIT POS or Online Menu.
- If you'd like to change your product brand default image, please edit the product brand by adding a new photo.
- If a brand has no assigned image, the system will use the product type image as the main image displayed on your POSaBIT POS or Online Menu.
- If you'd like to change your product type default image, please edit the product type by adding a new photo or selecting a different POSaBIT stock photo.
How to Enable the Image Gallery
To activate the Image Gallery, you need merchant-level access. Here’s how to do it:
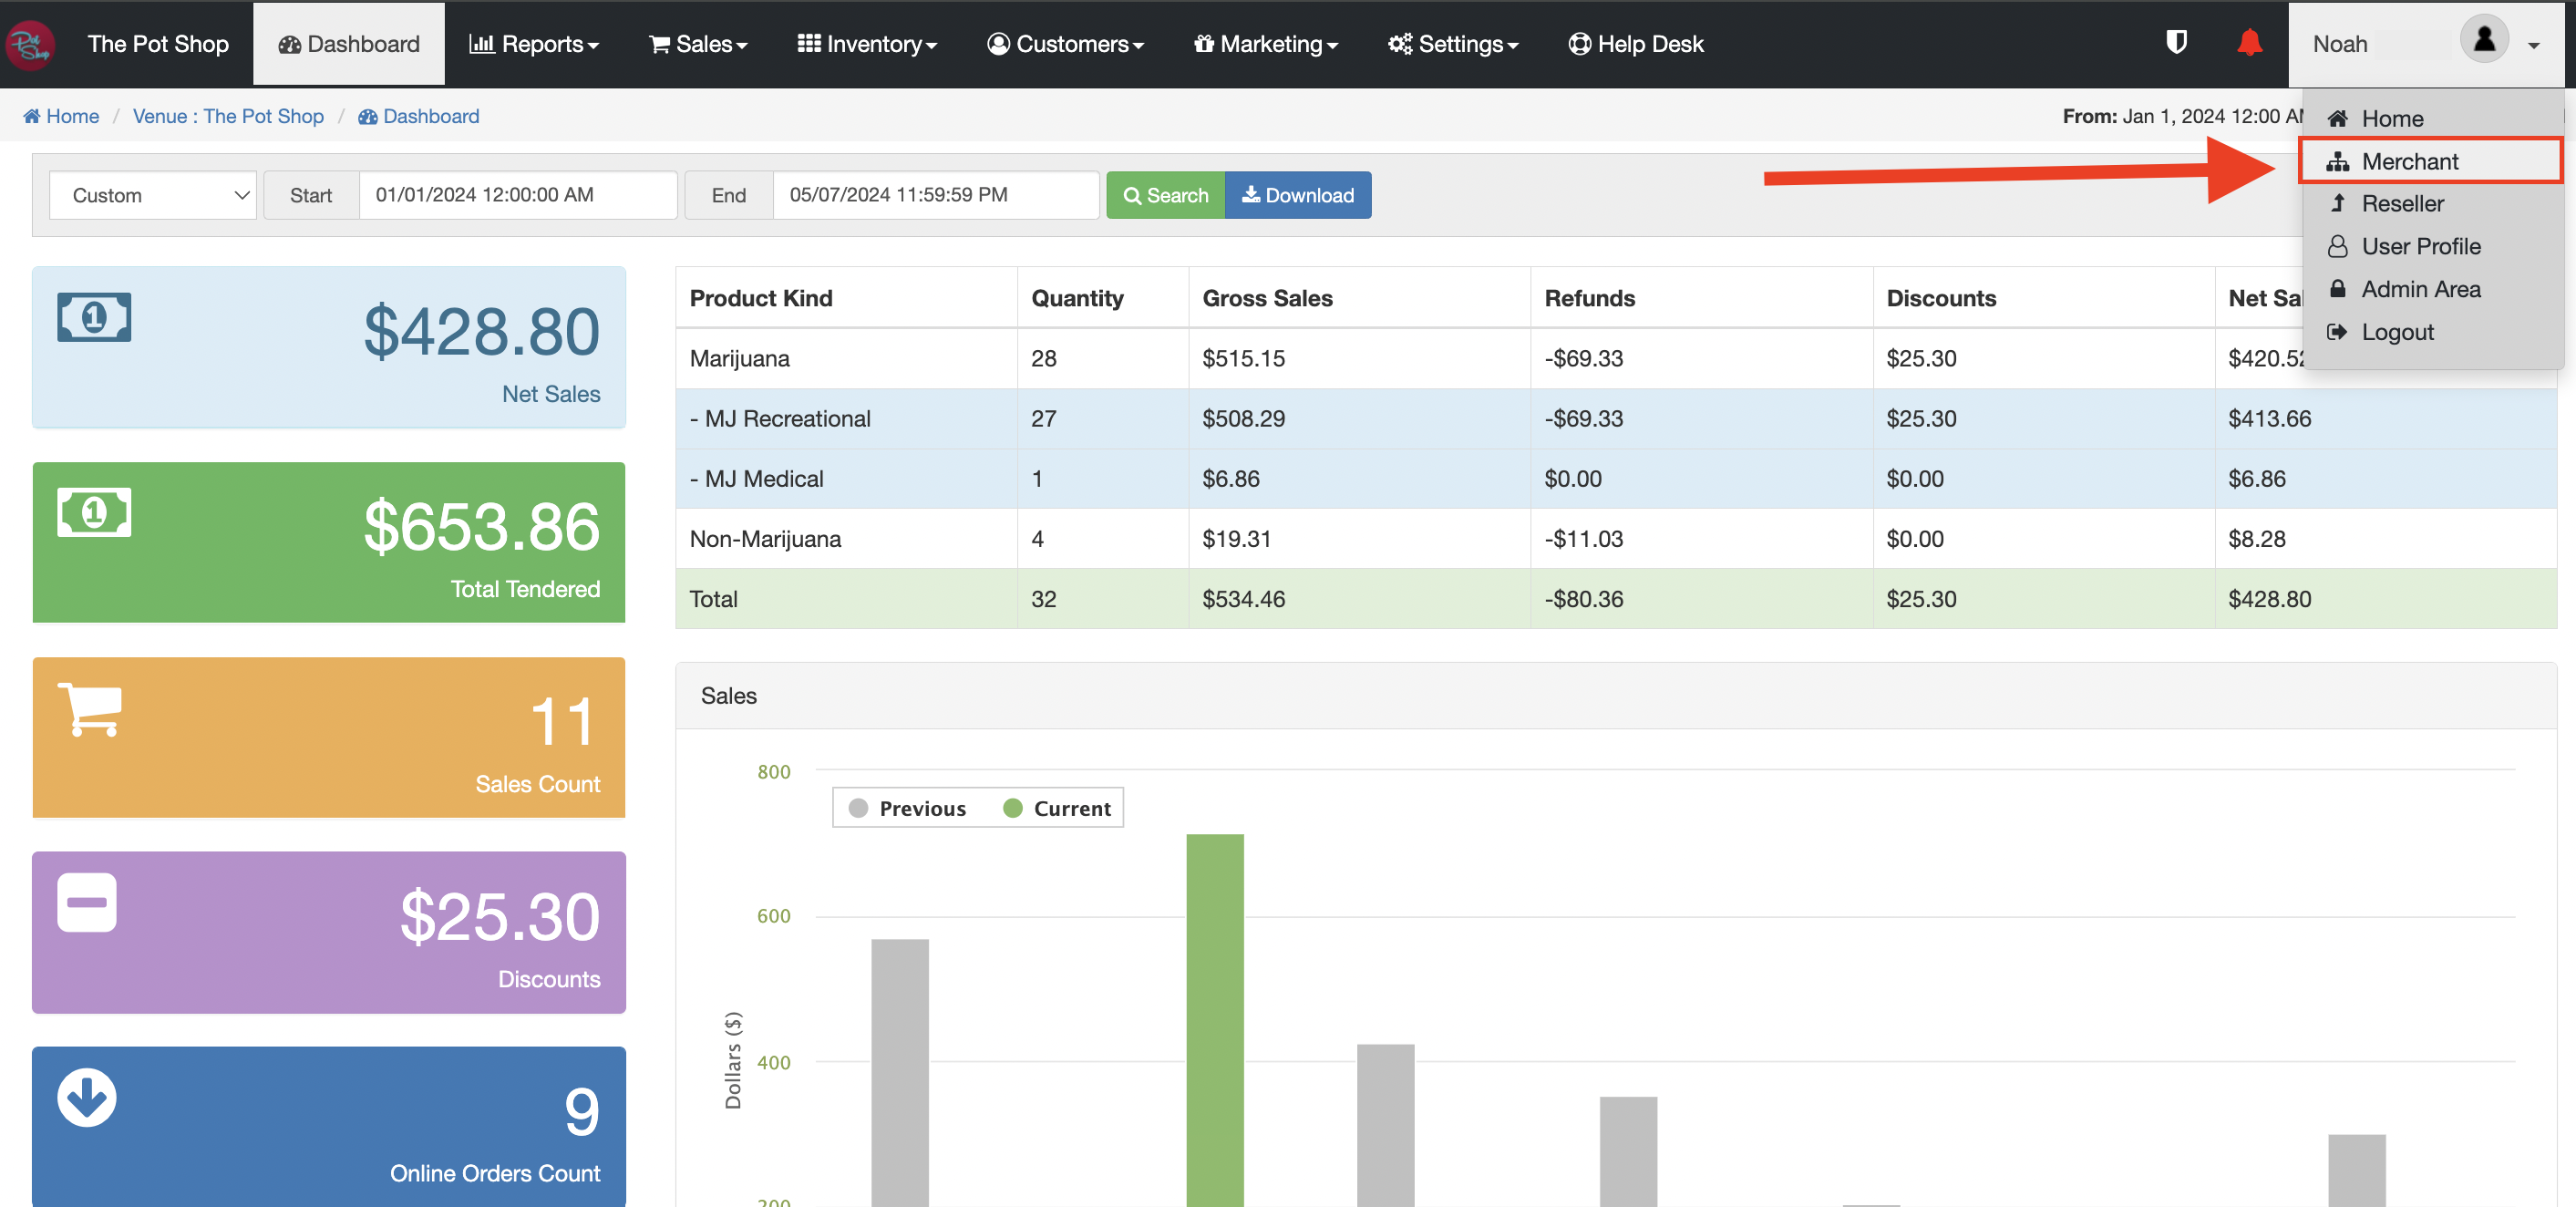
- Log in to the POSaBIT POS portal.
- Head to the Merchant side of the portal.
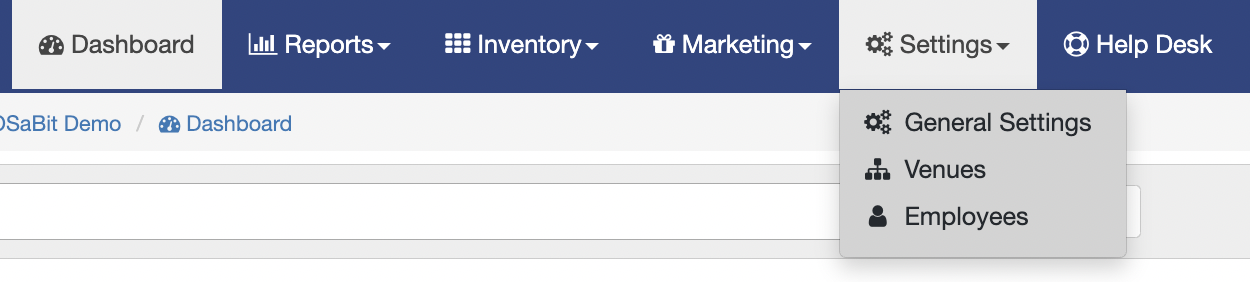
- On the Merchant portal, go to the Settings tab and choose General Settings.
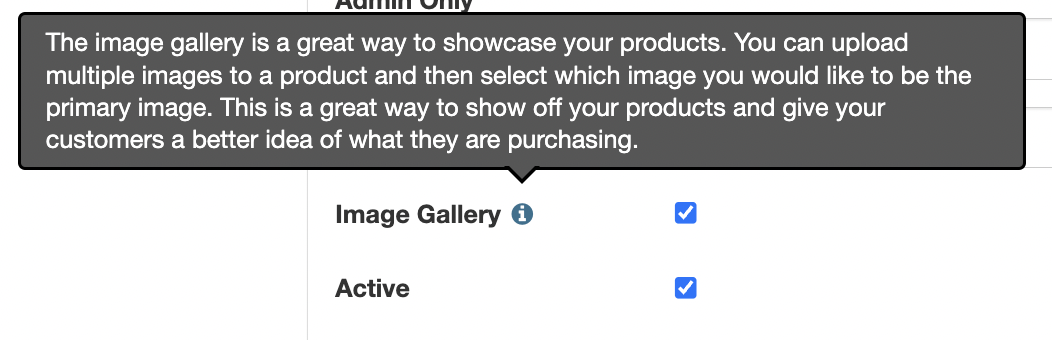
- Scroll down to the bottom of the General Settings page. Look for the "Image Gallery" setting. Tick the box next to it and Save your changes.
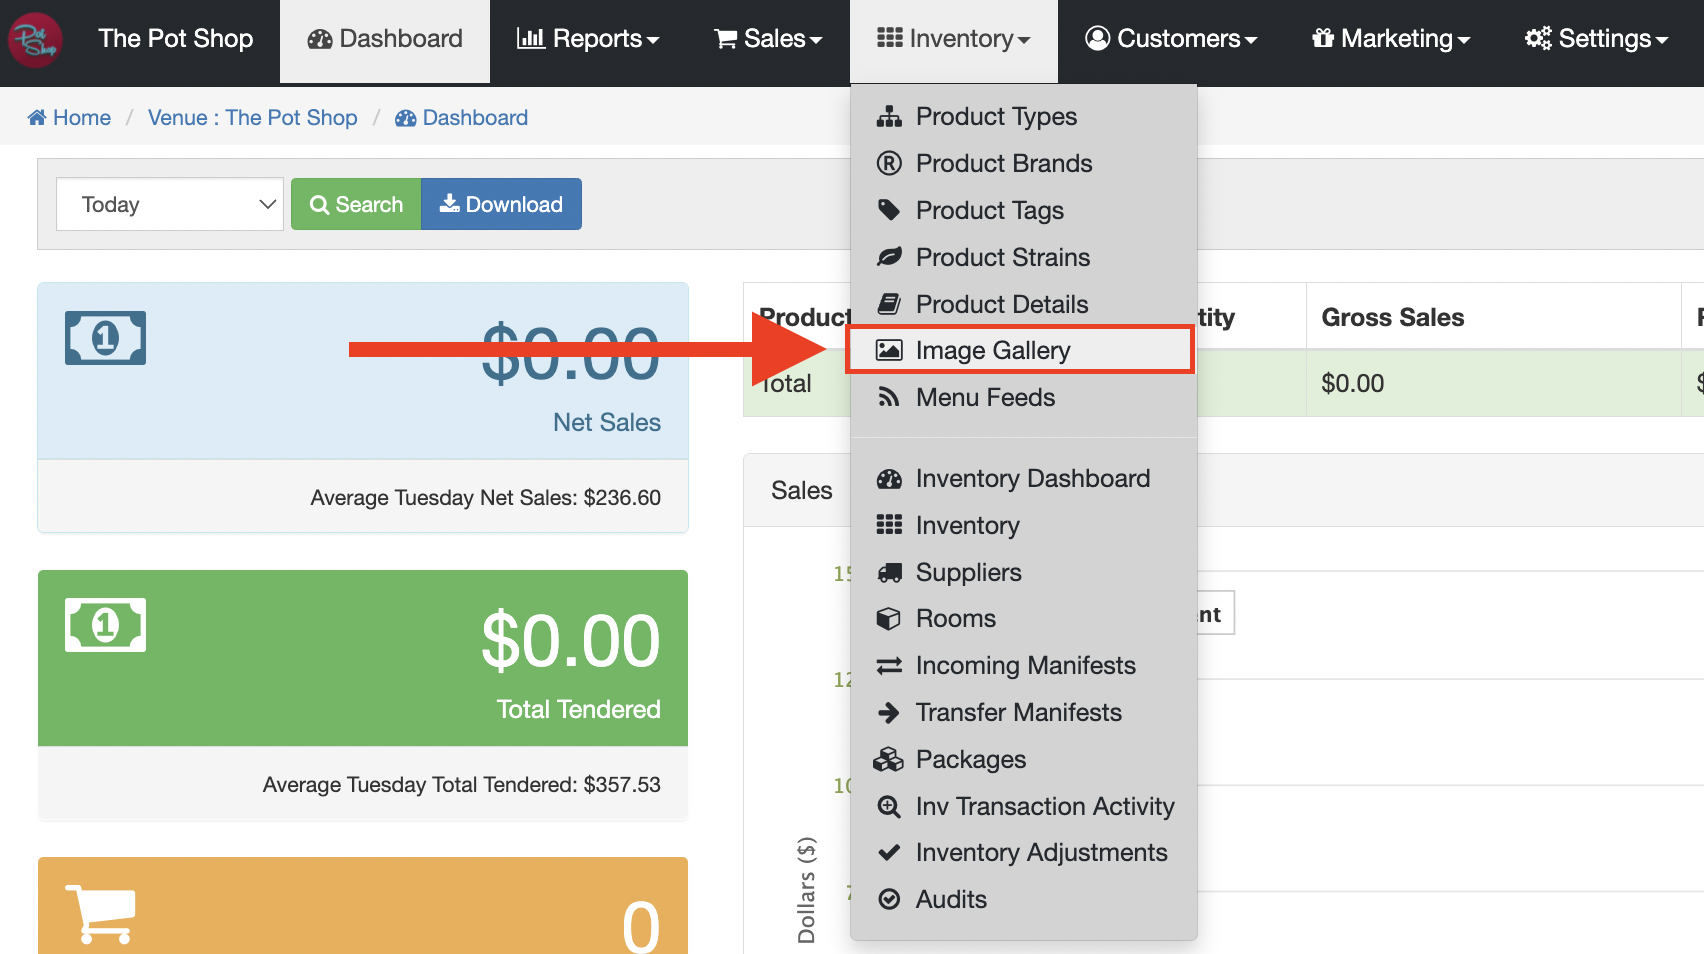
- Return to your chosen venue and navigate to the Inventory tab, then select Image Gallery. Congratulations, you've successfully enabled the image gallery feature!
Learn the Image Gallery with the articles listed below: