How to Add Images to Product Types

How to Add Images to Product Types
This article will guide you through adding images to product types. When you do this, the system will automatically assign these images to products within the product type that don't already have an image. This ensures your menu looks neat and complete, as the system will fill in missing images seamlessly.
Note: If a product does not have an image or brand image, then it will default to the product type photo
- Log in to POSaBIT's POS Portal.
- Navigate to the Inventory tab and select "Product Types."
- Click on the orange image icon next to the desired product type, or click on the "Edit" button.
- If you choose to click "Edit" instead of the orange image icon, you'll need to select either "Image Gallery" or "Upload New Image" to proceed.
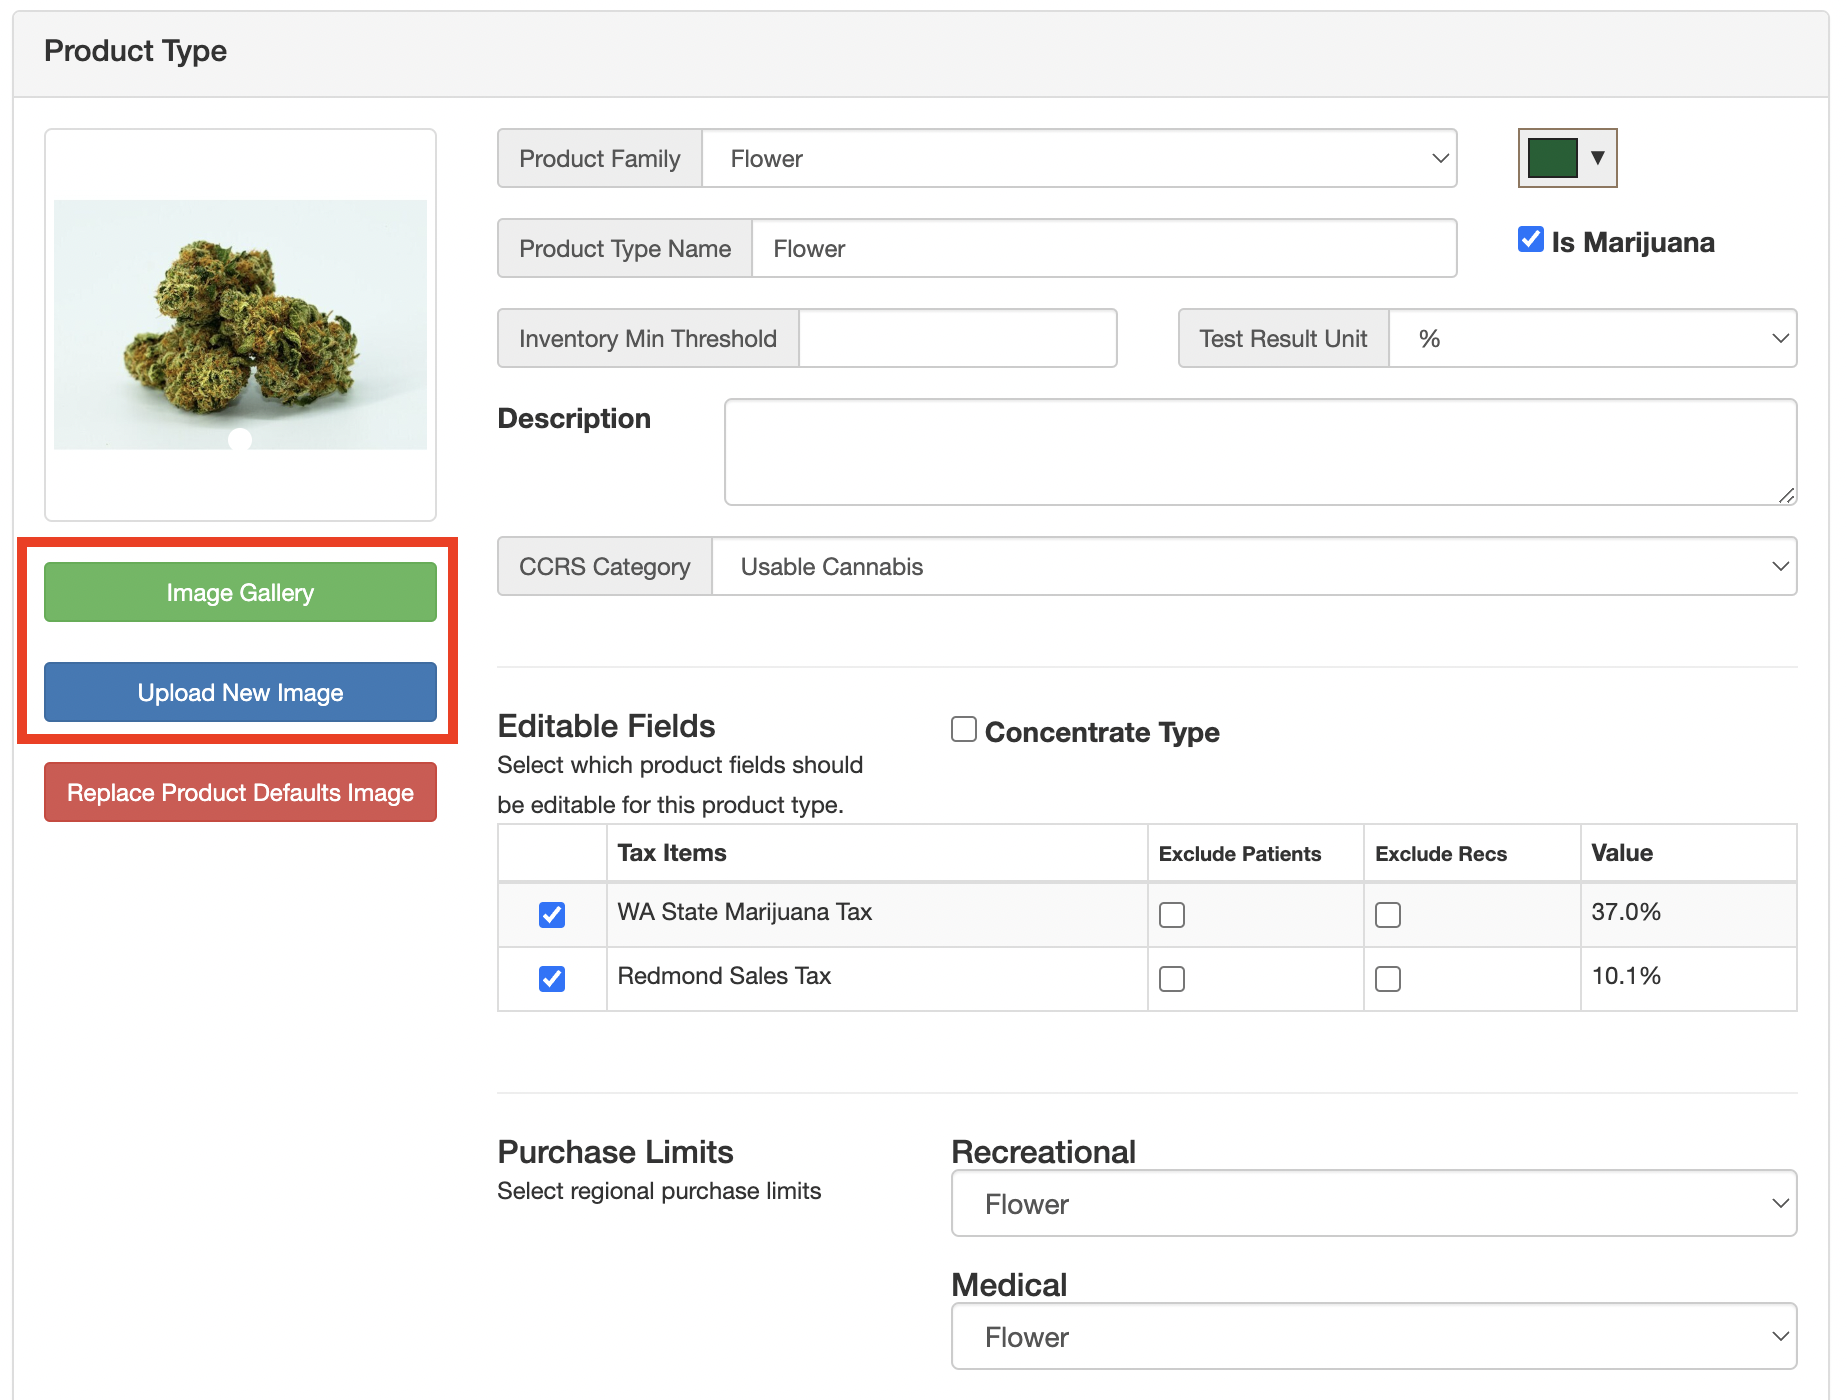
- If you choose to click "Edit" instead of the orange image icon, you'll need to select either "Image Gallery" or "Upload New Image" to proceed.
- A popup modal will appear, presenting you with a variety of images to choose from for this product type.
Inside the Popup Modal: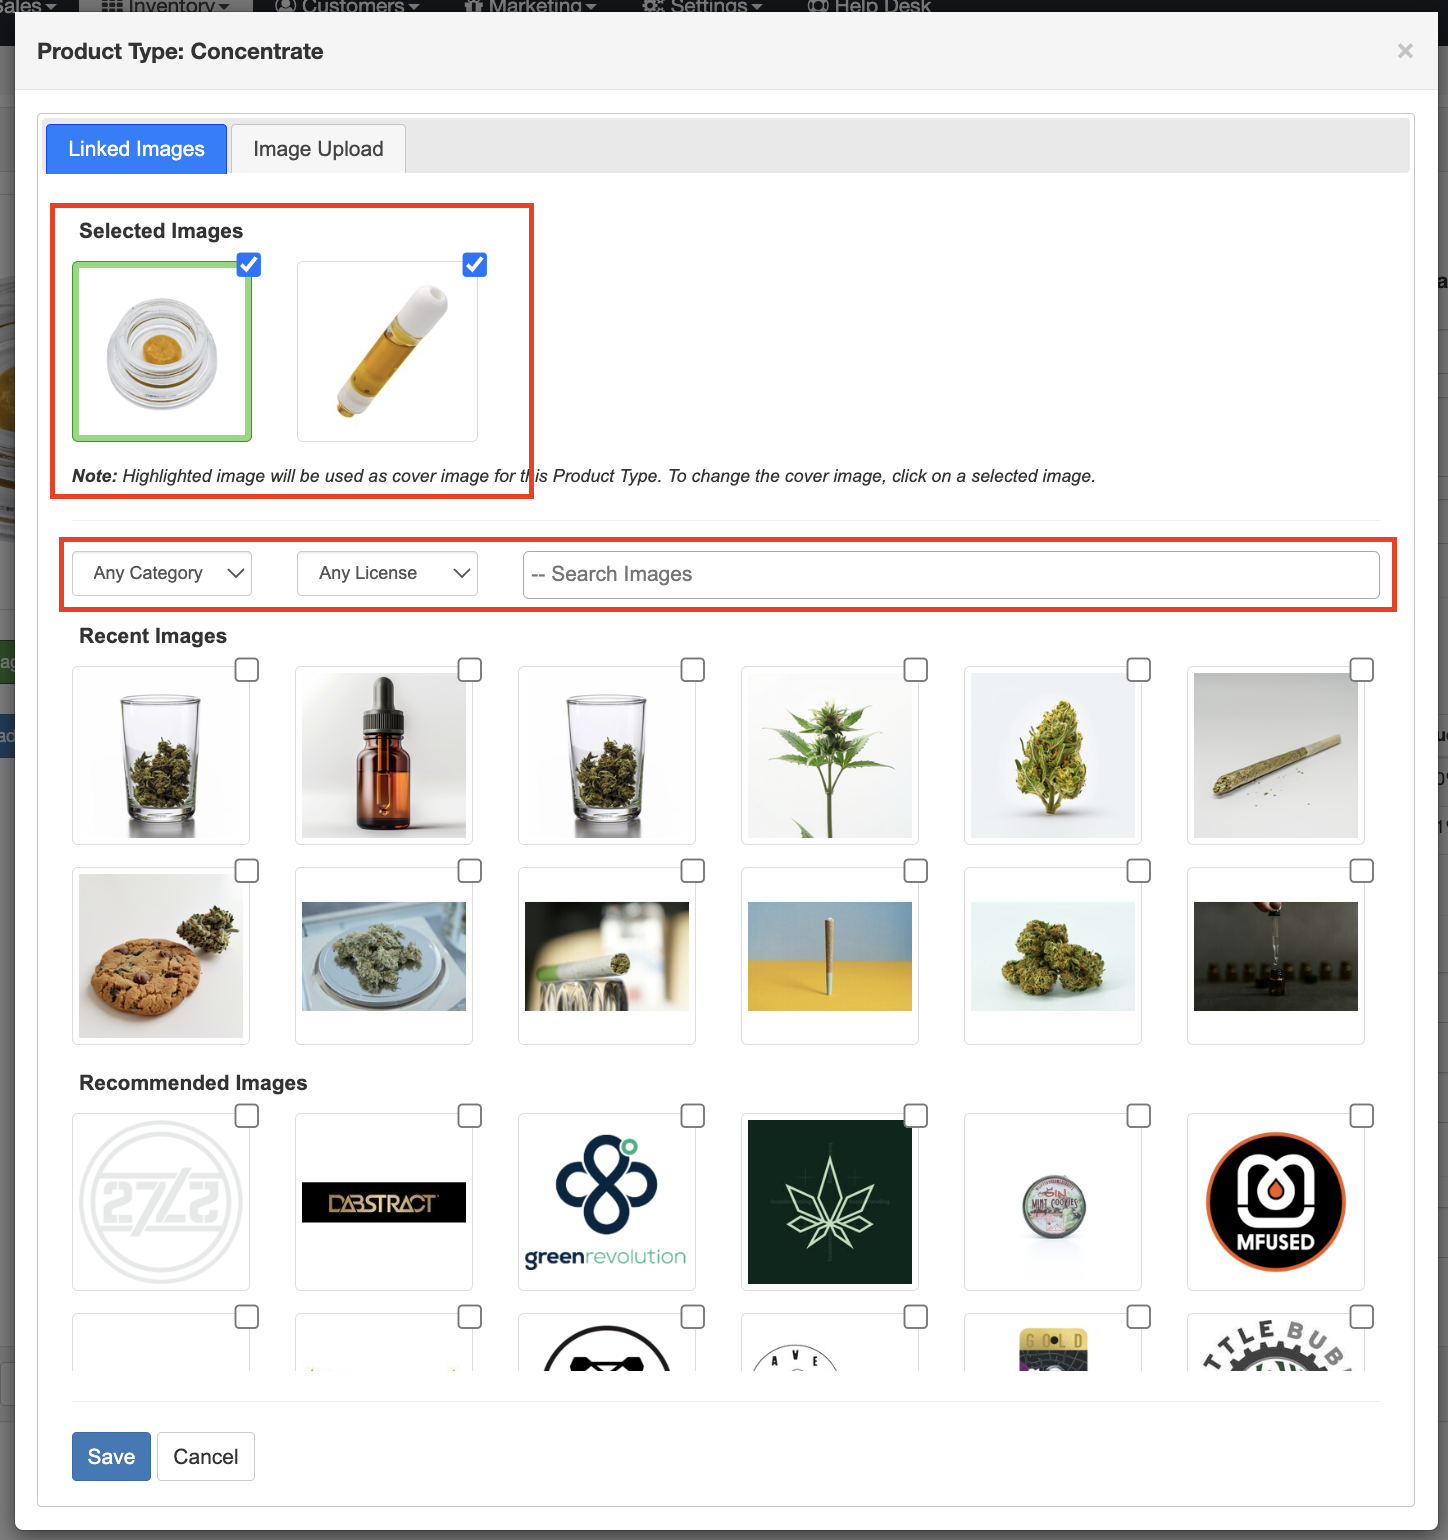
- Selected Images: View images currently assigned to the product type you're editing.
- Primary Image: Whatever image is first in the order will become the product types default image. You can drag the images around to reorganize the display order.
- Multiple images can be associated with a product type, and you can drag images to rearrange their display order.
- ** For POSaBIT POS & Menus: Multiple images is not yet implemented on POSaBIT menus or the POS and will be included as an enhancement in our v2 update to the Image Gallery.
- ** For 3rd Party Menus: the use of multiple images will need to be consumed via the integration with your menu provider. If you are interested in this functionality, please consult with your menu provider to discuss utlizing this feature.
- Multiple images can be associated with a product type, and you can drag images to rearrange their display order.
- Primary Image: Whatever image is first in the order will become the product types default image. You can drag the images around to reorganize the display order.
- Filters: Filter images by category (Product, Brand, Stock) and image license type (My Images, POSaBIT Images, Brand Images), and use the search function to find specific photos.
- Recent Images: Access images used recently.
- Recommended Images: Discover images with associated keywords.
- Selected Images: View images currently assigned to the product type you're editing.
- If you opt to upload new images, click on "Image Upload" at the top of the popup to add them to this product type. Click Save to finalize adding these new images.

- Once you have updated this product types image, you will have the option to have the new image replace the previous image that was used for this product type. This will replace all images on products that used the previous image.
By following these straightforward steps, you can improve your product type default images. These images will be used as defaults on all products with no product image OR brand image.