How to Add an Image to a Product

Adding images to products in POSaBIT is a breeze! Here's a guide on seamlessly incorporating one or multiple images into your products, enhancing your online menu and POS experience.
How to Add Images to a Product:
- Log in to your POSaBIT POS Portal.
- Navigate to the Inventory dropdown and select "Product Details."
- Locate the product you wish to edit. If creating a new product:
- Click the blue "New Product" button.
- Fill in the details and click "Create."
- Notice: Creating a product is necessary before attaching images.
- Once your product is located or created, click the orange Image Icon on the right side of the page.

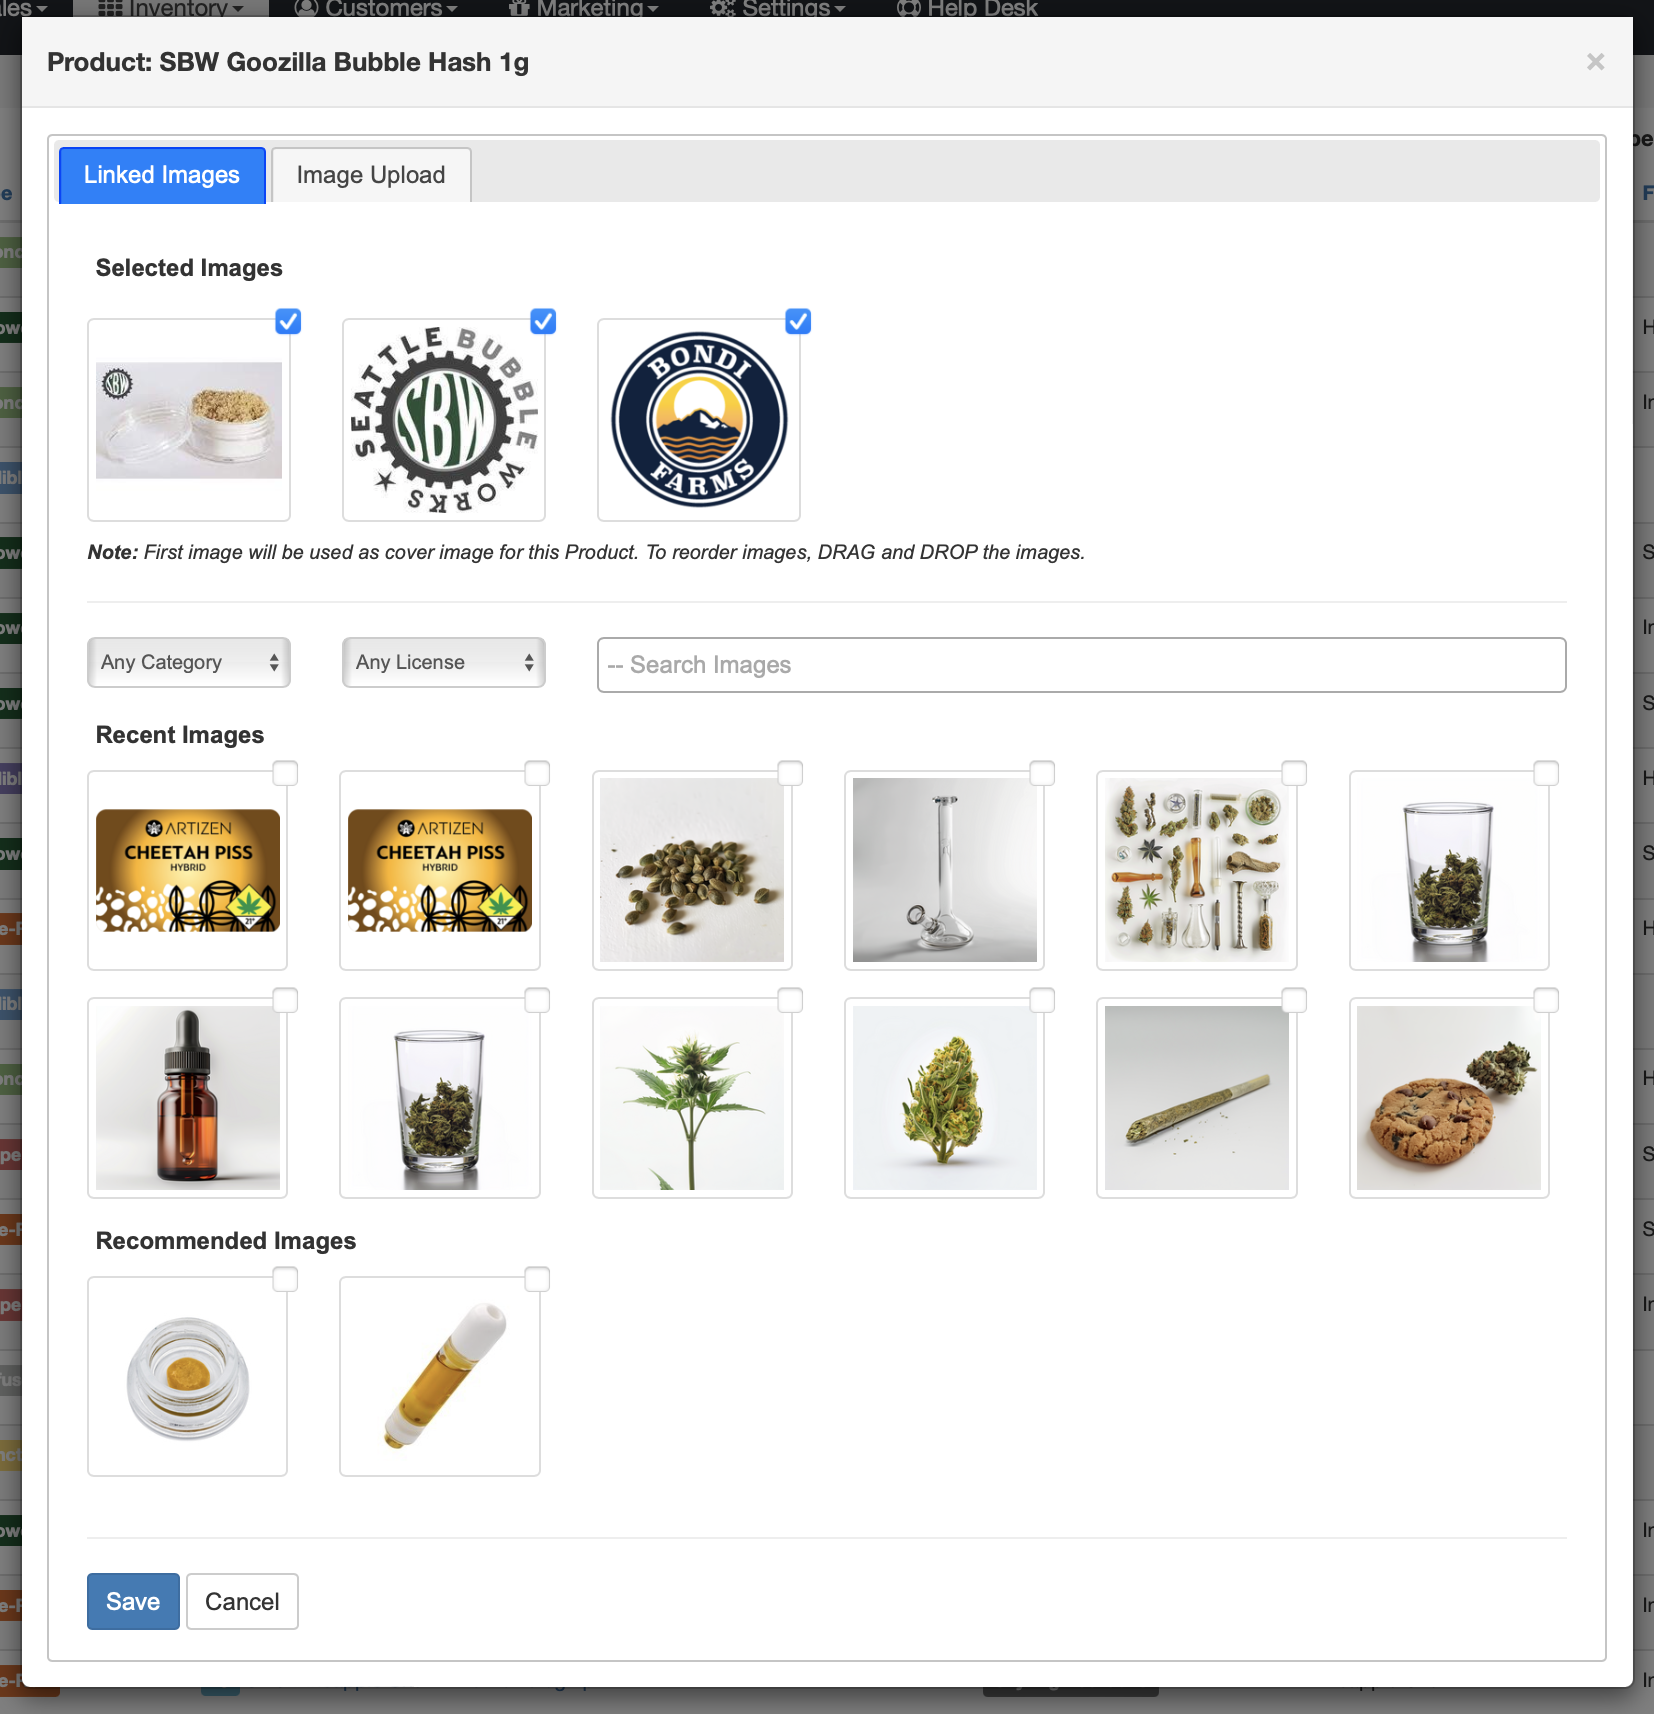
Adding Existing Image:
- Go to the Linked Images tab and select a Recent or Recommended Image.
- Recent Images: Images you've recently used.
- Recommended Images: Images related to the product, brand, and type.
- If the desired image isn't shown, use the 'Search Image' field.
- Multiple images can be associated with a product, and you can drag images to rearrange their display order.
- ** For POSaBIT POS & Menus: Multiple images is not yet implemented on POSaBIT menus or the POS and will be included as an enhancement in our v2 update to the Image Gallery.
- ** For 3rd Party Menus: the use of multiple images will need to be consumed via the integration with your menu provider. If you are interested in this functionality, please consult with your menu provider to discuss utlizing this feature.
- Click "Save" to add the images to the product.
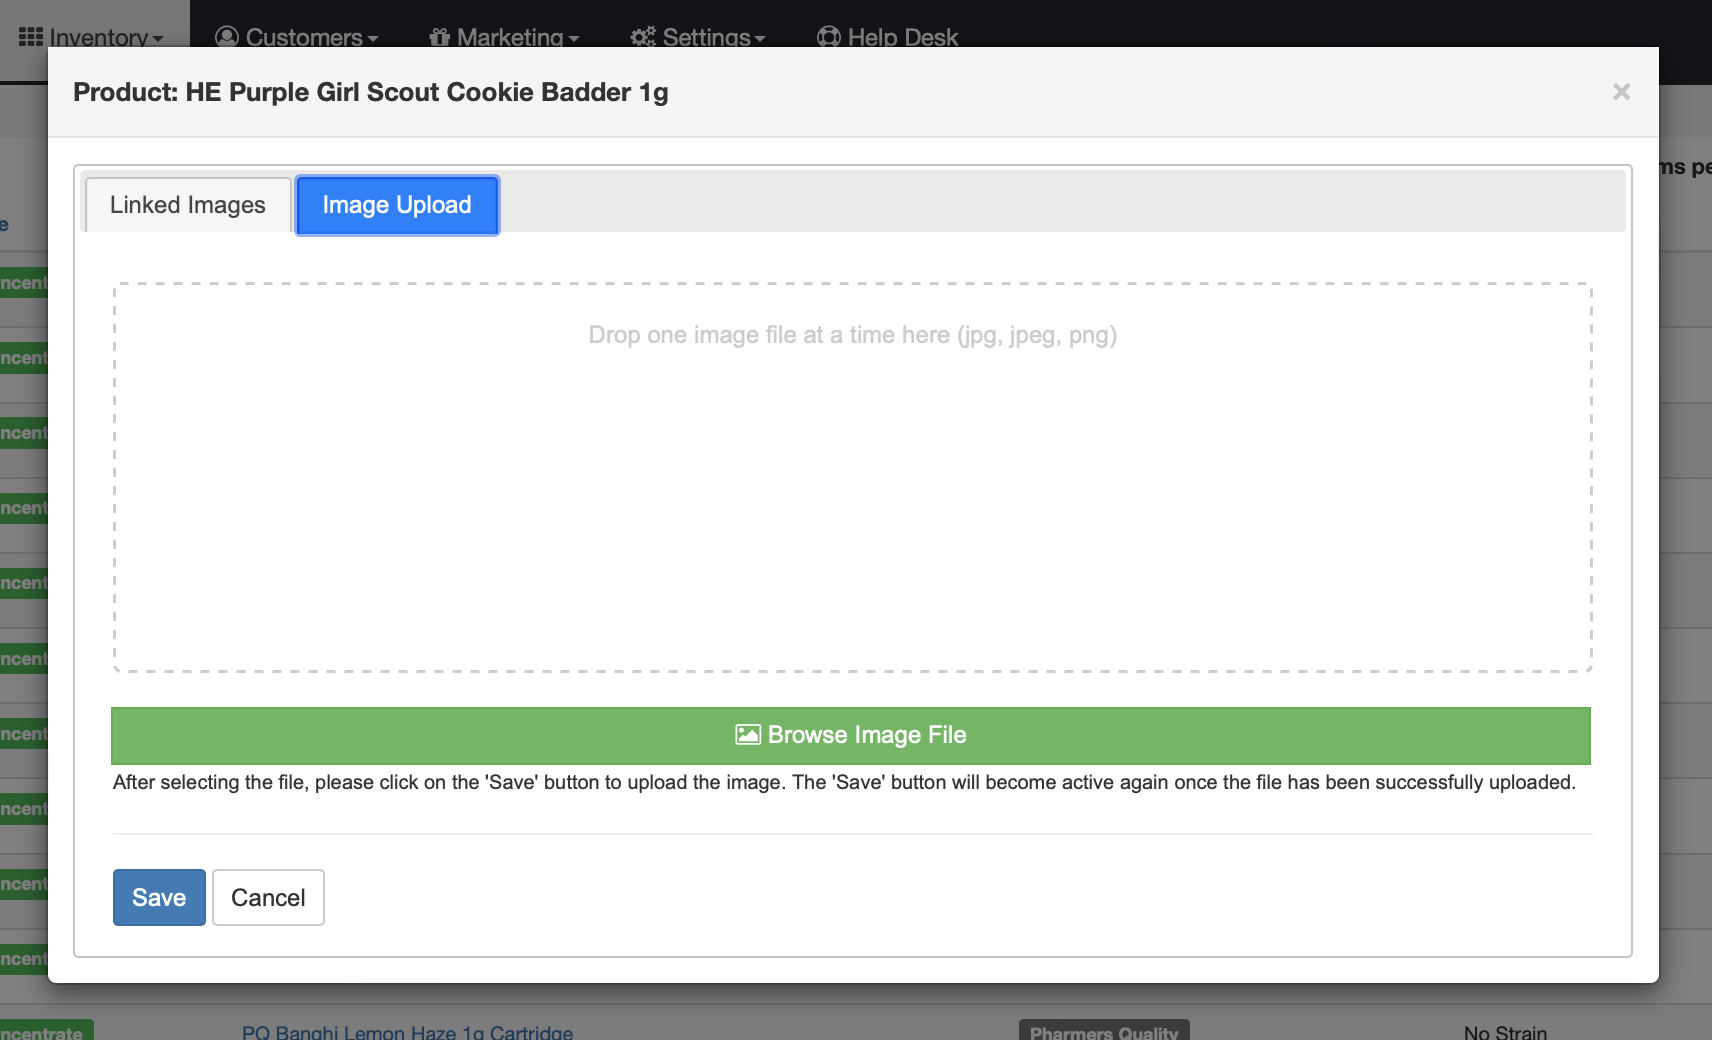
Adding New Image (Image Upload Tab):
- Navigate to the Image Upload tab.
- Drag one image at a time into the uploader or select Browse Image File.
- Click "Save" to add the images to the product.
With these straightforward steps, you can effortlessly enhance your product presentation, offering customers an enriched browsing experience both online and in-store.