How to Edit (and Delete) Images from the Image Gallery

How to Edit (and Delete) Images from the Image Gallery
Welcome to our guide on managing your image gallery effectively! In this article, we'll walk you through the process of editing and deleting images from the Image Gallery in a few simple steps. Whether you're looking to update product visuals or streamline your image library, we've got you covered.
Steps to Edit (and Delete) Images:
- Navigate to the Image Gallery page.
- Click on the image you wish to edit or delete.
- The image details page will appear, providing options for editing and deleting.
Explanation of Features:- Search Bar: Find products to associate with the image and click "Add" to link them.
- Remove All: Remove all products assigned to this image.
- Remove: Remove the image from specific products or all linked products.
- Delete: Permanently delete the image from the image gallery.
- Edit: Further edit the image (see step 4 for additional edit tools).
- Keywords:
- Blue keywords are custom keywords you have chosen to associate with the image.
- Gray keywords are auto-assigned keywords based on the product's name, brand, and type.
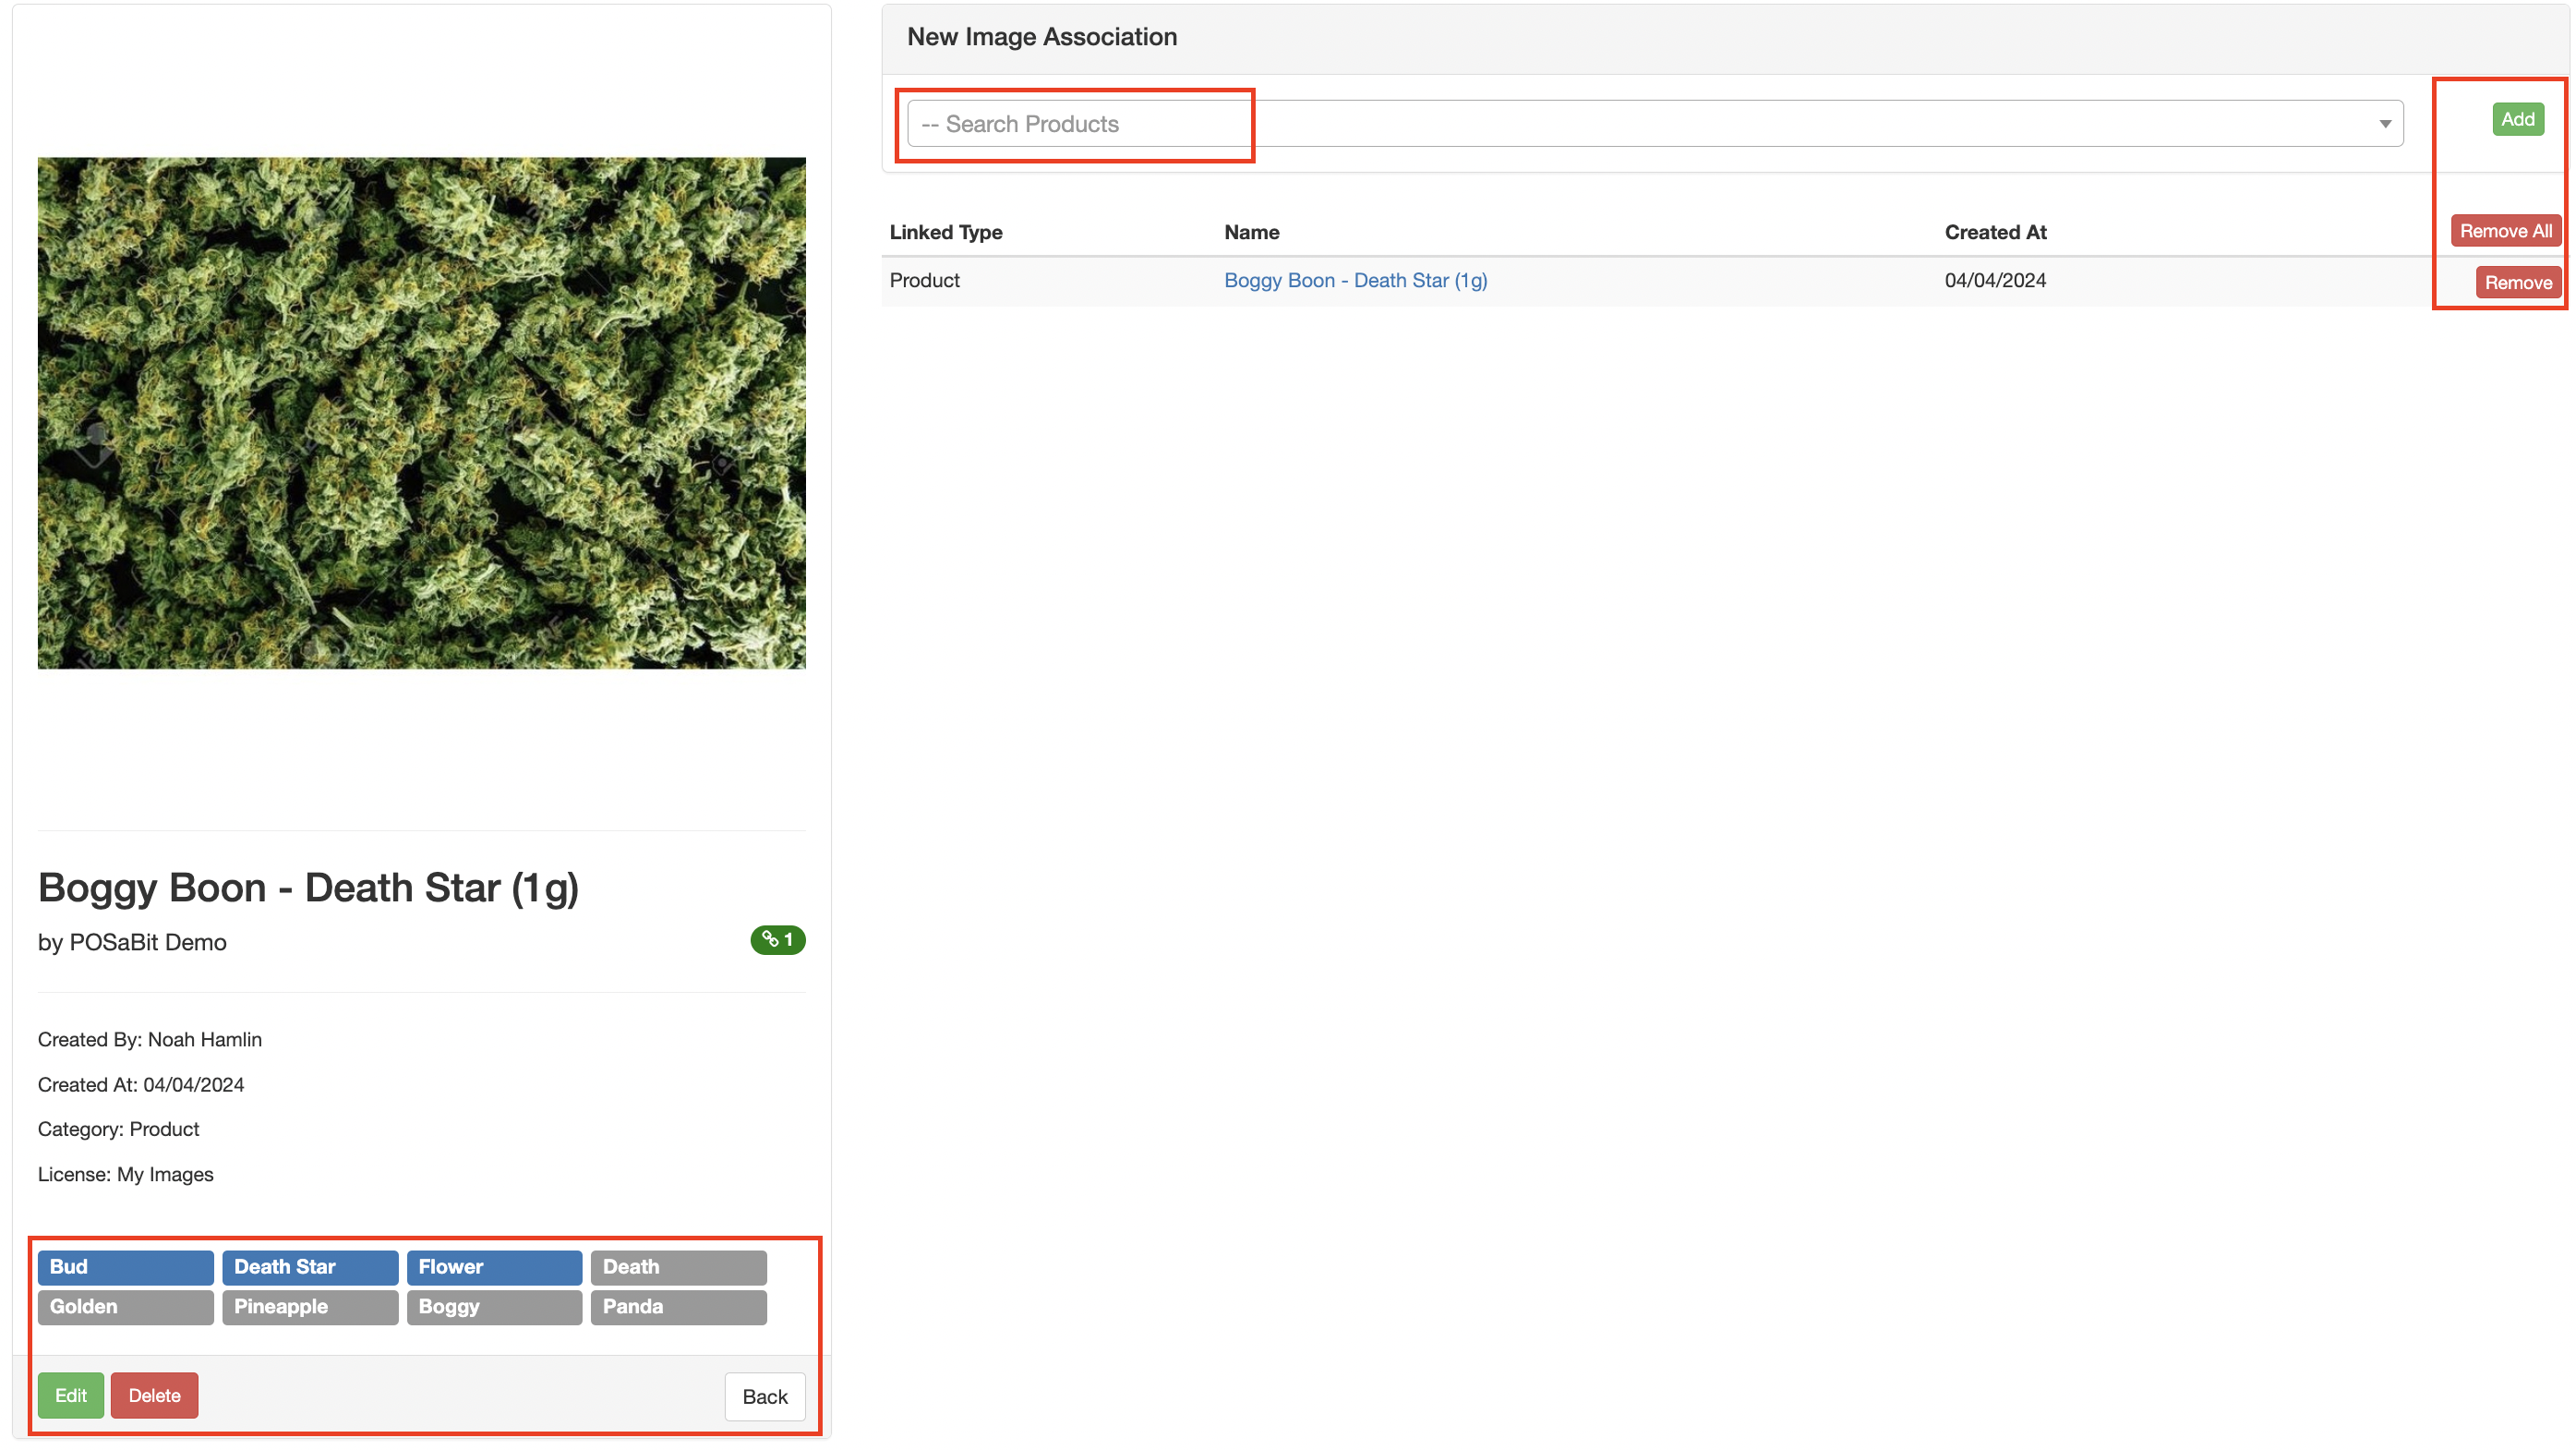
- Click the green Edit button to access additional editing options.
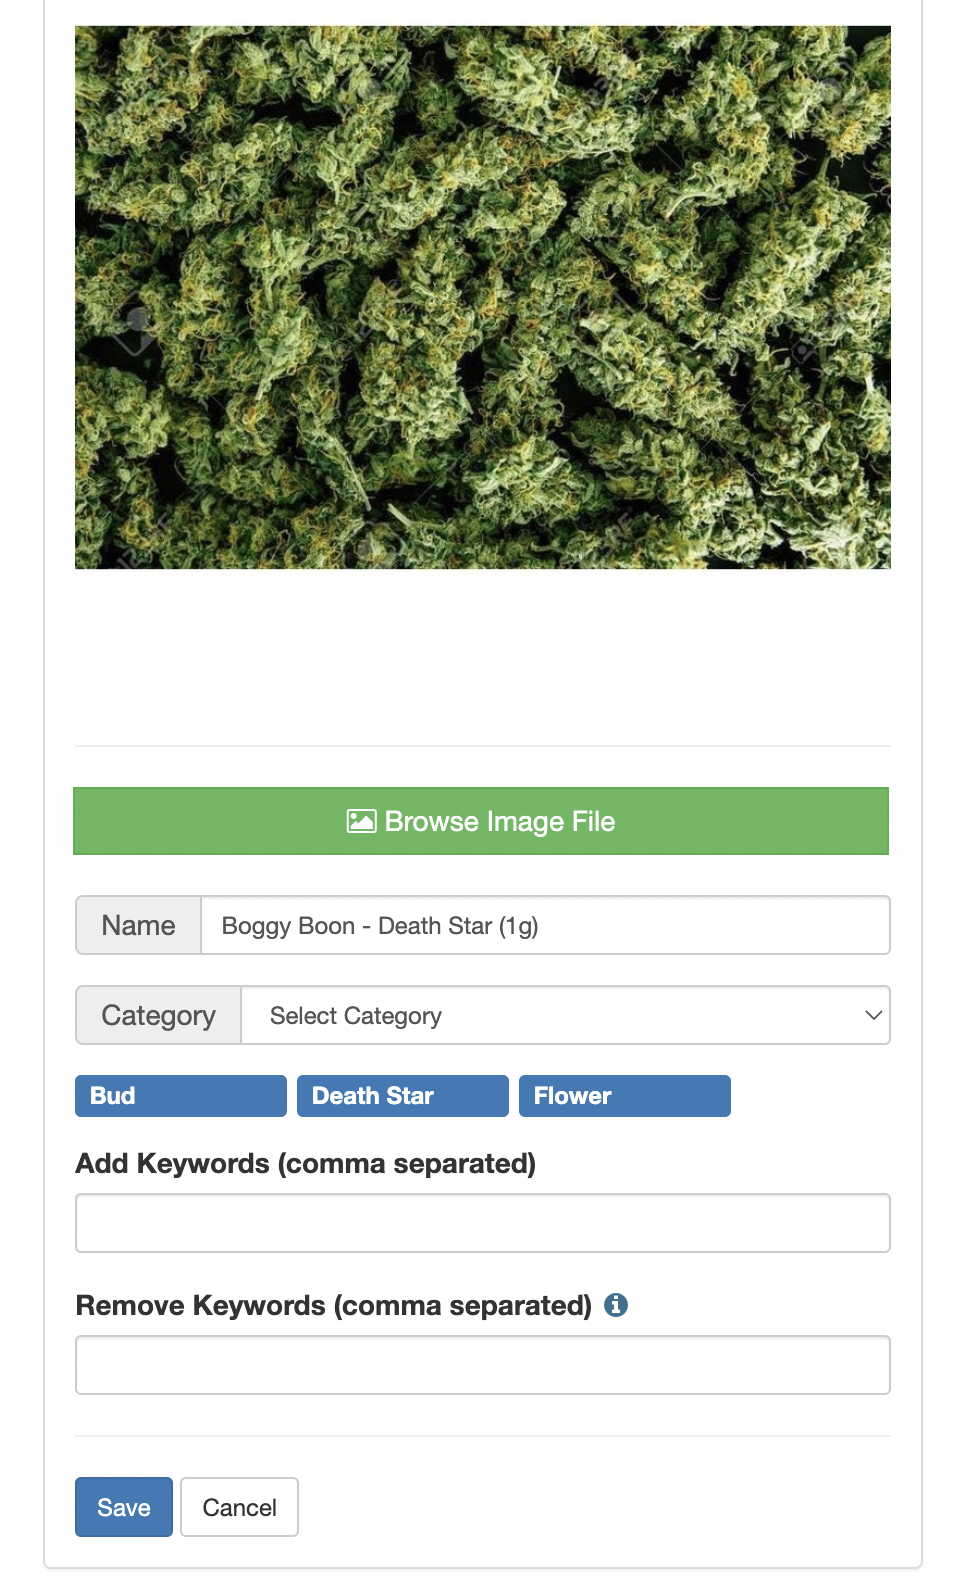
Additional Edit Tools:- Browse Image File: Select a new image to replace the current one.
- Name: Edit the name of the selected image.
- Category: Edit the category of the selected image. This identifies if the image is a product, brand, or stock image.
- Add Keywords: Add custom keywords you want the image to be associated to.
- Remove Keywords: Remove any custom keywords that were previously assigned to the image.
With these simple steps, you can efficiently manage and customize your images, ensuring your products are presented exactly as you desire.