Weedmaps - How to Connect a New Product to Curated Data

A key aspect of the service Weedmaps offers is access to curated or verified product data. These products contain detailed data on the strain effects, descriptions, images and much more. Therefore, when designing this integration we made sure you maintain access to this data allowing your customers to see the most detailed effects, descriptions, and images possible.
However, in order to access this enhanced data for new products, you must map your POSaBIT product details with the Weedmaps curated product details. Below you can find a overview of the steps required to map your new products to the Weedmaps data. Keep in mind, these steps are only required for new curated products that are accepted after your initial weedmaps setup is complete!
- Accept the manifest containing the new product
- Create product details for the new product within POSaBIT
- If necessary, create a new brand for the product
- Link the brand in POSaBIT to the Weedmaps curated brand
- Connect the newly created product in POSaBIT to the curated product in Weedmaps
First things first, you will want to accept the incoming manifest containing the new product. Follow the steps below to learn how to accept a manifest that contains a new product:
- Login to the POSaBIT web portal.
- Select "Incoming Manifests" from the "Inventory" drop down located at the top of the screen.
- Locate the manifest you would like to accept and press the green "Show" button.
- On the manifest page, press the orange "+" icon to create a new product within POSaBIT.
- You will now see a pop-up form to create a new POSaBIT product.
- If this product is for a brand you have never had at your venue before you will need to also create a new brand. To do so, select the "Brand" dropdown and press on the "Create New Brand" option. This will prompt you to enter in the name of the new brand.
- Continue filling out the product details adding as much detail as you wish. Once you have finished filling out the new product form, press the blue "Save" button at the bottom of the screen to create the product.
- Fill out the remaining fields for the incoming manifest including room, test results, price, cost, quantity, etc.
- After filling out all required lot/package details on the manifest, press the green "save" button to save the lot/package details.
- Finally, once you have successfully saved the lot/package details, press the green "Accept" button in the top section of the page to officially accept the manifest
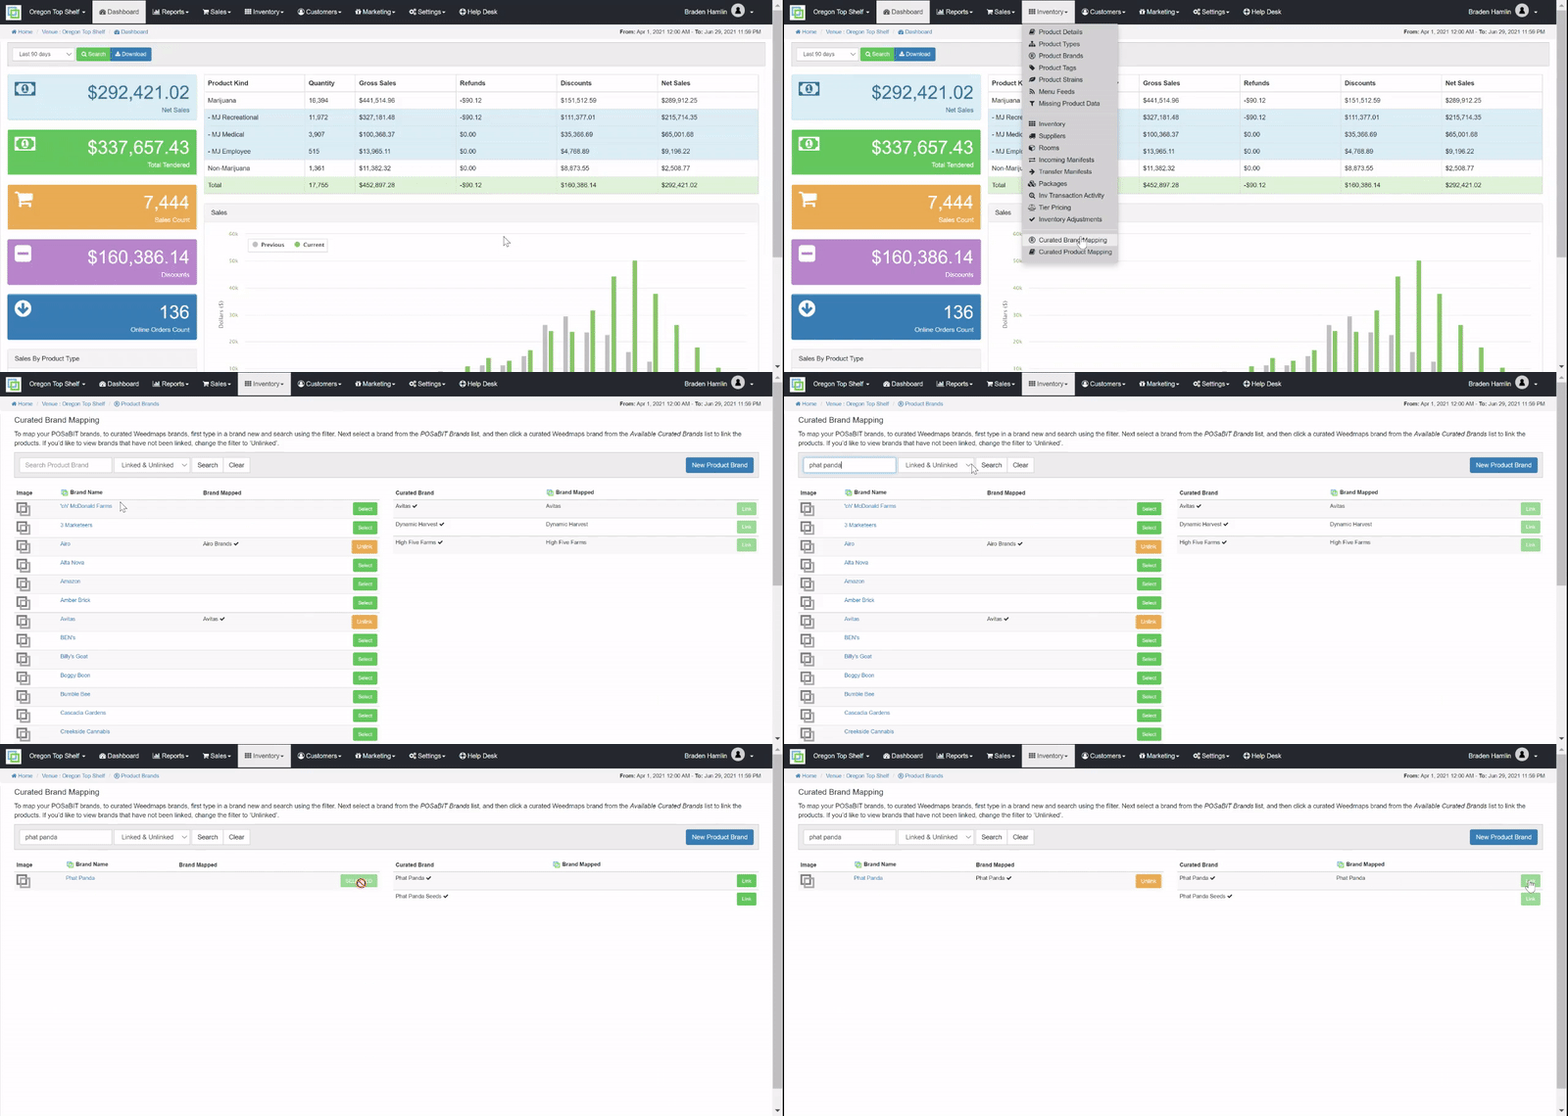
Secondly, you should link up the newly created brand within POSaBIT to the Weedmaps curated brand. Please follow the steps below to learn how to connect the brand within POSaBIT to the Weedmaps curated brand.
NOTE: If your venue has already carried products by this brand you may be able to skip this step. To double check, please go to the "Brand Mapping" page found under the "inventory" dropdown. Once there, use the search bar to find the desired brand and see if it has been mapped to a Weedmaps brand yet.
- Login to the POSaBIT web portal.
- Select "Brand Mapping" from the "inventory" dropdown at the top of the screen.
- Using the search bar at the top of the screen, search for the newly created brand.
- Once you have found the brand on both tables, press the green "Select" button on the left hand table.
- As soon as you press the green "select" button you will notice the green "link" buttons on the right hand table will become clickable. Locate the row with the matching brand name and press the green "Link" button to map the brands together.

________________________________________________________________
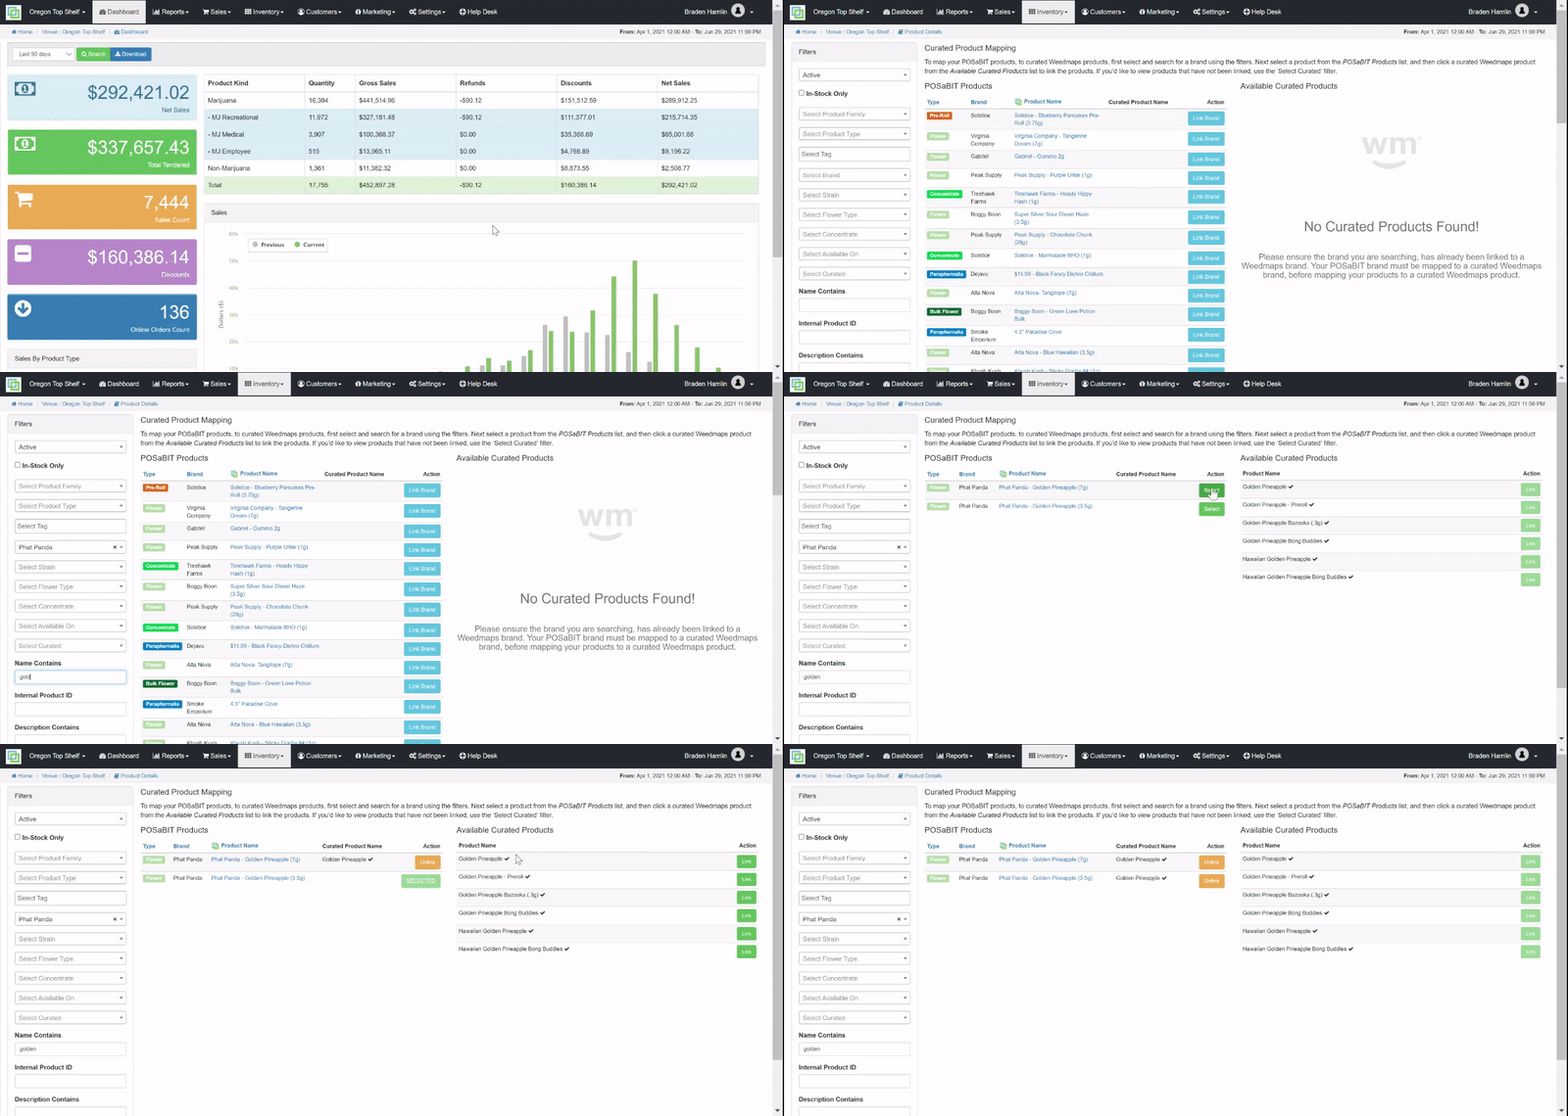
Finally, you are now able to link the newly created product within POSaBIT to the Weedmaps curated product. Please follow the steps below to learn how to link POSaBIT products to curated Weedmaps products.
- Login to the POSaBIT web portal.
- Select "Curated Products" from the "inventory" dropdown at the top of the screen.
- Using the brand filter on the left hand side of the screen, select the newly created brand so that you are only seeing products from that brand.
- Next, located the product that you just created from within the left hand table. Once found press the green "Select" button.
- Similar to above as soon as you press the green "select" button you will notice the green "link" buttons on the right hand table will become clickable. Locate the row with the matching product name and press the green "Link" button to map the products together.

