Accepting an Incoming Manifest (Metrc)
Step 1: Accept the Manifest in Metrc
- Log into your METRC account and view your manifests
- Accept the manifest items you are bringing into inventory
- Wait about 5-15 minutes - Metrc updates periodically and will allow POSaBIT to pull in the manifest once METRC updates.
Step 2: Locate the Manifest in POSaBIT
- From the top navigation bar, click Inventory > Incoming Manifests
- Click on green Show button or click on the manifest Ref Number, next to the manifest you are accepting.
Important: If you do not see the manifest in question under the list of 'pending' incoming manifests, then hit the blue Sync button. The system automatically syncs with Metrc every 15 minutes, so it is possible you just need to manually sync up with Metrc (by hitting the blue sync button), to get the latest data pull.
Step 3: Assign Manifest Items (packages) to Products
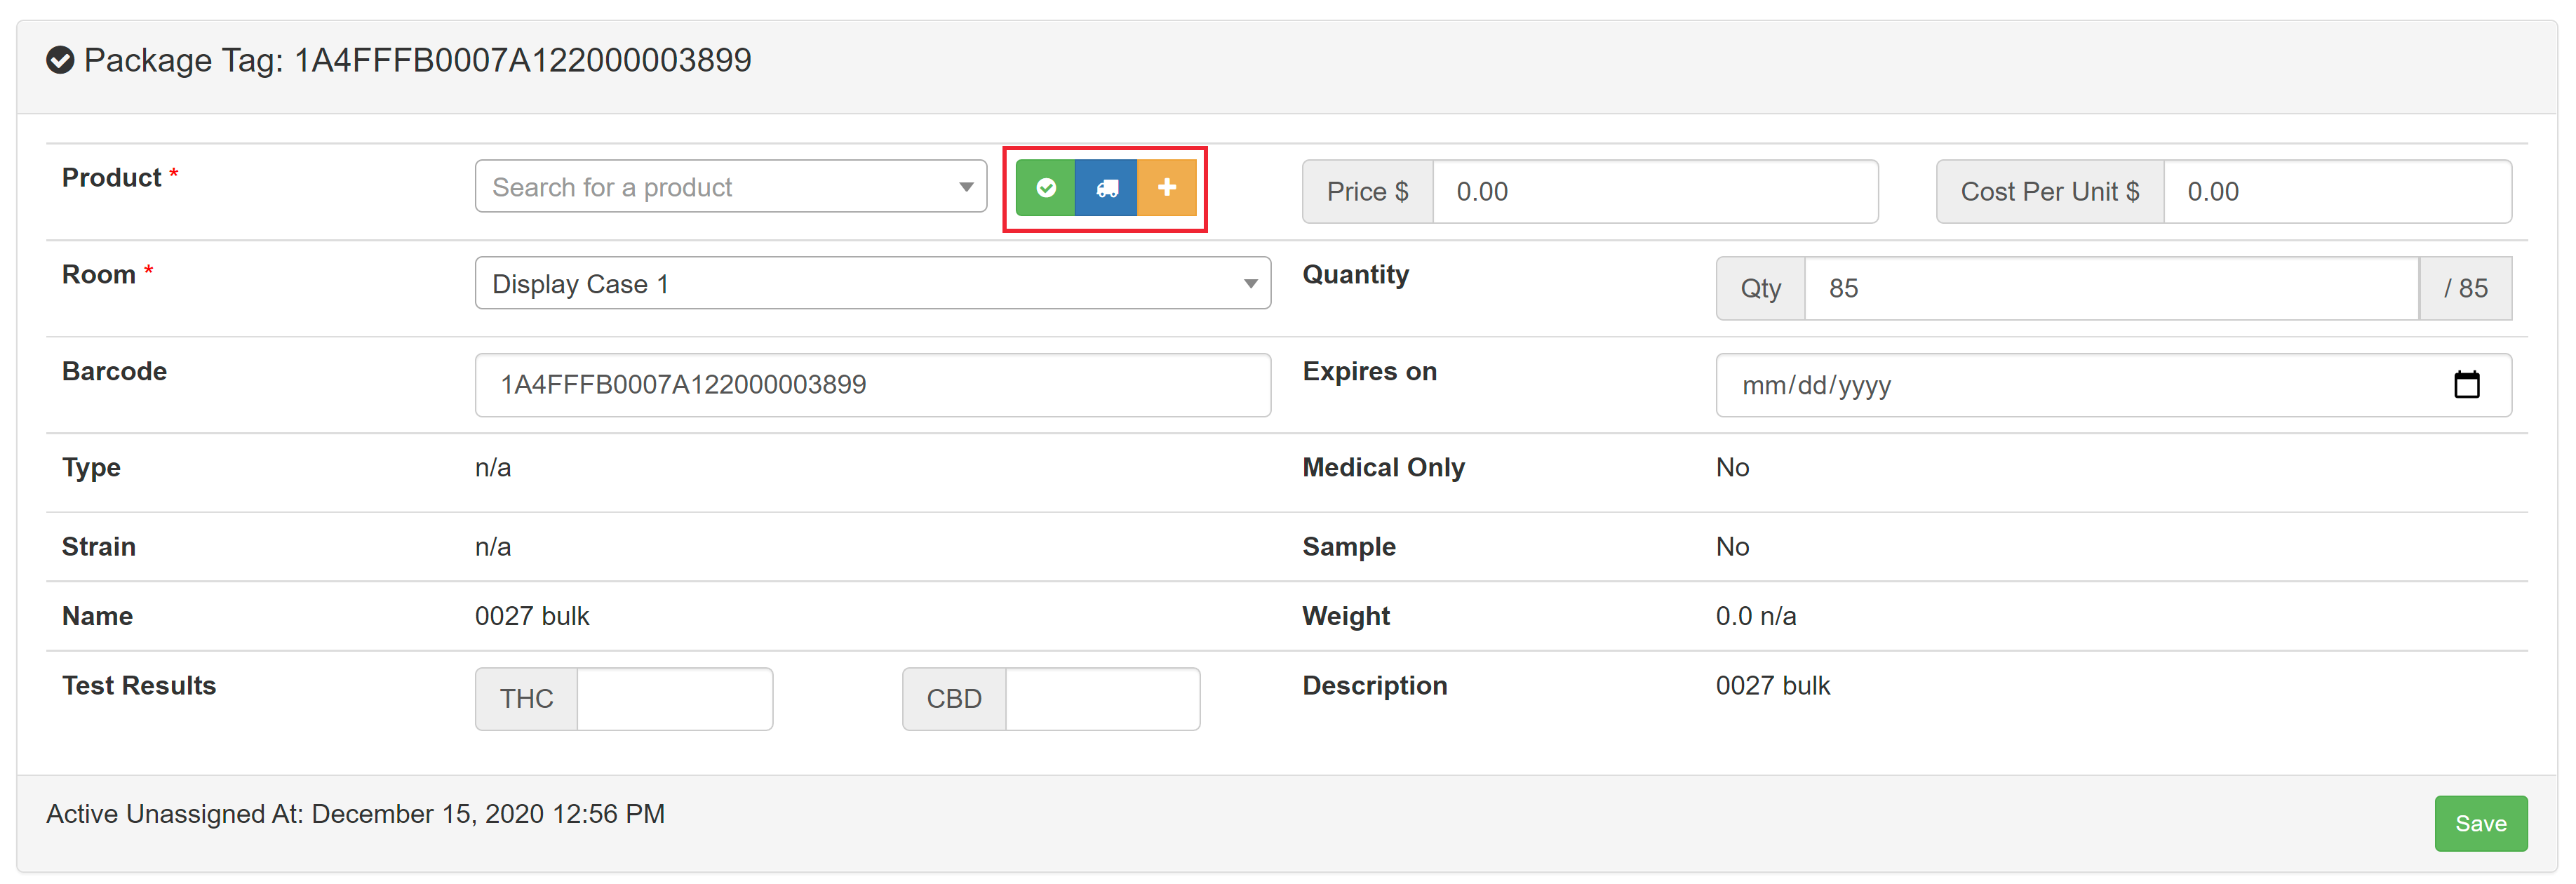
- For each package ID, search the product library and associate it with a Product.
- If you have never sold this product before, select the orange Add New Product button.
- If you have sold this product before, simply type in the name of the product and select it.
- If you can't find the Product you are searching for, you may have to loosen your search results. The product list automatically defaults to showing active products from the supplier you are accepting the manifest from. You can open up the product results by clicking on the product state button and/or supplier button:
- Clicking the green product state button will display active and inactive products
- Clicking the blue supplier will display all products, from all suppliers
- Clicking the green product state button will display active and inactive products
- If you have never sold this product before, select the orange Add New Product button.

- When Accepting Prepackaged Flower: After you select a prepackaged product from the product list (product is unit based, and is not weighable), a pop up window will appear and prompt you to confirm the number of units you are accepting. For flower products (bulk or prepackaged), Metrc sends POSaBIT the bulk weight, so selecting a prepackaged product from the list will automatically transform/record the bulk weight into the appropriate number of units, depending on the weight of the prepackaged product that is selected. For example, if Metrc thinks you are recieving 70 grams of product, and a 3.5 gram product is selected from the product library list, then the system will recognize that you are recieving 20, 3.5g packages.
2. Enter the wholesale cost per unit (This is the cost that you paid the vendor for each unit of an item, not the price that you will sell the item for in your store).
Quantity auto-populates based on information pulled from Metrc.
4. By default, Barcode is automatically populated with the package ID.
If an item already has a barcode label, you can use that barcode instead of the package ID. Just input the barcode into the barcode section
Otherwise, enter your own Barcode. If you add your own barcode, remember to print labels for your items before selling them
5. Make sure to fill out the THC/CBD, the expiration date, and assign a room
Step 4: Accept the Manifest
When you're done filling out product information for the new package, press the green "Save" button in the bottom right hand corner of the package creation module. Once you have filled out and saved all packages within the manifest verify the Cost at the top of the page and then hit the green Accept button.

Once the manifest has been successfully accepted into the system, the header at the top of the manifest will turn green, and will show the date, time, and employee that accepted the manifest.
