How to Manually Create an Incoming Manifest

Depending on what traceability system your state uses, you may need to manually generate incoming manifests within POSaBIT. POSaBIT's manual manifest creation allows you to easily enter all necessary manifest data to populate new inventory within your POSaBIT system.
Note: If your state uses Metrc, then you are only required to manually generate an incoming manifest for non-marijuana products.
Follow the steps below to learn how to manually Create and Accept a Manifest in POSaBIT:
- Log in to the POSaBIT POS portal
- Select "Incoming Manifests" from the Inventory drop-down found at the top of the page
- Press the blue button labeled "New Manifest" found in the top right-hand corner of the page
- Fill out the following information to create a new incoming manifest form:
- Supplier: Use the drop-down selector to select which supplier is providing the paraphernalia products. If you have never received a product from this supplier, you may need to create a new supplier, learn how to do so HERE
- Transfer Date: Fill in the date the products were shipped (left the supplier's facility)
- Reference ID: Enter the manifest ID or other unique identifier to help you easily locate this manifest if needed
- Delivery Date: Fill in the date you received or plan to receive the products
- Discount (optional): Add a discount to all products in the manifest
- Notes (optional): This text box provides a space to add any notes you would like to save to the manifest for future reference
- After you have entered the required information, press the blue "Save" button to create the new manifest form.
- Now that you have created the manifest form, you will need to fill out which products are included within the manifest and the inventory values. Press the white "New Item" button on the right-hand side of the screen to start creating a new product lot/package
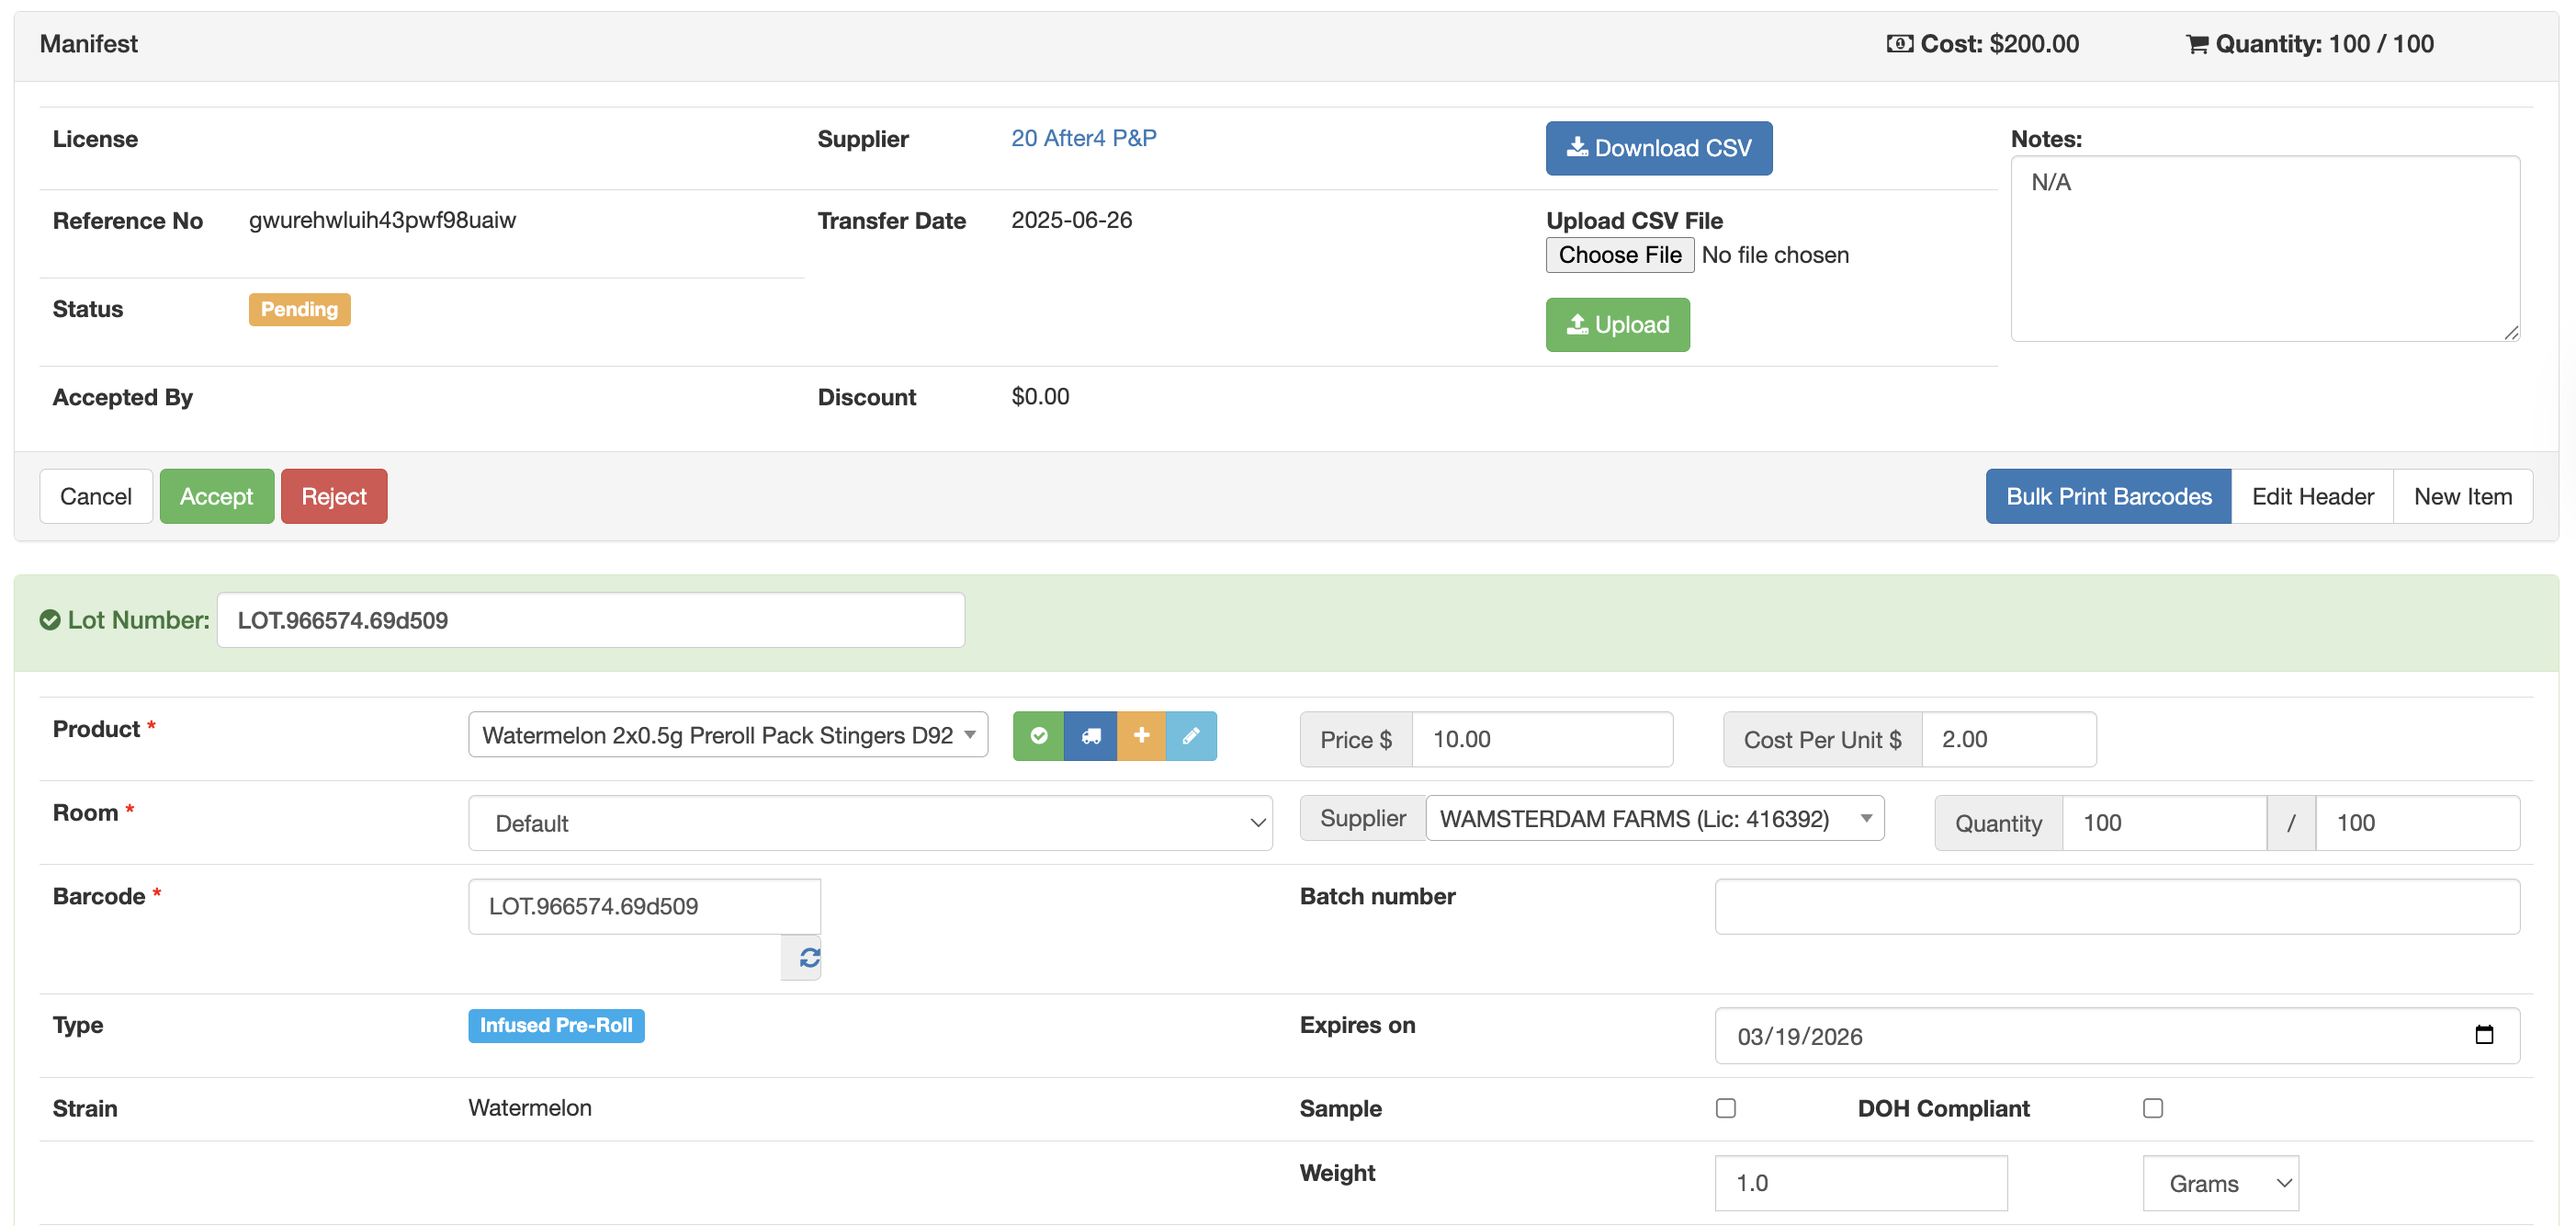
- Add the first product by clicking the New Item button on the right side. Fill out the following information about the first product lot/package found within the manifest:
Lot Number
Enter the lot number for the product you are entering details onProduct
Here you can search for an existing product if you have carried this product in the past; otherwise, create a new product by pressing the orange "+" iconRoom
Select which room you wish to add this lot/package toBarcode
Enter the barcode you wish to use for this lot/package. You can also press the circle arrows to automatically generate a random barcodeTest Results
Enter the products' THC and CBD data, if this is a paraphernalia manifest, ignore this fieldPrice
Enter the price you would like to sell this product atCost Per Unit
Enter the cost you paid for each unitSupplier
If the supplier of the manifest is the same supplier of this product, leave this field blank. Otherwise, select the supplier of this specific product.Quantity
Enter the quantity of units you would like to accept from the manifest (left) as well as the total quantity of units that were included within the manifest (right).Batch Number
Enter the batch number from the manifestExpires on (optional)
This field allows you to enter the product's expiration date. This field only appears after selecting a product.Sample
Checking this flag will make this product a sample, meaning only employees will be able to purchase it. This field only appears after selecting a product.DOH Compliant (Washington Only)
Checking this flag will make this product eligible for DOH tax exemptions. This field only appears after selecting a product.Description (optional)
This text box allows you to give a lot/package a specific description for this product. Note: this description is for internal use only.COA URL
Input the COA URL if it's on the manifest.Test Results
Enter the products' THC and CBD data. If this is a paraphernalia manifest, ignore these fields - Once you have entered all the required information for the New Item, press the green button labeled "Save" to save and verify that all information was entered correctly
- Next, repeat steps 6-8 for any additional lots/packages that you received in this manifest.
- Once all lots/packages have been entered into the form and saved, press the green "Accept" button at the top of the screen to accept the manifest.
For additional assistance, please reach out to POSaBIT support @ 1 (855) POSaBIT OR SUPPORT@POSaBIT.COM