Creating Customer Tags
Customer tags are the perfect way to organize your different customer groups. Building customer groups allows for easier filtering, targeted discounts, and custom data metrics. Customer tags are completely customizable by easily creating new tags and connecting them to specific customers. Commonly used to designate groups such as employee, veteran, industry, senior, etc.
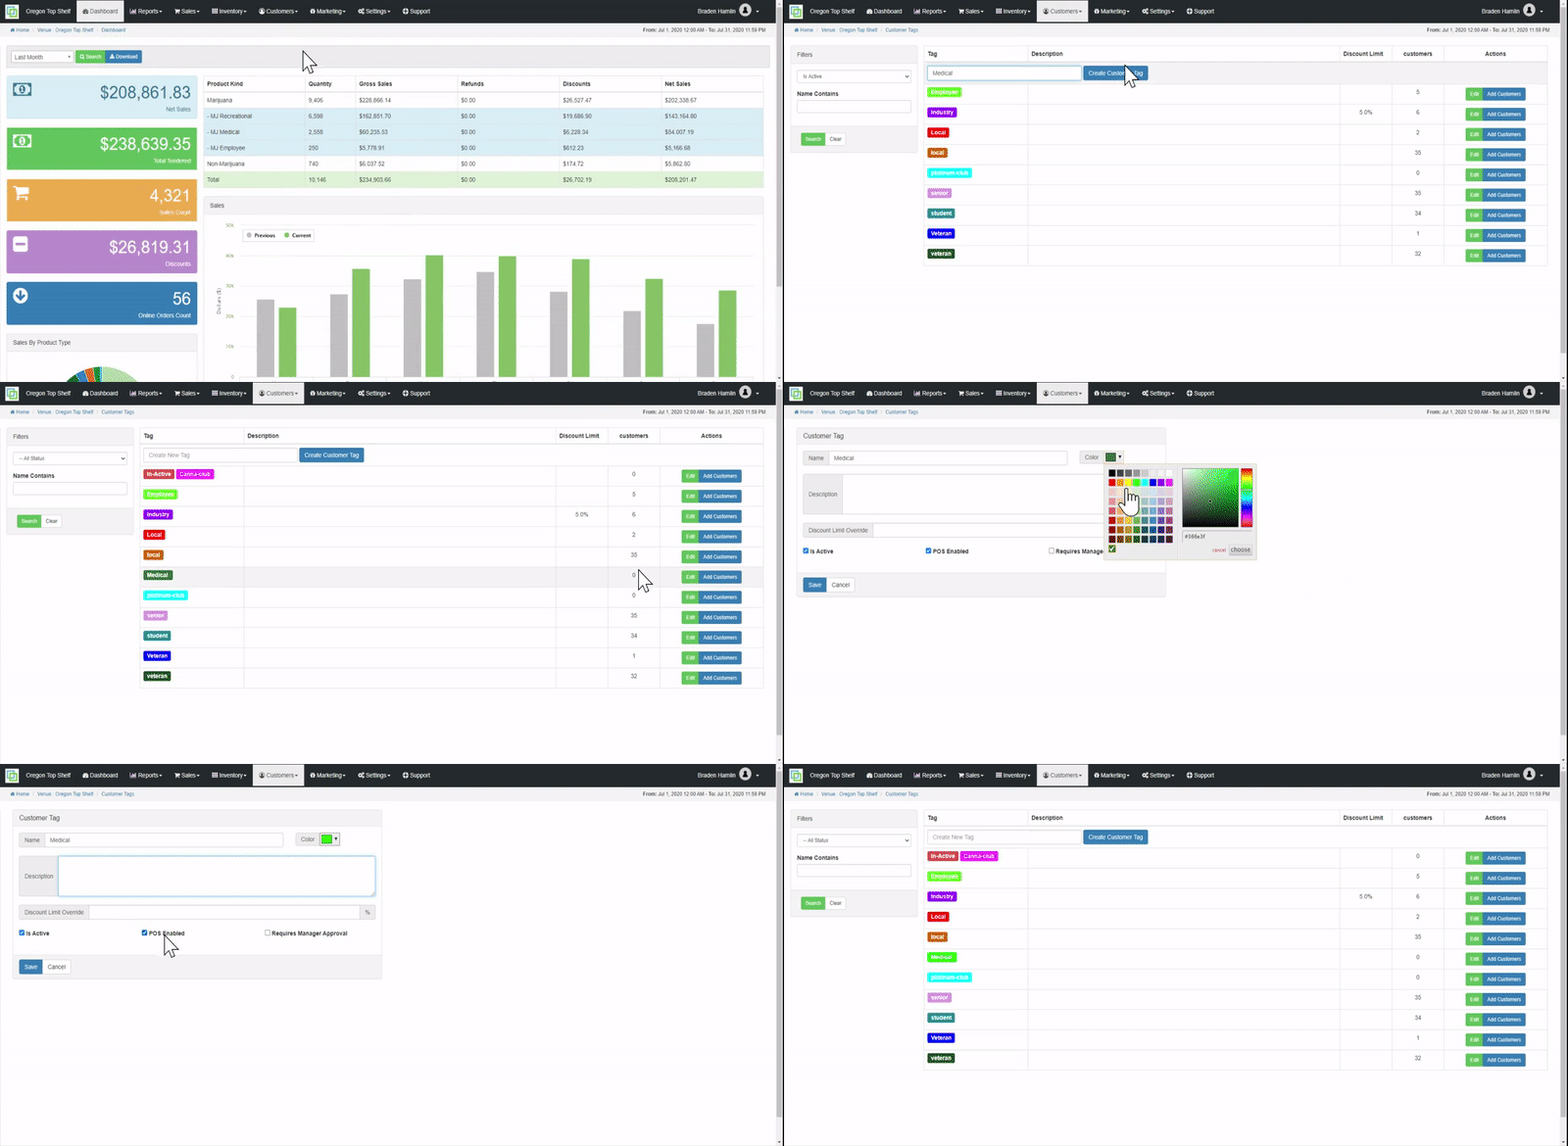
Learn how to create a customer tag below:
- Login to the POSaBIT web portal
- Select Customer Tags under the Customers drop down located at the top of the screen
- Type in the name of the new tag in the text box labeled Create New Tag
- Press the blue Create Customer Tag button next to the text box
- Scroll down until you locate the newly created tag and press the green Edit button
- Adjust any additional settings to ensure the tag is set up how you desire
- Name
- Color: The color of the icon that this tag will use
- Description: Brief overview of the customers in this tag
- Discount Limit Override: Set a max discount percentage that this group can receive off their purchase
- Is Active: Designate if you want this tag currently active or inactive
- POS enabled: If checked, you will be able to add this tag directly to customer's account when checking them out using the POS
- Requires Manager Approval: If checked, a manager's pin will be required to add this tag to a customer's profile on the POS
- Press the blue Save button
- Learn how to add customers to your new Customer Tag HERE

For additional assistance please reach out to POSaBIT support @ 1 (855) POSaBIT OR SUPPORT@POSaBIT.COM
