Customer Profile & Acknowledgments Overview

With POSaBIT customer profiles, easily customize the customer loyalty sign-up process, and define the important customer data you'd like to capture!
From the backend portal, the Customer Acknowledgment tab is where profile requirements are configured. On a store-by-store basis, define the minimum required information to create a loyalty profile, choose whether to require customers to leave their signature when creating a new profile for the first time and optionally upload any legal documentation you may want to present to the customer (i.e. Terms of Use, Privacy Policy).
At a minimum, all customer profiles must require either a phone number, ID document #, or both - the phone number or ID document # is used as the unique customer identifier for each profile. Having this information helps prevent duplicate customer records, and generates the information of the customer next time they come back in to shop!
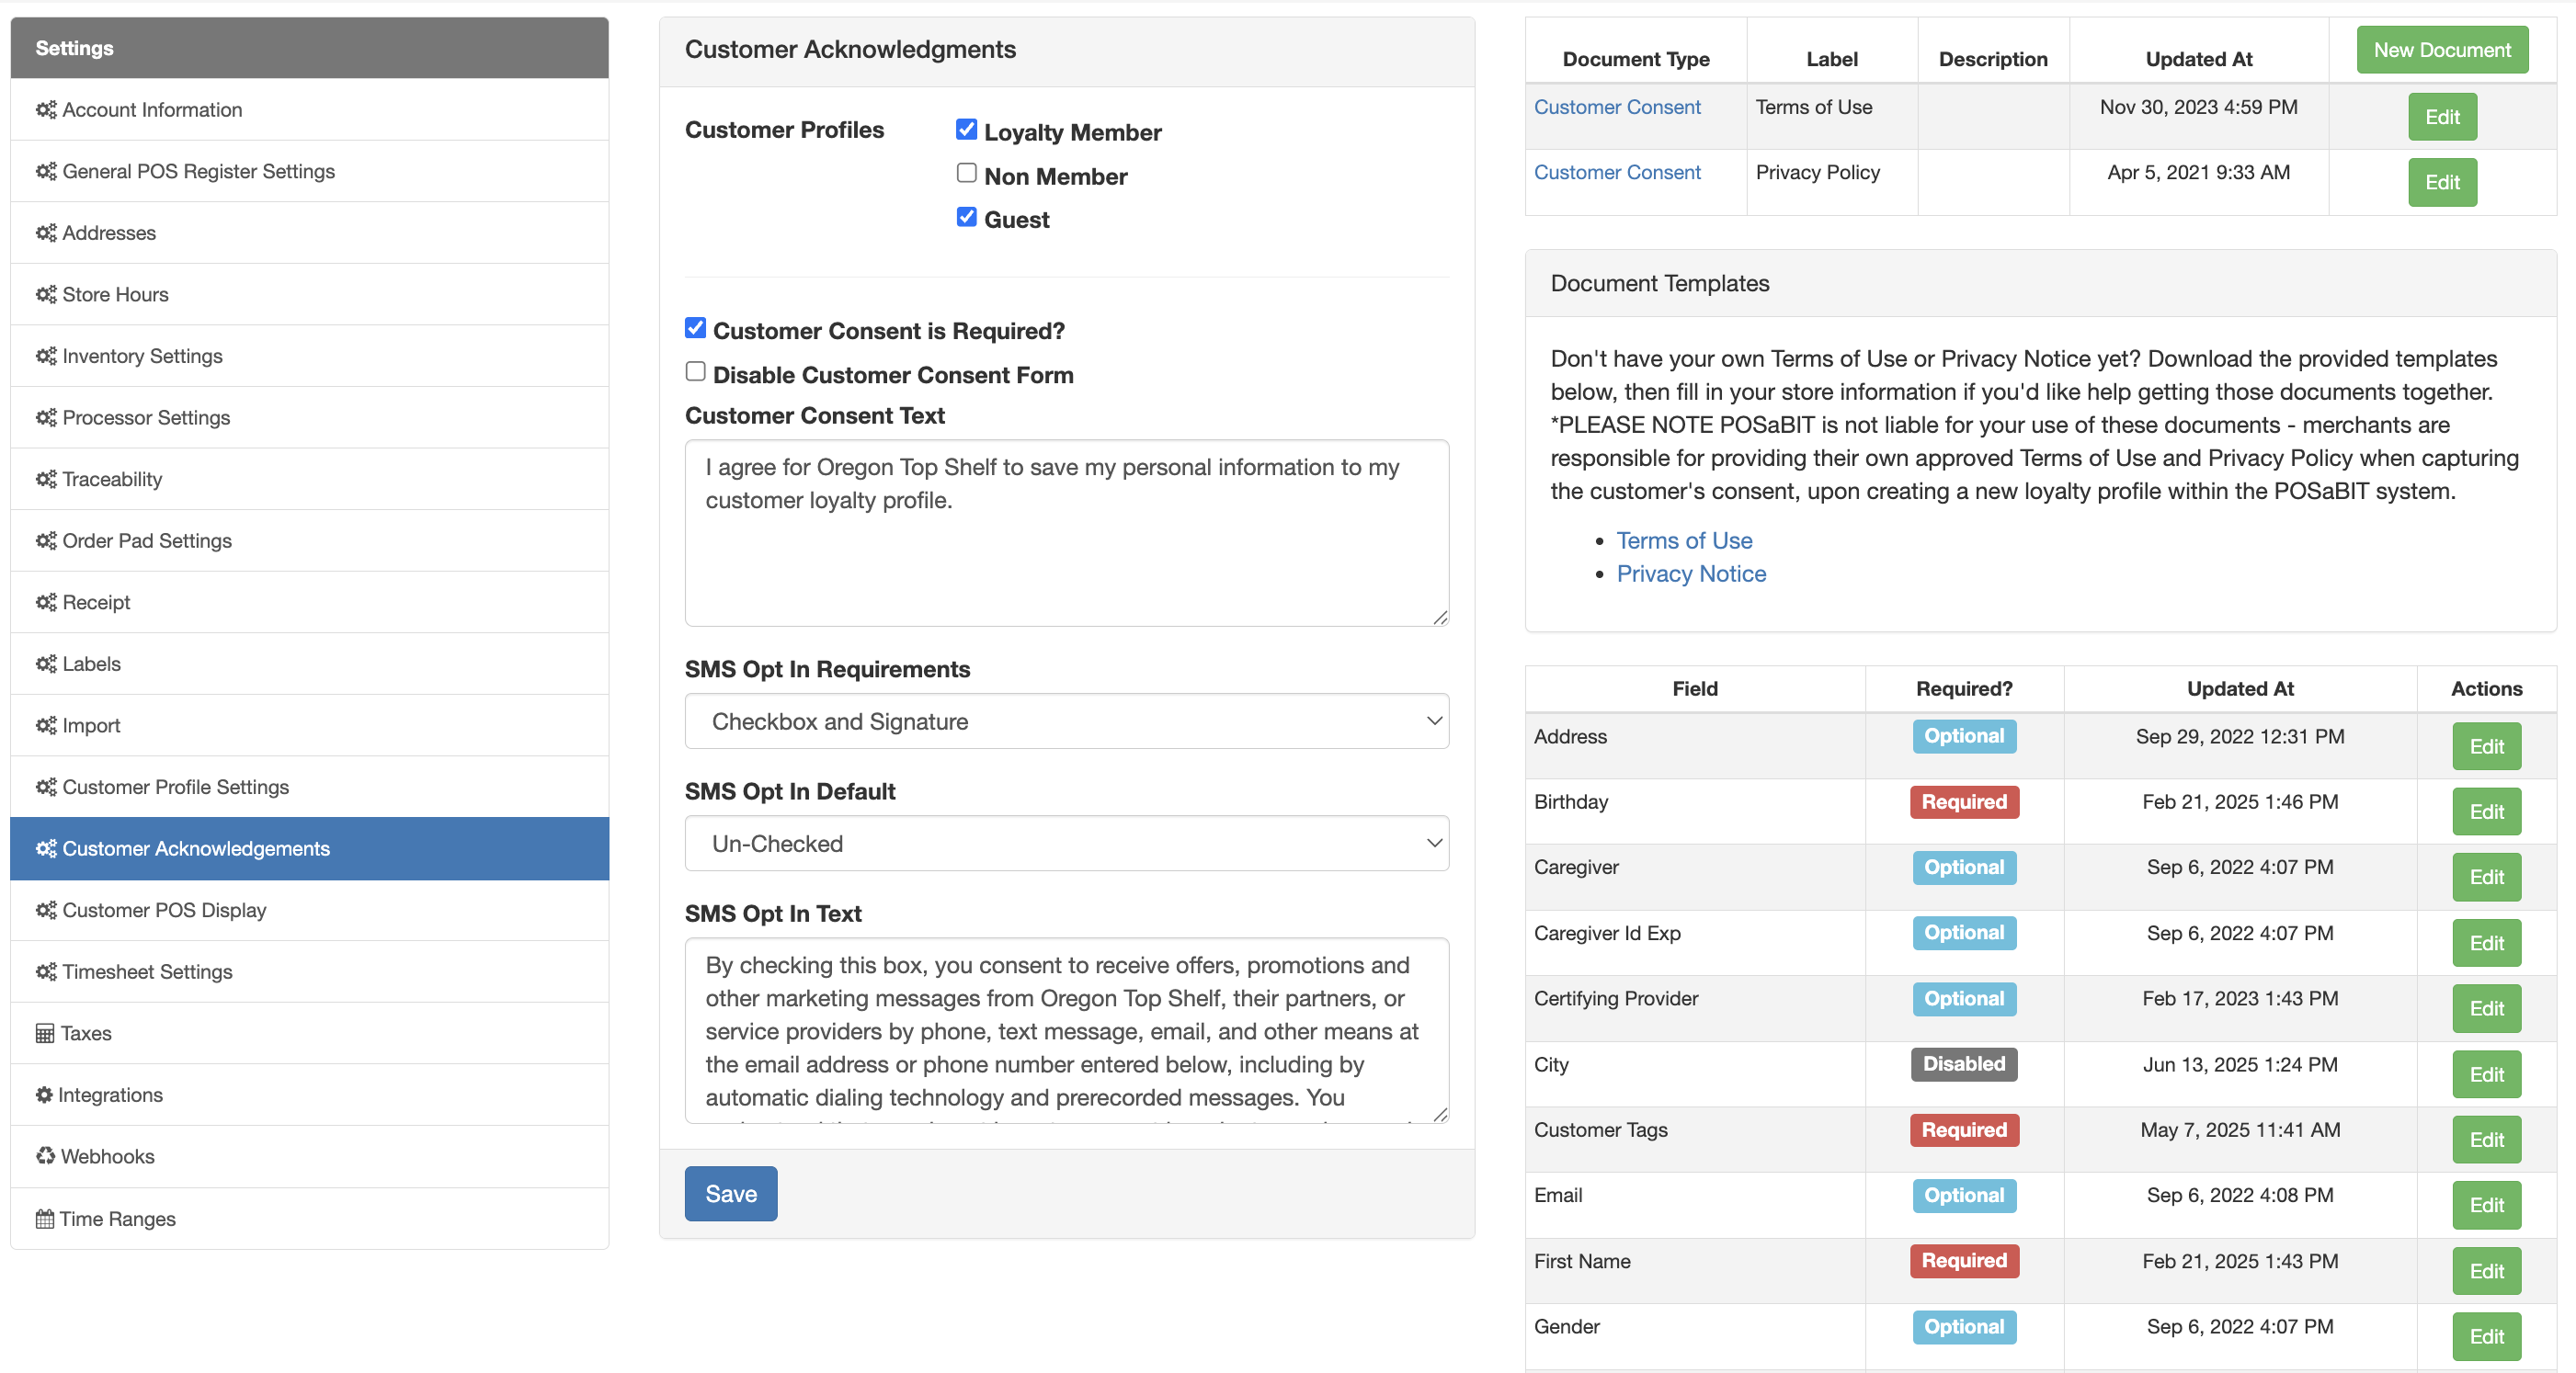
Under the Customer Acknowledgements tab, the following can be customized:
- Customer Profiles: Enable the customer types you want
- Loyalty Member
- Non Member (For states that require every customer be tracked)
- Guest
- Customer Consent is Required?: If enabled, customer consent will be required.
- Disable Customer Consent Form: If enabled, the customer consent form won't show on the POS.
- Customer Consent Text: This is the language used to ask for the customer’s consent to save their profile information.
- For example - "I Agree to the Terms of Use and Privacy Notice"
- SMS Opt-In Requirements
- Checkbox
- If this option is selected, then the customer will be required to check the 'SMS Opt In' box, if opting into receiving marketing messages from the store.
- Checkbox & Signature
- If this option is selected, then the customer will be required to check the 'SMS Opt In' box, AND a signature field will appear, prompting the customer to also sign their signature, if opting into receiving marketing messages from the store.
- Checkbox
- SMS Opt-In Default
- Checked
- If this option is selected, then the checkbox will be auto-selected by default
- Un-checked
- If this option is selected, then customers will be responsible for checking the box, if they'd like to opt-in to receiving marketing messaging from the store
- Checked
- SMS Opt-In Text: this is the language used for capturing customer's opt-in, for allowing the store to contact them about marketing
- For example - "By checking this box, you consent to receive offers, promotions, and other marketing messages from Tate's Marijuana Shop, their partners, or service providers by phone, text message, email, and other means at the email address or phone number entered below, including by automatic dialing technology and prerecorded messages. You understand that you do not have to consent in order to receive goods and services from Tate's Marijuana Shop and that data rates may apply. You can opt-out of these communications at the time by replying "unsubscribe" or "stop" these communications."
- Customer Fields: At a minimum, a phone number and/or ID document # are required. If you would rather capture an ID document # for every customer profile instead of the phone number, then ensure the 'Required' flag is enabled for the ID Document #, and then disable it from being required under the phone number field.
- Legal Document Upload: If you'd like to upload any legal documentation you may have around customer data usage (i.e. Privacy Policy, Terms of Use, etc), then you can upload them in the portal! Once uploaded, your customers will be able to view the documents from the POS.
- If you do not have the existing legal documentation, don't sweat it! Feel free to download and use the templates provided in the backend portal - each template has placeholders for your business information, which you can simply add it!
Note: For Spring big/Alpine IQ integrations, there is a second (loyalty) checkbox enabled on the signature screen. You can put specific verbiage in there for whichever loyalty partner you use.
After saving a new customer profile, POSaBIT saves a copy of the customer's profile to the system for your records. To access a copy of the customer's consent form, navigate to the customer's profile and then click on the signature date/time at the bottom of the customer details form.
For additional assistance, please reach out to POSaBIT support @ 1 (855) POSaBIT OR SUPPORT@POSaBIT.COM