How to Setup a POSaBIT Menu on Wordpress with Multiple Venues

In this article, you will learn how to set up a WordPress site with a POSaBIT menu. You will also learn how to add multiple venues to your WordPress site.
How to Connect your POSaBIT URLs to the WordPress site
- Log in to the POSaBIT Portal and go to the venue you would like to add the menu to.
- Go to the Inventory tab --> Menu Feeds
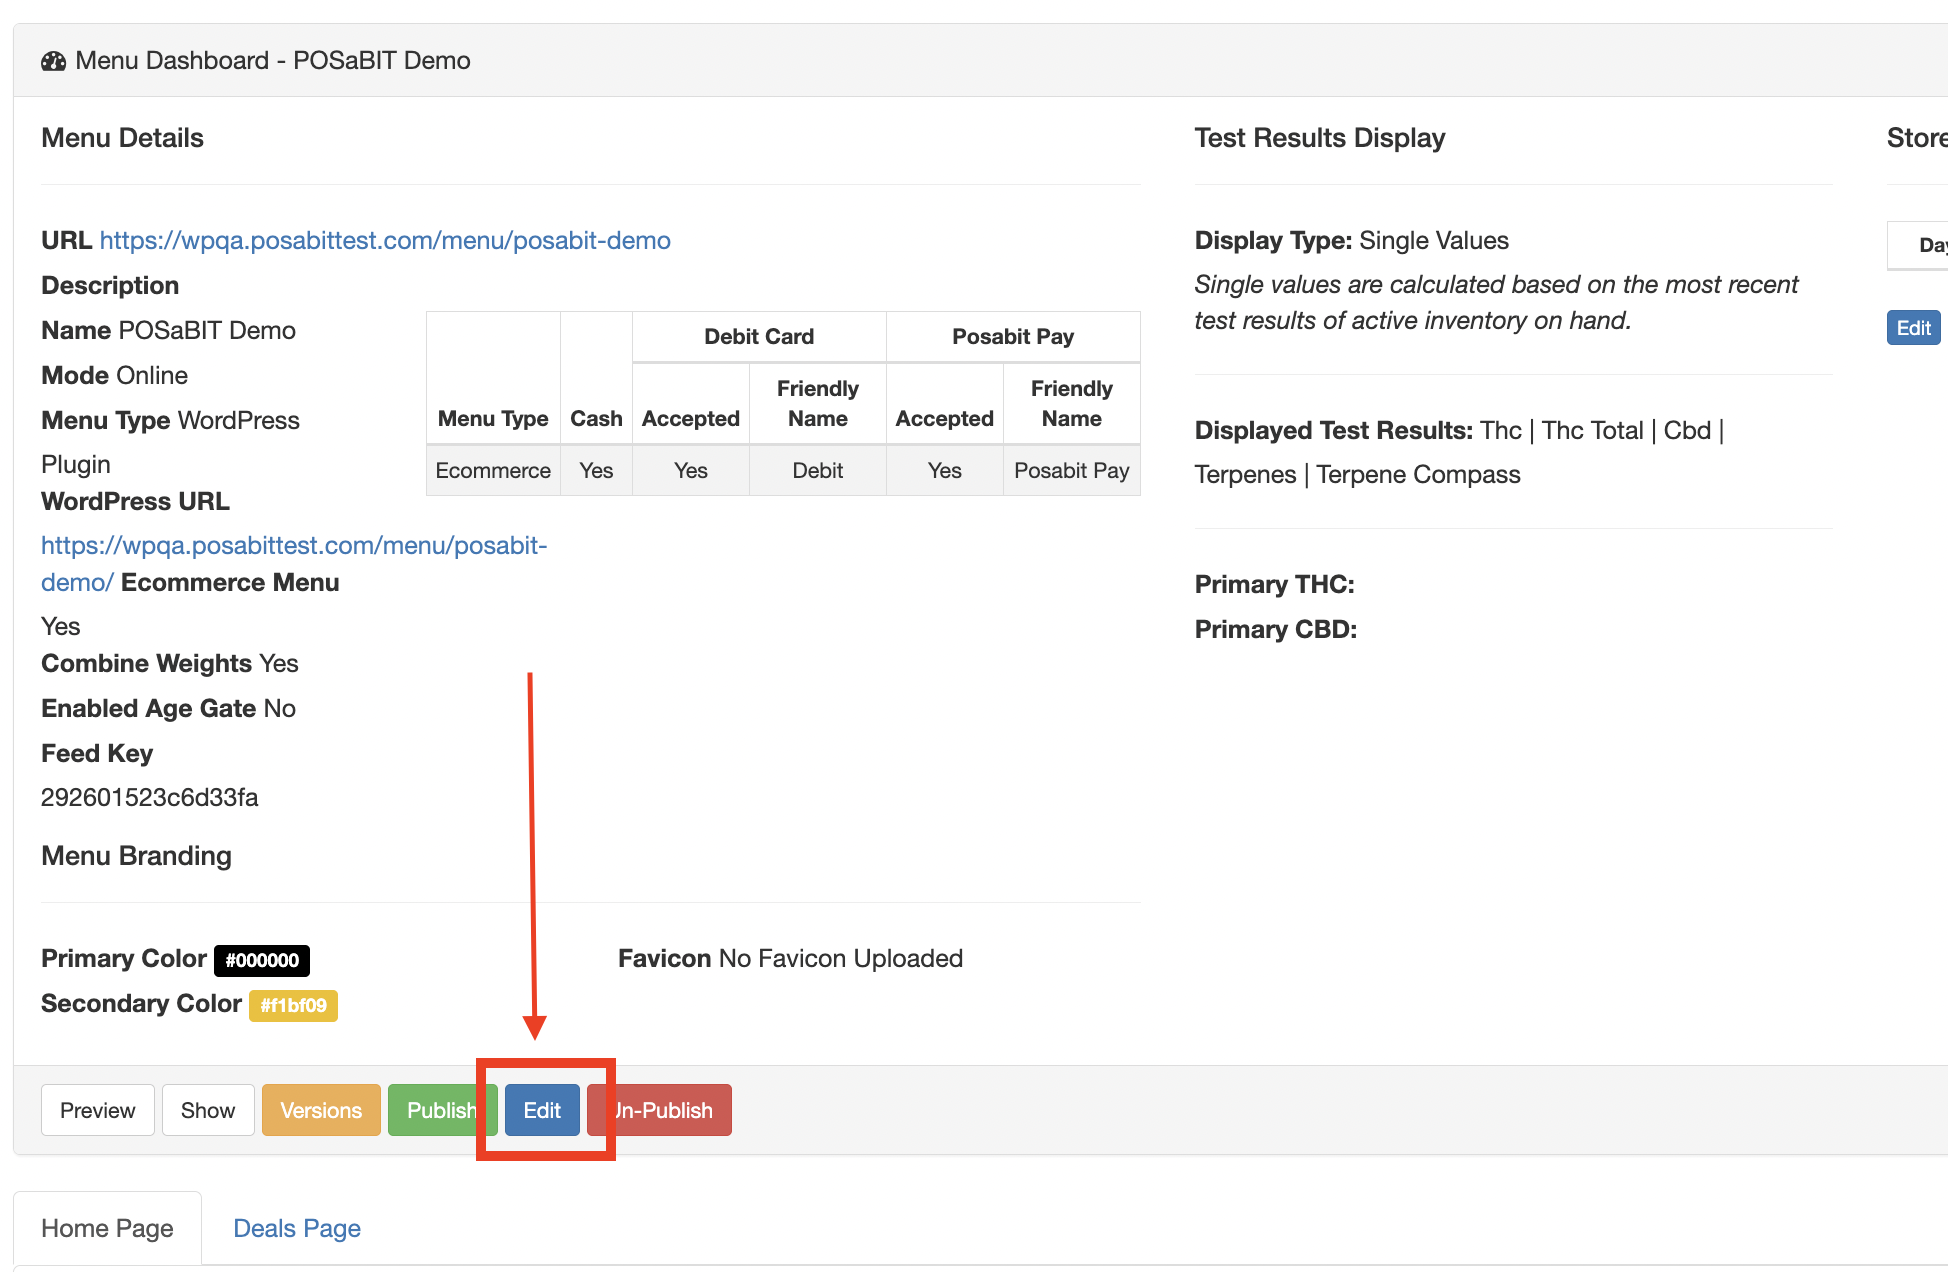
- Click the green Edit button on the right side of your menu.
Note: To use this integration, you must have a POSaBIT V2 menu.
- From the menu settings page, click on the blue Edit button.
- The Menu settings page will be opened. Locate the Menu Type field and select WordPress Plugin.
- A new field labeled WordPress URL will appear below the Menu Type field. Using your website's menu page URL, paste it into this text box.
- Next, make sure the Ecommerce URL field matches the WordPress URL.
- Save.
- If you are adding multiple venues, go through steps 1-8 for each additional venue with the corresponding venue's URL to the menu.
IMPORTANT NOTE: Make sure to use the URL associated with the correct venue when pasting in the URLs. Locate the correct URL by using step 7 in the "How to Set up a POSaBIT Menu within WordPress" set of steps. The preview site will have the correct URL.
Download/Install WordPress Plugin
- Click HERE to download the POSaBIT Menu WordPress Plugin. (https://app.posabit.com/pb/ecomm_wordpress_download)
- Once downloaded, head to https://wordpress.com/ and log in to the account associated with your domain.
- After logging in, select "Plugins" -> "Add New Plugin" -> "Upload Plugin".
- Next, upload & install the POSaBIT Menu Plugin you downloaded in step 1.
- After the install is complete, select "Settings" -> "POSaBIT Menu Settings".
- Within the "POSaBIT Menu Settings", enter the "E-commerce URL" & the "Base Name" where you want your menu displayed."E-commerce URL" is the Wordpress hosted URL you entered within the POSaBIT portal. This can be found within your menu feed settings within your POSaBIT POS portal (app.posabit.com)"Base Name" is the URL path you added onto the end of your normal URL when you set the "WordPress URL" within the POSaBIT POS portal. For example, if you set "www.example.com/menu" as the WordPress URL within the POSaBIT POS portal, then "/menu" would be your base name.
Ensure your Menu Page is Set to Full Width
- Log in to your WordPress Dashboard.
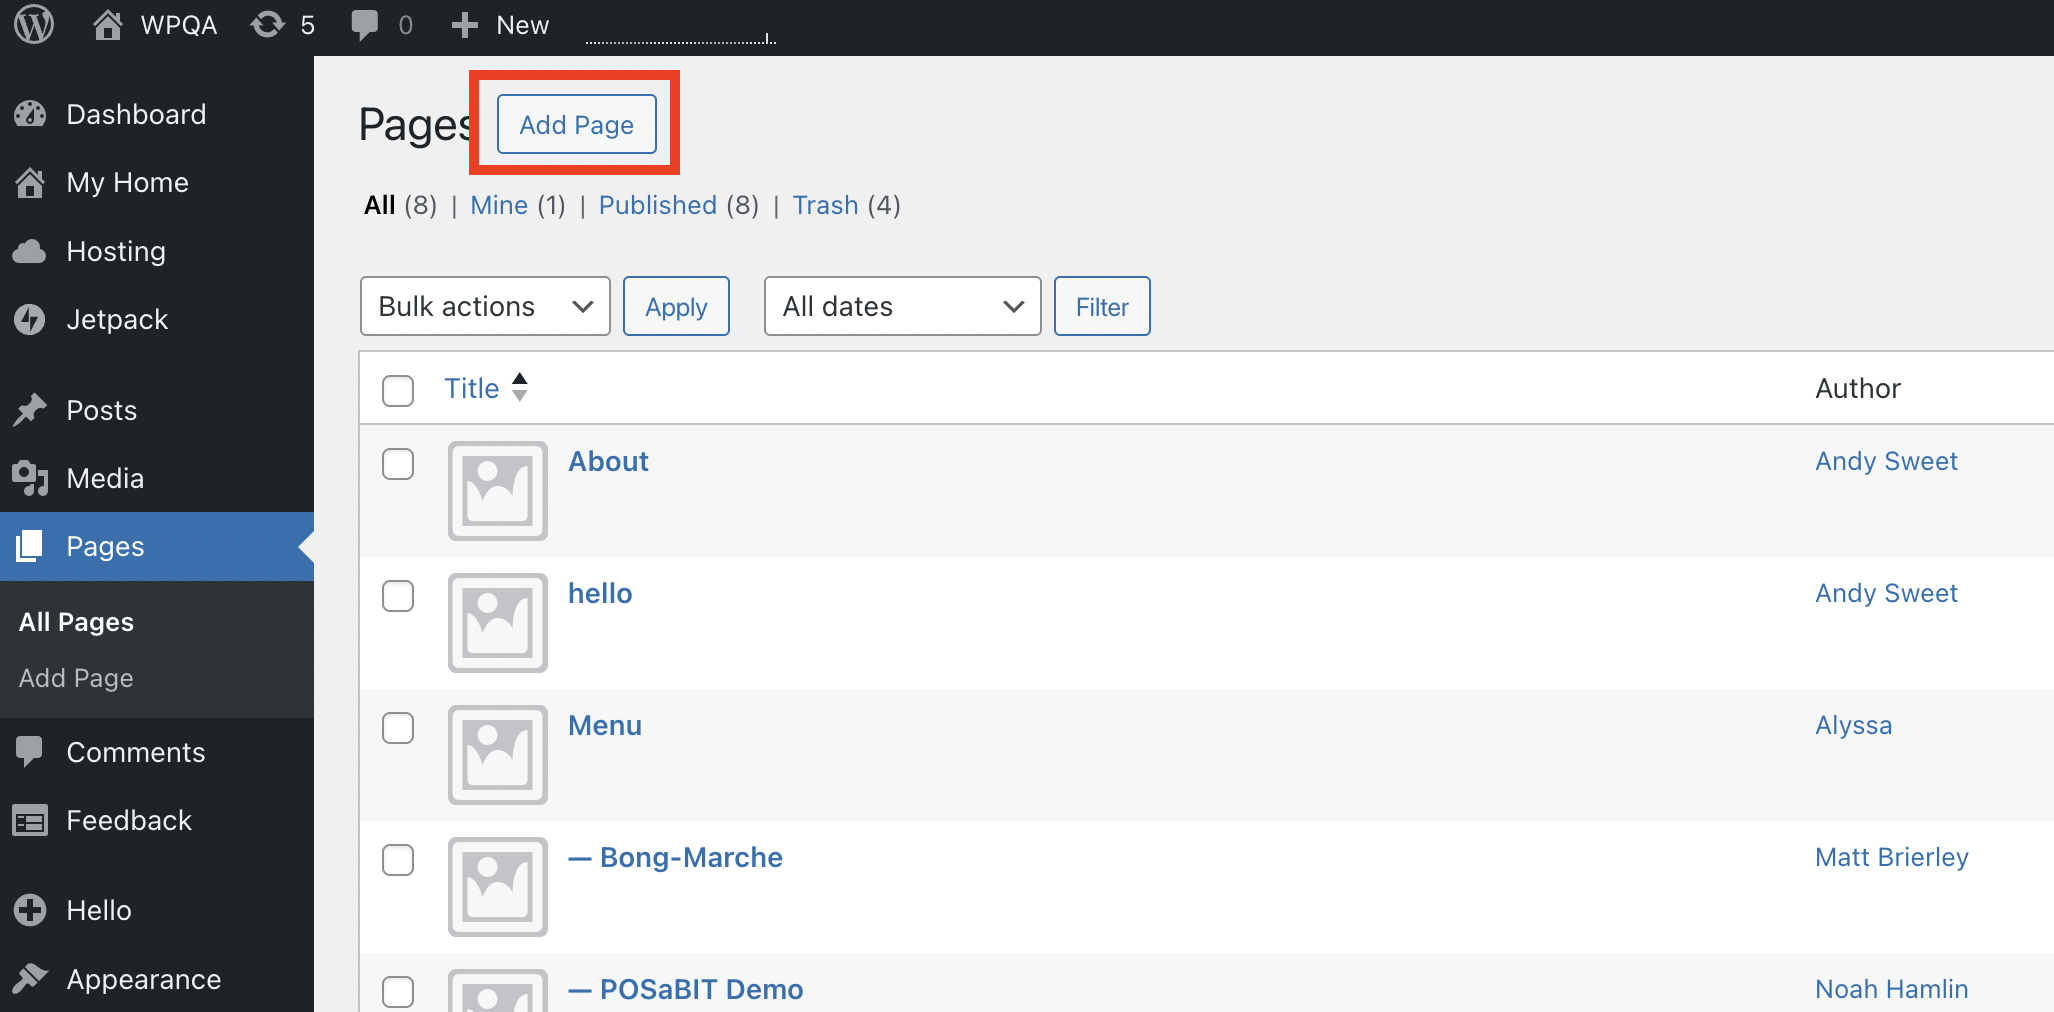
- Navigate to the Pages tab on the left side.
- Locate the page you use for your menu and click the Edit button below the menu page. If you don't have a page like this created, click the Add Page button on the top of the page and create a "Menu" page.
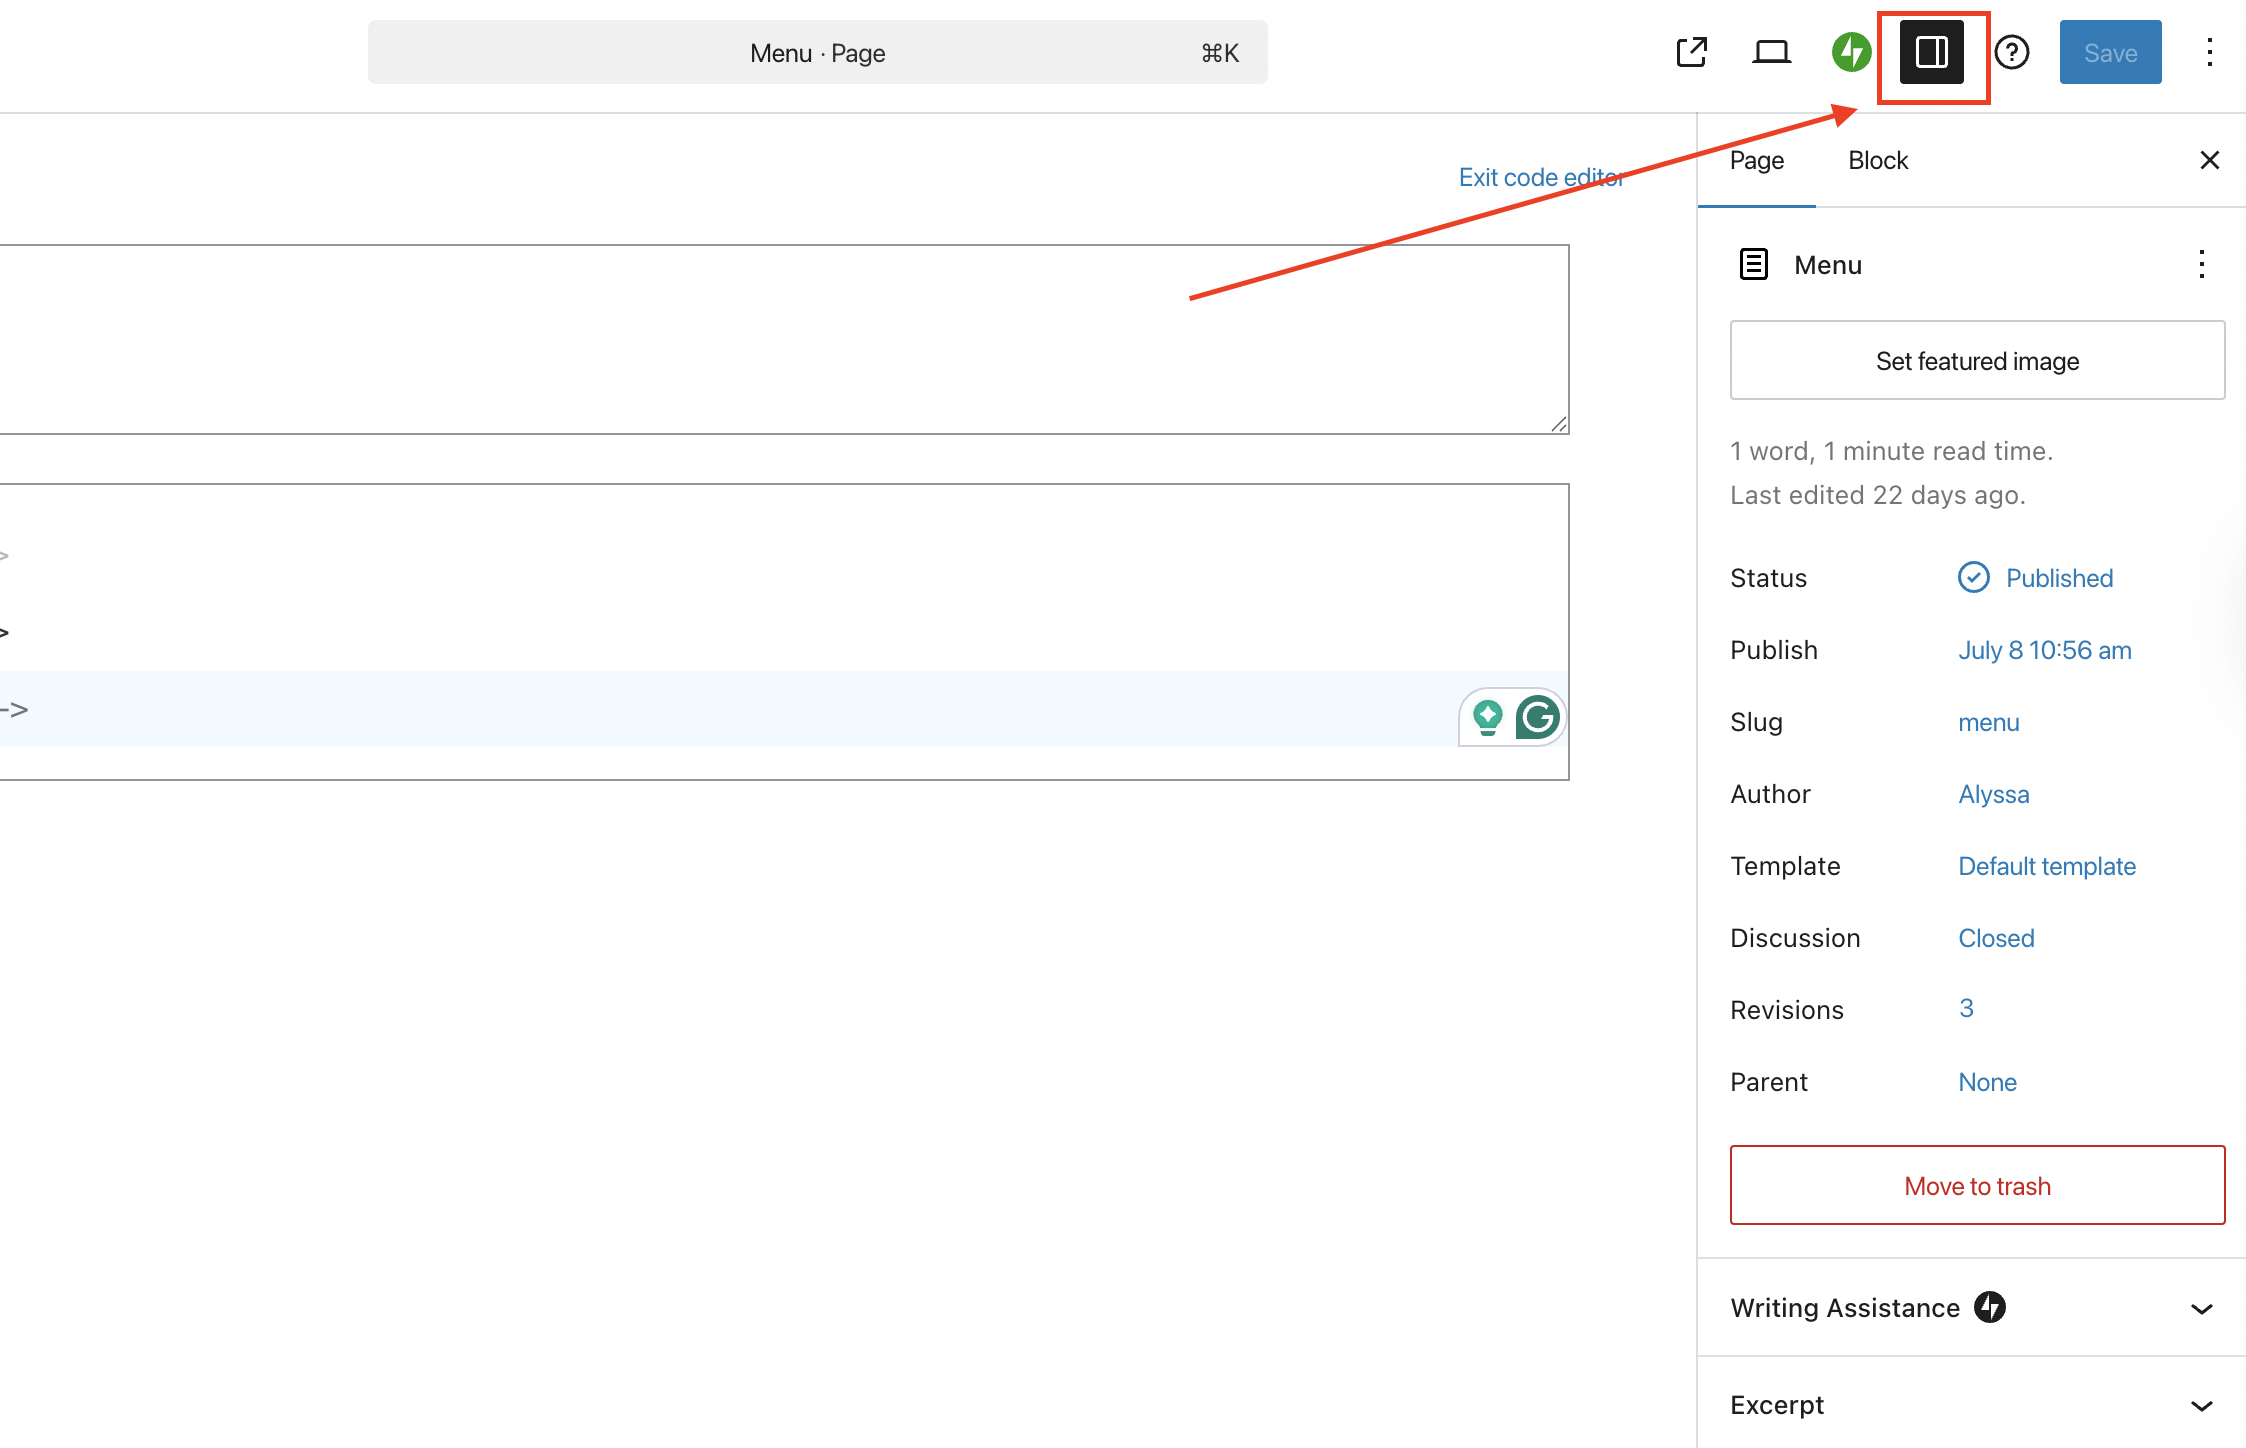
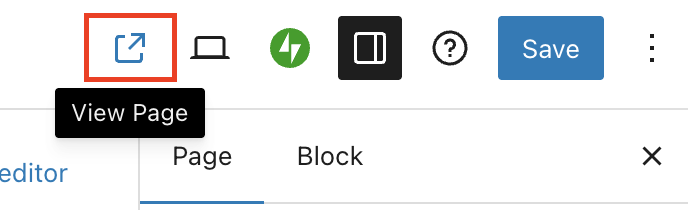
- From the menu page that is opened, click the icon in the image below. This should open a Settings tab on the right side of the page.
- Next, locate the Template field and click the dropdown. Select "Full Width" if available (this is specific to the Ocean theme in WordPress). If it's not available, look for something related to full size and select that option. If there are no options like that, keep the "Default Template" selected.
Notice: Some themes in WordPress may not have a "templates" field. Continue to the next step if this is the case.

How to Set up a POSaBIT Menu within WordPress
- Log in to your WordPress dashboard.
- Navigate to the Pages tab on the left side.
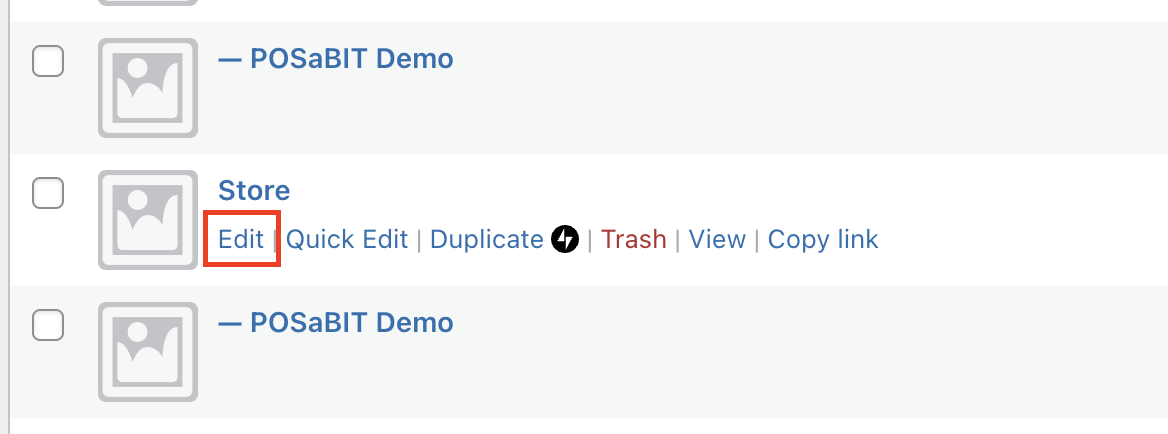
- Locate the page you use for your menu and click the Edit button below your menu page.
- From the menu page that is opened, click the 3 dots on the top right corner of the page. Once the settings tab opens, ensure you are in "Code Editor" for the Editor mode.
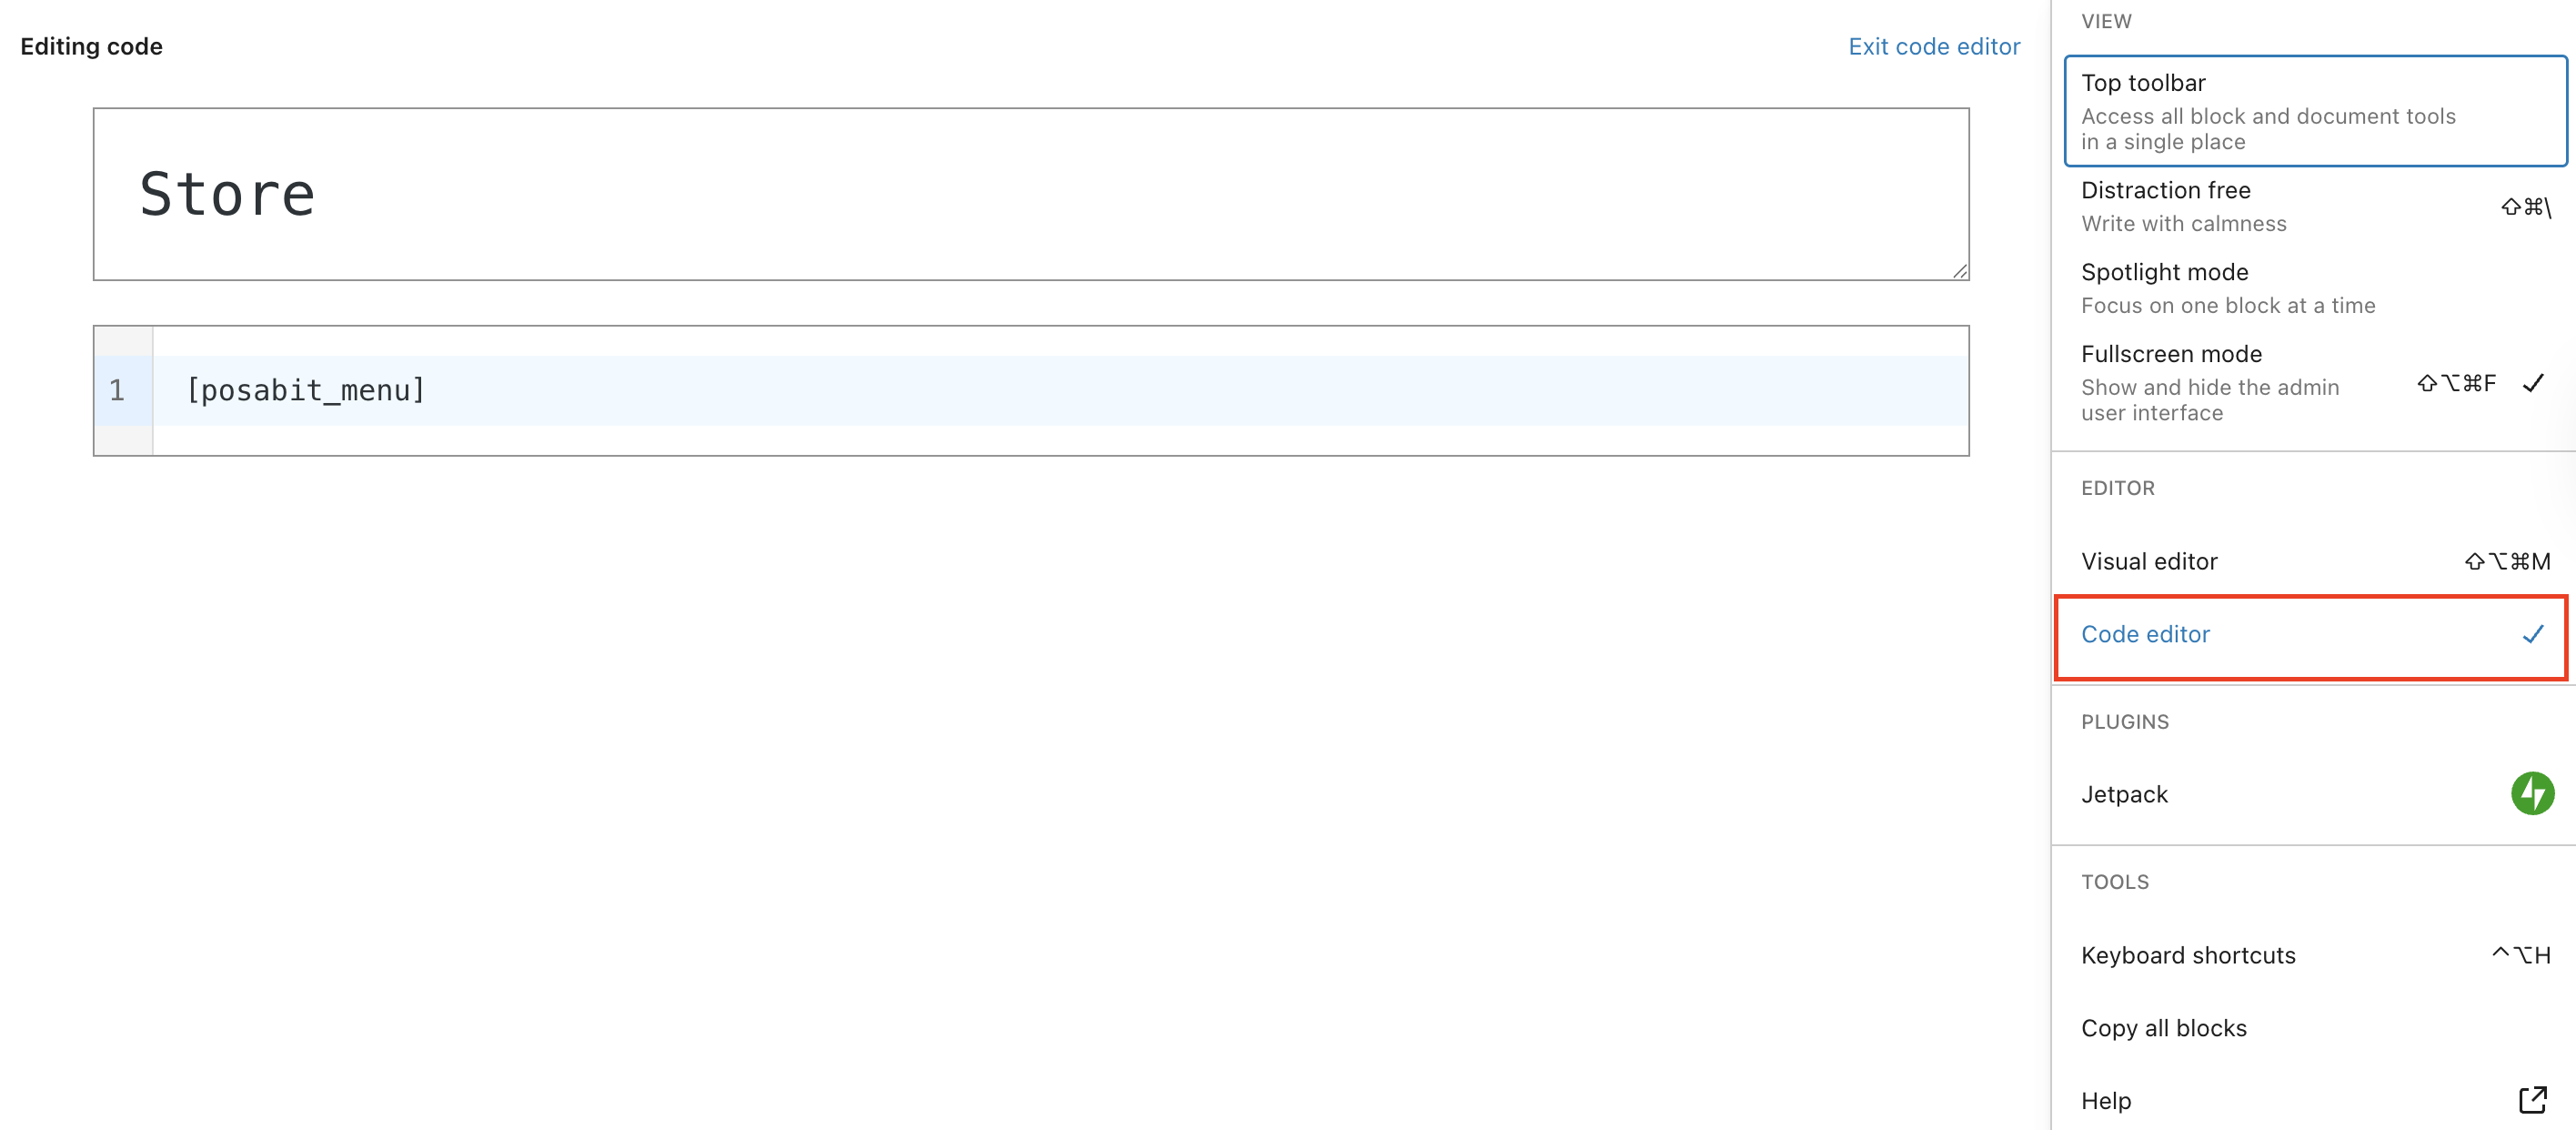
- Once it is in Code Editor Mode, paste the following line of code into the code block:
<style>
.wrap { max-width: 1600px !important; }
</style>
[posabit_menu] - After adding the code, click Save at the top right corner.
Note: If this code block is not working properly, reach out to POSaBIT support. We will need to make new code based on your theme.
- To preview the page, click the preview icon in the top right corner of the page.
How to Add Multiple Menus (Multi-Venue ONLY)
- From the WordPress Dashboard, go to the All Pages tab on the left side of the site.
- Click Add Page
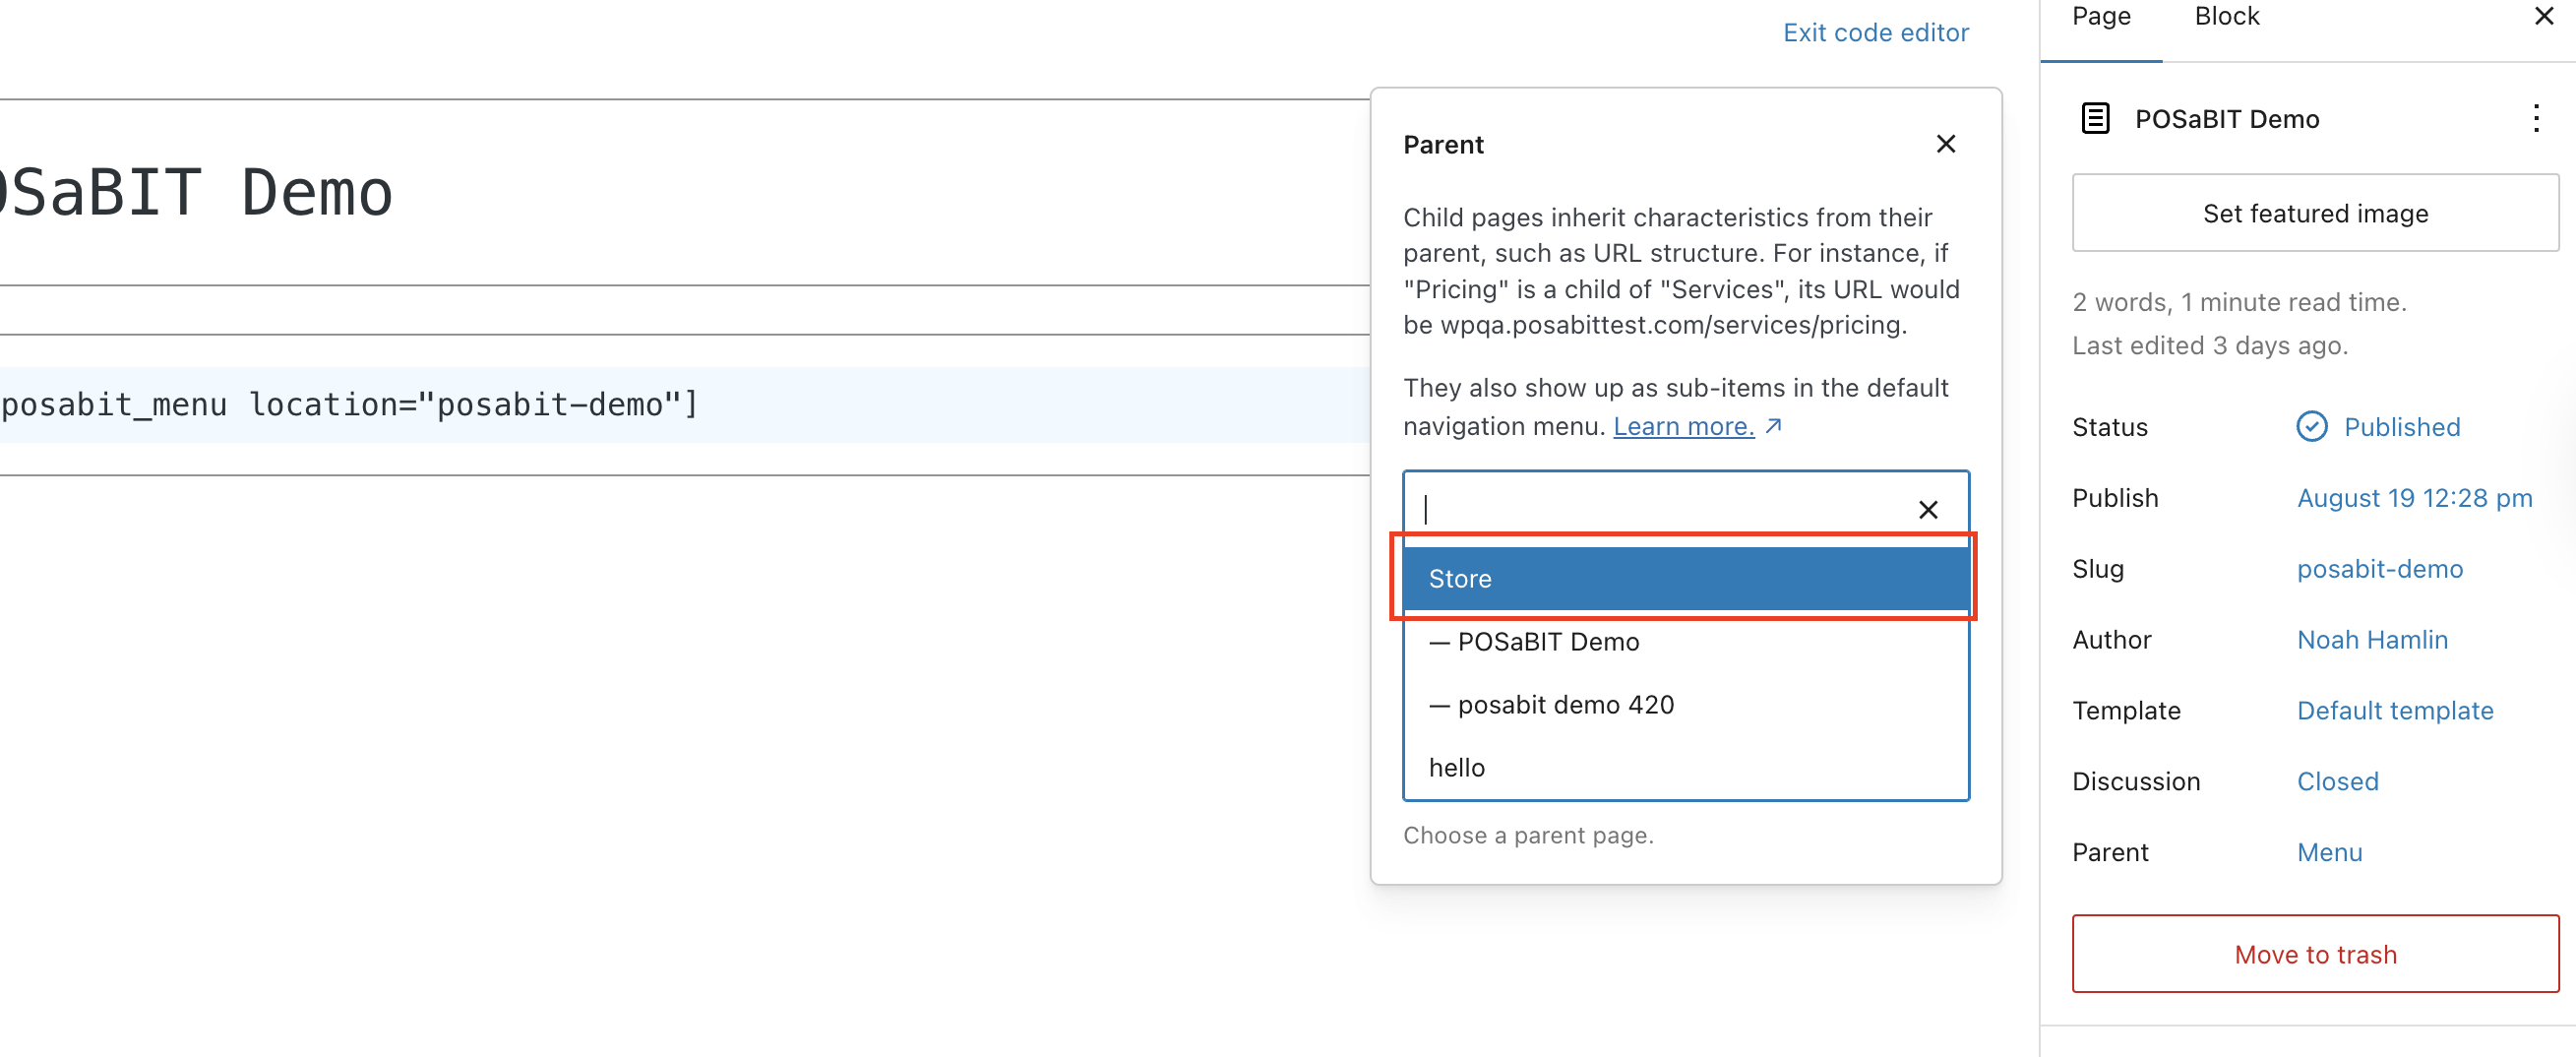
- A new page will open. Click the settings icon from the previous steps to open the settings tab on the right side. Locate the Parent field and select your menu page (called store in this case) that you previously created in the previous section of steps above.
- Name this new page something related to the venue it will be associated with. (Example: west-seattle)
- Once a name is added, enter the code below into the code block. Using the name of this menu, replace the example code (where it says posabit-demo) with the correct name of this venue's page (whatever you named this venue in step 4).
[posabit_menu location="posabit-demo"]
- After adding the code, using the Settings tab on the right, make sure the Slug field matches the name of this page. If it's not the same, click on the blue slug name and update it.
- Save.
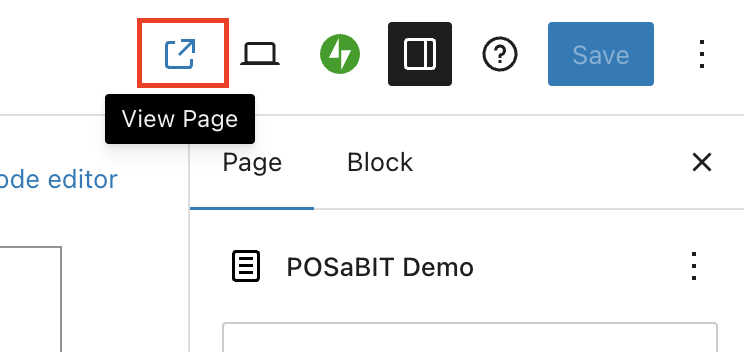
- To get the link for this page, click the View Page button in the top right corner of the page. See the image below to locate this icon:
- Once the menu preview is open, make sure the URL matches the one you entered into the POSaBIT Portal menu settings.
- If you have multiple venues to add, use the same steps from steps 1-9 to add more venues. Make sure each has its own unique name per venue. If this is for only one venue, continue to the next section of steps below.
Connect the URL to WordPress
- Navigate to the WordPress Dashboard.
- On the left side of the page, find the Settings tab on the menu toolbar.
- Under the Settings dropdown, select POSaBIT Menu
- E-Commerce URL field:
- For Multi-Venue, use any of the venue URLs you have added to the POSaBIT Portal menu settings, and paste it into the E-commerce URL field.
- For a Single-Venue, paste the URL for your menu page on your WordPress site in the E-Commerce URL field
- In the Base Name field, add a backslash / then the name of your main menu page you used in step 3 of the "How to Set up a POSaBIT Menu within WordPress" section in this article. In this example, it is /menu.
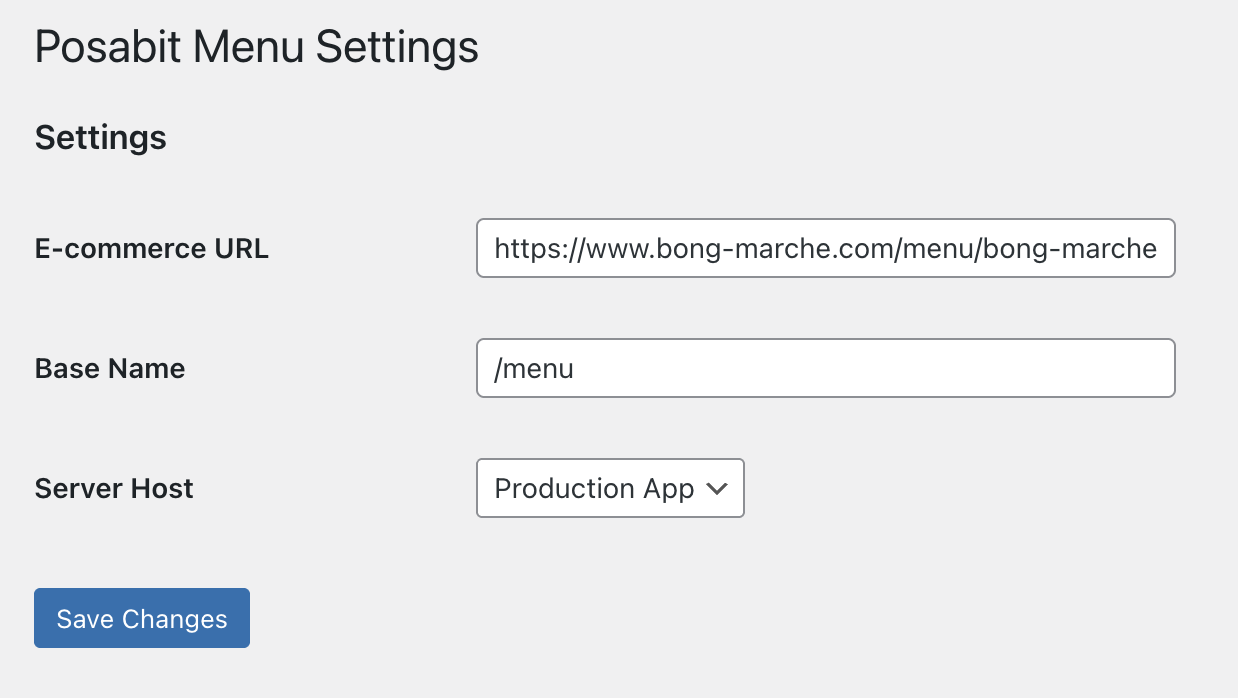
- In the Server Host field, select Production App.
- Save, and your Menu should now be integrated with your WordPress site.