How to Connect Zebra Label Printer to POS Terminal

How to Connect Zebra Label Printer to POS Terminal
Connecting and setting up your label printer to your register is a straightforward process. See these steps below for a walkthrough:
- Locate a USB port on the terminal and plug the label printer in, make sure to plug the label printer into an outlet as well.
- Turn the label printer on. A pop-up asking for which app the label printer should be assigned to might appear, if so, click on the POSaBIT app.
- Open the POSaBIT app
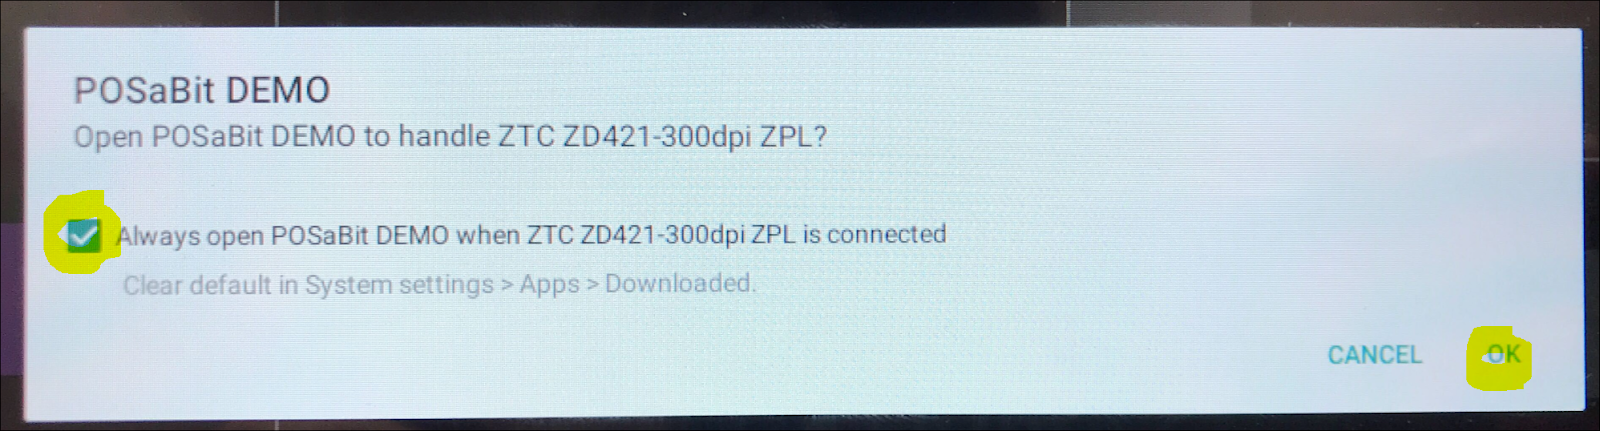
- When the app is open and the printer is connected, we should see a dialogue box like this. Check the box for 'Always open POSaBIT...' and choose 'Ok'
- With that done, enter an employee PIN
- Choose the hamburger menu in the upper left corner, then choose 'Settings'
- On the right of the screen, you'll see this area for Label Printers. Check the box for 'USB Mode', and choose 'Discover USB'. When this is done, we should see a file path populating for the label printer
- At the same time, for testing purposes at least, we recommend checking 'Print after each product is added to the cart' to see how labels are printing out during the transaction workflow. Otherwise, if this box is not checked, labels will print out once the transaction is completed on the POS
- Additionally, if your label printer is either the GK420T or LP2824 model, you will need to check the box for 'Using Zebra GK420T'. Now your printer should be all set up and ready to print!


For additional assistance please reach out to POSaBIT support @ 1 (855) POSaBIT OR SUPPORT@POSaBIT.COM