Employee QR Code & NFC Tag/RFID Card POS Login Setup

POSaBIT offers the ability for users to quickly and securely log into POS terminals by scanning a QR code or by scanning NFC/RFID cards (RFID/NFC does require additional hardware - see below for more). No longer worry about users sharing or overseeing pin numbers.
To enable this feature:
- Open the Settings menu and click General POS Register Settings.
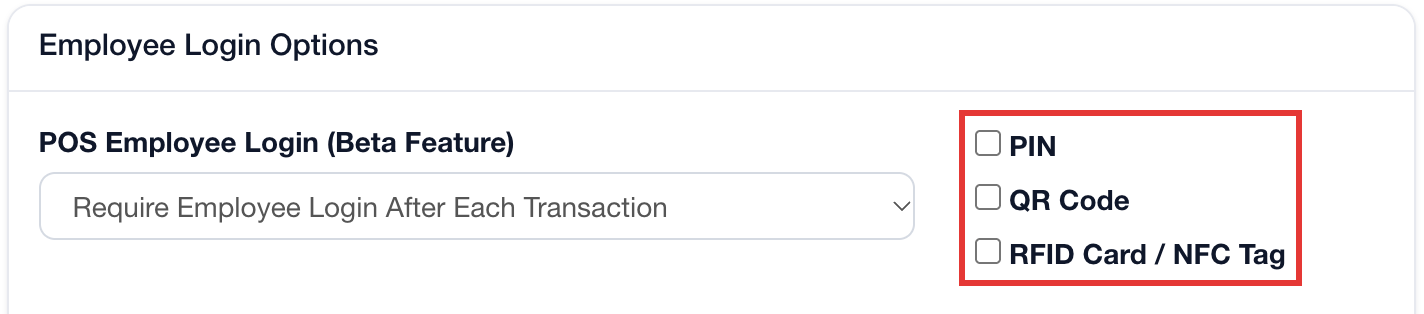
- Under Employee Login Options, check the box next to each option employees should use to identify themselves at the point of sale terminal, then click Save at the bottom of the page. Options include PIN, QR Code, or RFID Card / NFC Tag.
- Note: The POS will only allow what is checked, so if you only have QR Code selected, this will be the only way employees will be able to log in.
QR Codes
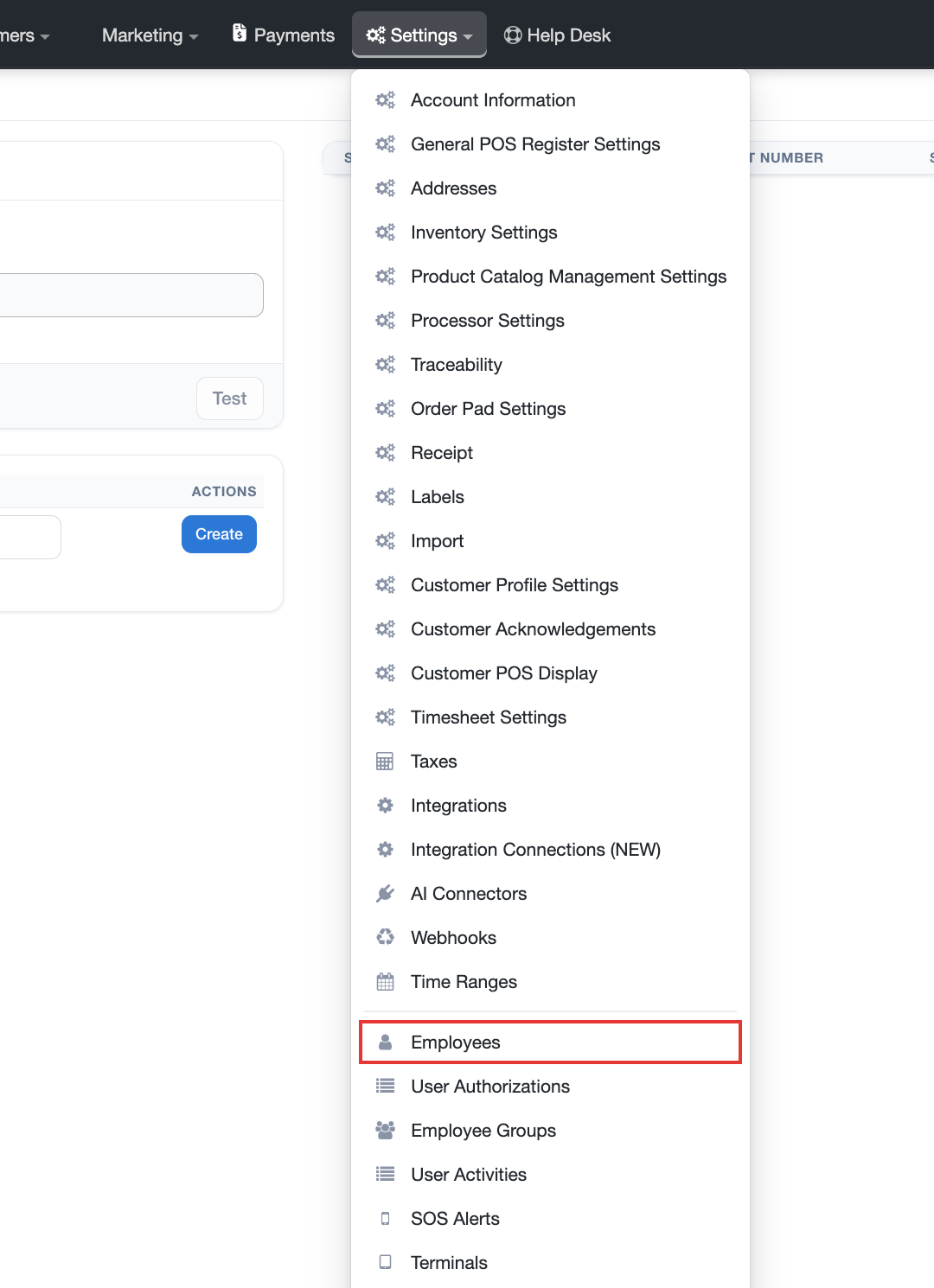
- To print an employee's QR code, open Settings > Employees and click on an employee name.
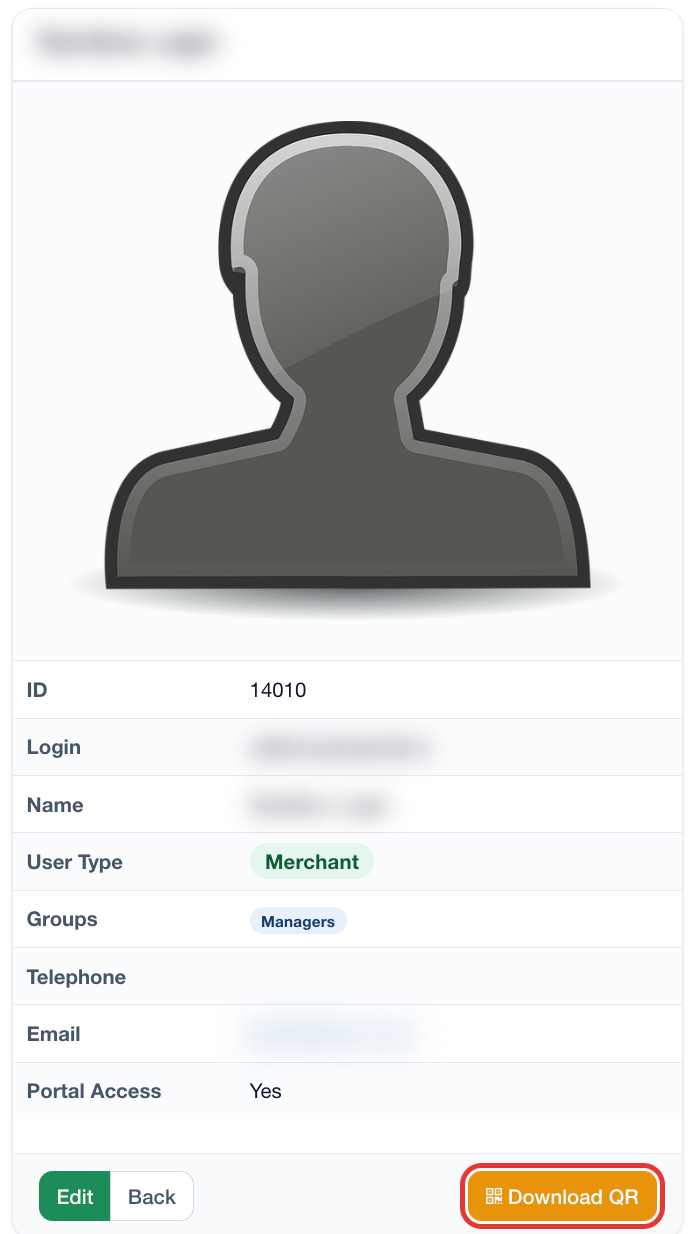
- Click the orange Download QR button at the bottom of the employee profile to download the employee's QR code. Print it on a normal printer or label and attach it to the employee's ID.
- When at the POS terminal and the pin screen pops up, use the barcode scanner attached to the point of sale to scan the employee's QR code
NFC Tags/RFID Cards
Hardware Needed for the RFID Card / NFC Tag Pin Alternative:
Most of our POS devices will require purchasing an external reader, the only POS that has a built-in NFC reader is the HP Engage Console. We are still looking into alternative external RFID / NFC readers, though we do have 1 external reader that we have integrated with our POS that we recommend to get if you want to get started on the NFC tag pin alternative login. These readers and the NFC Tag stickers are relatively inexpensive, which is one reason we went with this specific reader. See the two links below to purchase the NFC reader and the NFC Tags which allow you to log in without a PIN. We are looking into a better-performing RFID reader at the moment, with the goal of allowing users to use existing RFID cards.
- Link to the NFC Readers - Make sure you get the 8H reader!
- Link to the NFC Tags
Notice: The HP POS hardware systems have a built-in NFC tag reader in the middle of the screen. When prompted to use the NFC tag, simply put the NFC tag in the middle of the screen and it will read it if it's an NFC tag with the correct frequency.
Portal Settings:
- Open the Settings menu and click General POS Register Settings.
- Under Employee Login Options, check the box next to RFID Card / NFC Tag and click Save.
Hardware Setup:
- If you set up the portal settings correctly, when a user lands on the pin screen there should now be a message to "Present NFC". Don't scan the RFID / NFC tag yet. Continue the setup process by logging into the POS with your PIN.
- Now that you're logged in, go to Settings within the POSaBIT POS app.
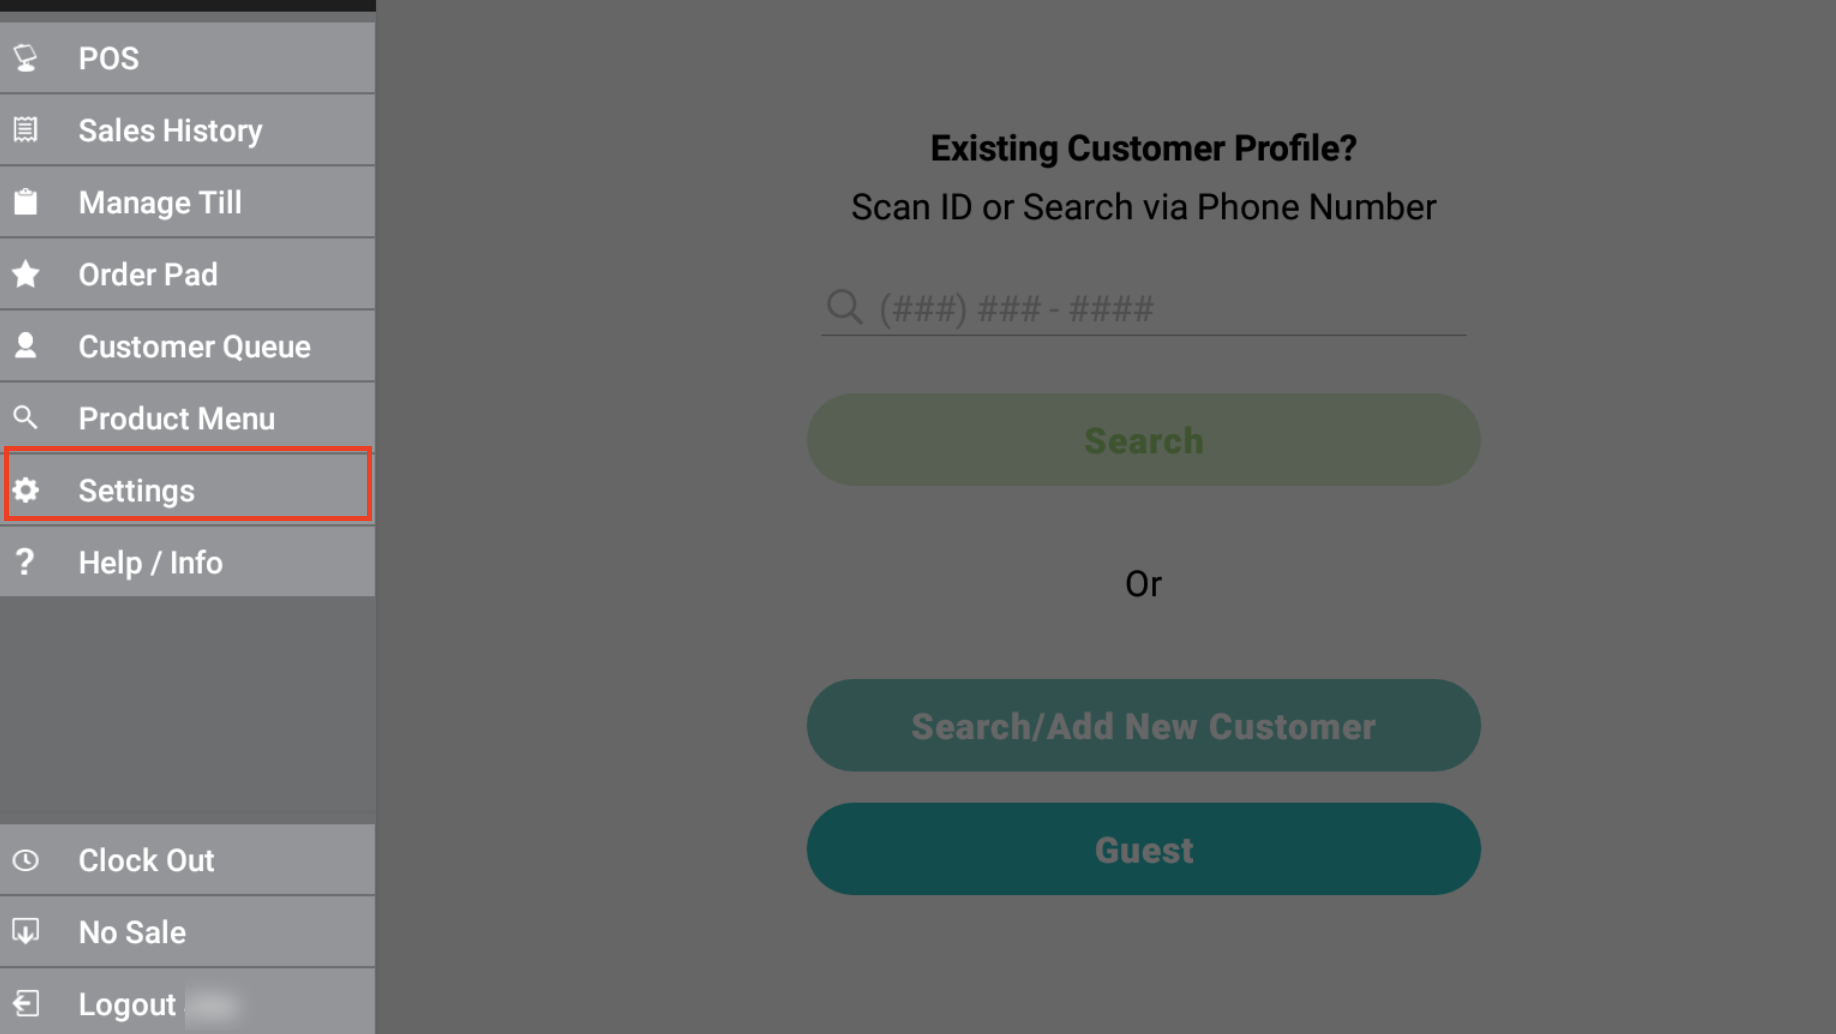
- Click the Configure NFC Card button located under the POS settings tab.
- A popup message will display explaining the setup. You must click OK, then it will exit the popup. If you try to scan the RFID Card / NFC tag with this popup open, nothing will happen, you must click OK and the popup will close. This is where you will scan the RFID Card / NFC Tag. If you're using the external reader, there will be a small beep noise.
- After scanning the RFID Card / NFC Tag, there will be another popup asking to confirm assigning the RFID Card / NFC Tag to the logged-in user. After clicking Confirm, the setup has been completed.
- Now the user may log out of the POS and present the RFID Card / NFC Tag from the normal PIN login screen. After scanning the Card / Tag, the user should be logged in just like you would if you entered your employee PIN.
For additional assistance please reach out to POSaBIT support @ 1 (855) POSaBIT OR SUPPORT@POSaBIT.COM