springbig - How to Create and Link Offers

One of the most unique aspects of POSaBIT's integration with springbig is the ability to redeem springbig offers directly from the point of sale! Once a offer is redeemed redemption details are then shared automatically with springbig in order to keep an accurate count of how many times a customer can redeem each offer as well as when the offer expires.
While offers aren't specifically available within POSaBIT, by leveraging the additional capabilities of springbig, POSaBIT is able to support the use of customer offers. This means that you will now have the ability to attach offers directly to your SMS campaigns while also controlling exactly which customers have access to each offer. For example, lets say you want to try to win back some customers that have not visited your venue in a while. You can now send a campaign to all loyalty customers who have not shopped at your venue in the last 3 months. POSaBIT is then able to identify which offers each customer is eligible for and only display that customers available offers on the point of sale.
In order to display and track offers between both POSaBIT and springbig, offers will need to be build in both systems. These offer will then automatically map together based on their name!
How to Link Offers Between POSaBIT and Springbig:
Step 1) Creating the Offer within Springbig:
- Login to Springbig's web portal
- From the "home" page, select the blue "New Campaign" button from the base of the page
- First, you will need to determine which customers should receive this offer. To do so, press on the blue expandable dropdown selector labeled "recipients".
- Next, if you would like to send out a message with your offer, write a campaign message in the text box labeled "stashboard creator"
- Once your message is complete, press the tab labeled "Track Offer" on the right hand side of the "stashboard creator"
- Next, create the offer by filling out the following offer settings depending on how you want this offer to be used:
- Offer type:
- digital voucher - A personalized discount that is only available to select customers
- bonus points - a bonus point reward if a customer spends a certain amount
- instant points - instantly give a group of customers a certain amount of loyalty point
NOTE: Digital Voucher is the only offer that will need to be linked to POSaBIT, bonus points and instant points will be automatically added to each customer account based on purchase data that is passed into Springbig.
- offer for customer: This is just the name of the offer (make sure you remember exactly what you name this)
- bonus type (only for bonus points): Determines how customers will receive their bonus points
- bonus value (only for bonus points): The amount of points that will be applied to the bonus type to determine how many bonus points the customer will receive
- offers per customer: The amount of times a customer can use this offer
- expiration date: This is the date at which the offer will expire and be no longer usable
- preload image: An image that will be sent alongside your message
- voucher image: An image that will be displayed on the customer's voucher
- Offer type:
- Finally, select a pre-built notification message. This message will be the initial message the customer receives including a link to the "stashboard" message you have created.
- After selecting your notification message, press the blue "Send Campaign" button to generate your offer as well as send your campaign
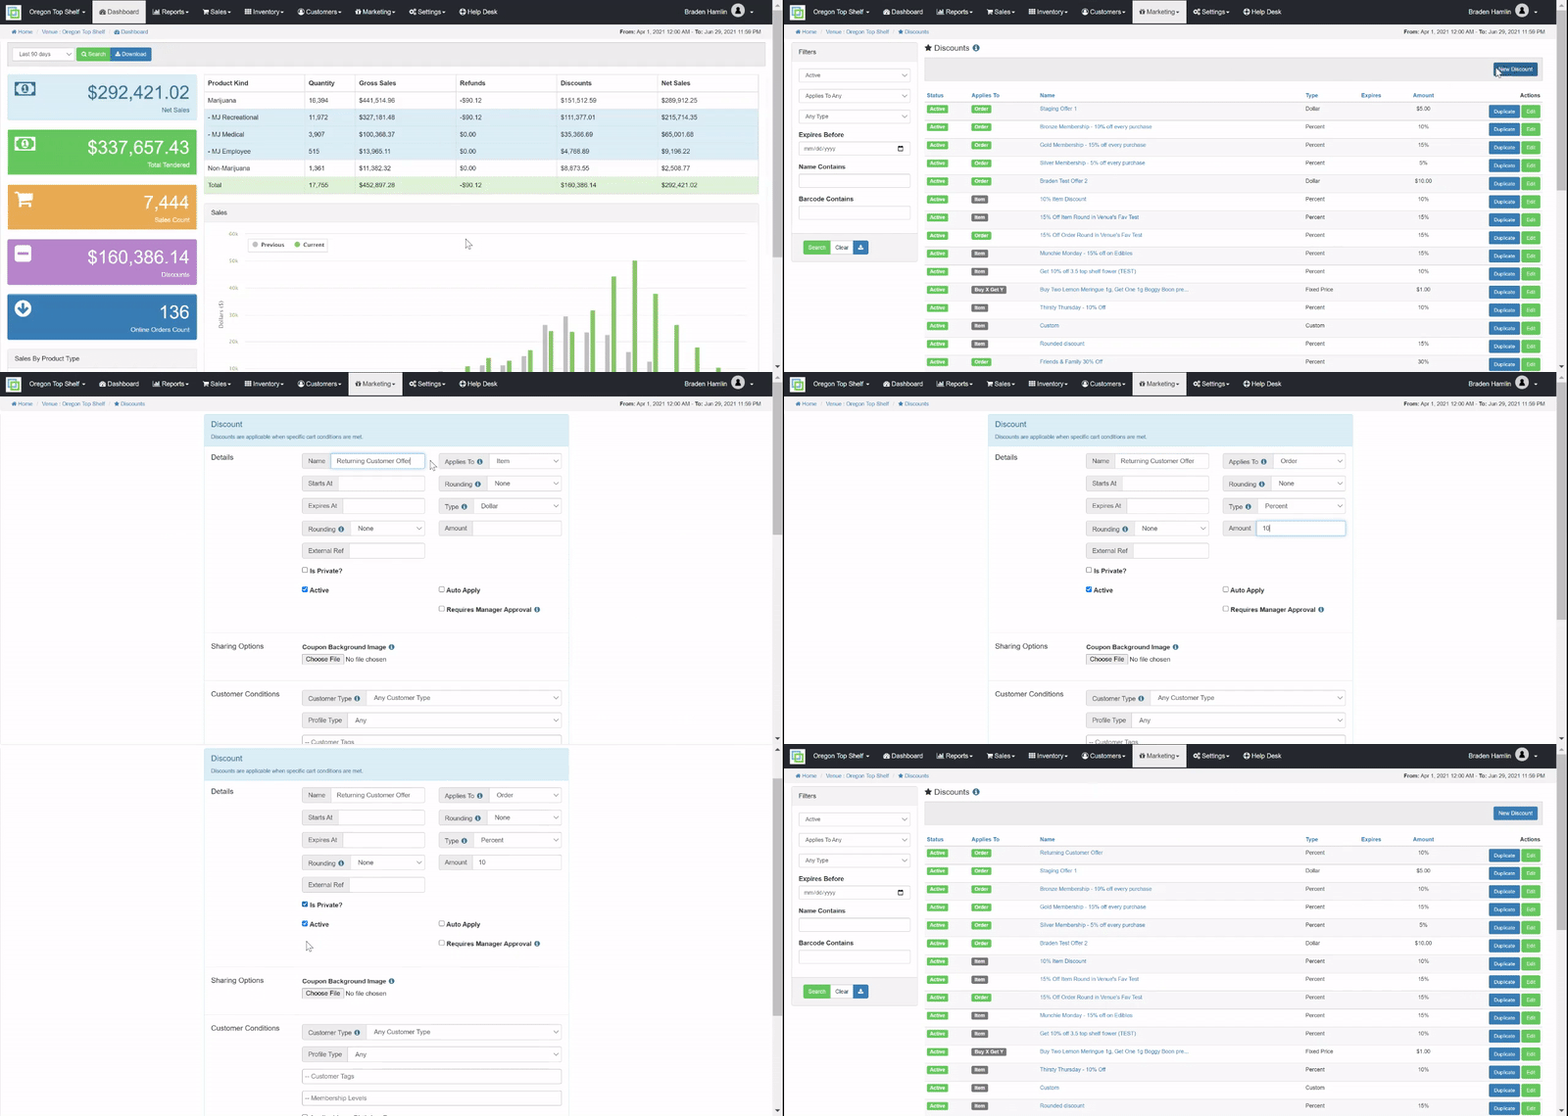
Step 2) Creating a Offer within POSaBIT:
- Login to the POSaBIT web portal
- Select "Discounts" from the Marketing dropdown at the top of the page
- Press the blue "New Discount" button located in the top right hand corner of the page
- Set up the custom discount using the settings/options described HERE. When building this discount you will need to set certain settings so that the discount can properly map to Springbig, these are described below:
- Make sure that the discount name in POSaBIT exactly matches the name you entered when creating the offer within Springbig!
- When creating the discount in POSaBIT, make sure you SELECT the flag/checkbox labeled "Is Private?"
- Once you have completed the form, press the blue "Save" button to create the offer (specialized discount)

Congratulations, on setting up your first shared offer between POSaBIT and Springbig. For any further questions please reference the POSaBIT knowledge base or contact your POSaBIT account manager!
For additional assistance please reach out to POSaBIT support @ 1 (855) POSaBIT OR SUPPORT@POSaBIT.COM
