Creating and Adding Product Tags to Products

Product tags can be created at either the venue or merchant level. These tags can be used when setting up discounts as well as providing in-depth sales data for a specific group of products. First, you'll create your tag(s), then you can assign products to each tag! Tags can be added to products one by one or you can use our bulk tagging feature that allows you to filter and apply tags to a group of products. Learn the different areas you can utilize product tags HERE
- Venue Tags: These tags are specific to your store and cannot be seen by any other venue within your merchant account.
- Merchant Tags: These tags are shared across all venues within your merchant account.
Let's start by learning how to create new tags:
- Log in to the POSaBIT web portal
- Select Product tags under the Inventory drop-down at the top of the screen
- To create a new tag, type the tag name in the Create New Tag field, then click the Create Product Tag button.
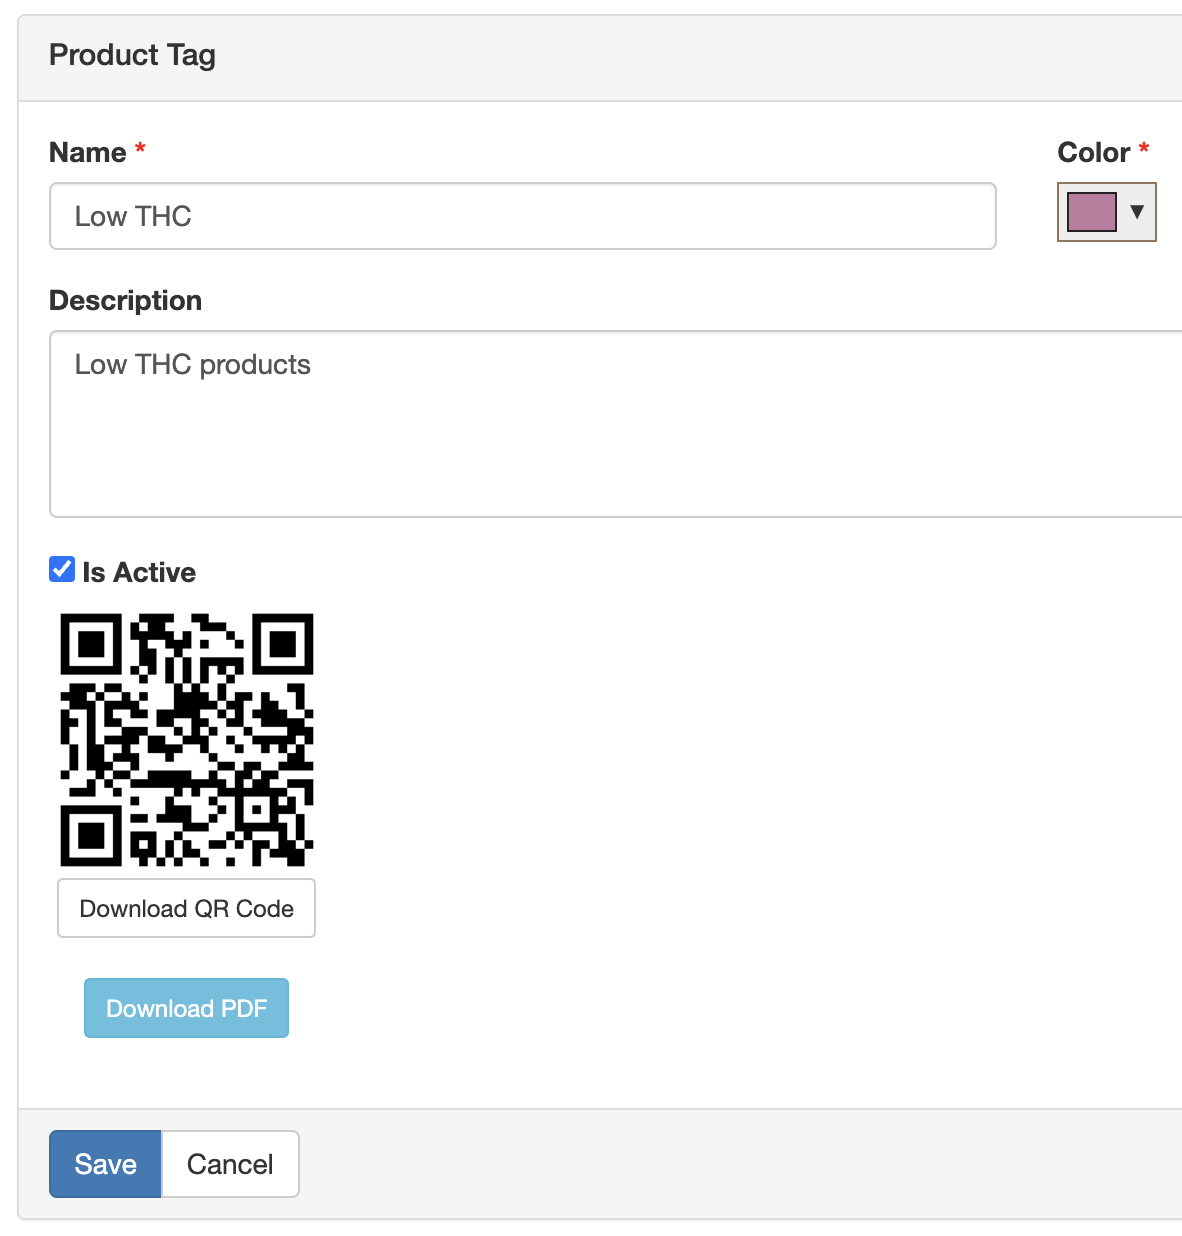
- Once created, click the green Edit button on the newly created tag to add a description or change the color of the tag. Additionally, you can deselect the Is Active checkbox to deactivate the tag. There is also a QR code that can be downloaded and printed out, so if there is a discount that applies to this product tag, the budtender can scan the QR code to apply the dsicount.
- After confirming that the tag is set up with the desired description and color, press Save at the bottom of the page.
After you create your tag(s), you can attach them to products! Add tags to products in one of two ways:
- Individual Product: Edit the product details of an individual product, select which tags you'd like to apply, then click save:
- Bulk Edit: On the product details page, filter to find the desired products, then use the checkboxes on the left side of the table to select which products you wish to edit. Once selected, press the "Edit Checked" button in the top right corner of the screen. You can now select any product tags you wish to apply to all checked products, then click save.
For additional assistance, please reach out to POSaBIT support @ 1 (855) POSaBIT OR SUPPORT@POSaBIT.COM