How to Enable the Integration Within the Weedmaps Portal (New WM Customers)

Important Note: The following article pertains to venues that are not currently using Weedmaps as their menu provider. If your venue is currently using Weedmaps, please click HERE to learn how to integrate your existing menu.
Once you have created your a new "Weedmaps" menu feed within the POSaBIT portal, you should now enable the POSaBIT integration through your Weedmaps web portal. If you have not yet created a "Weedmaps" menu feed, click HERE to learn how to do so.
Follow the steps below to learn how to enable the POSaBIT / Weedmaps integration from within your Weedmaps web portal:
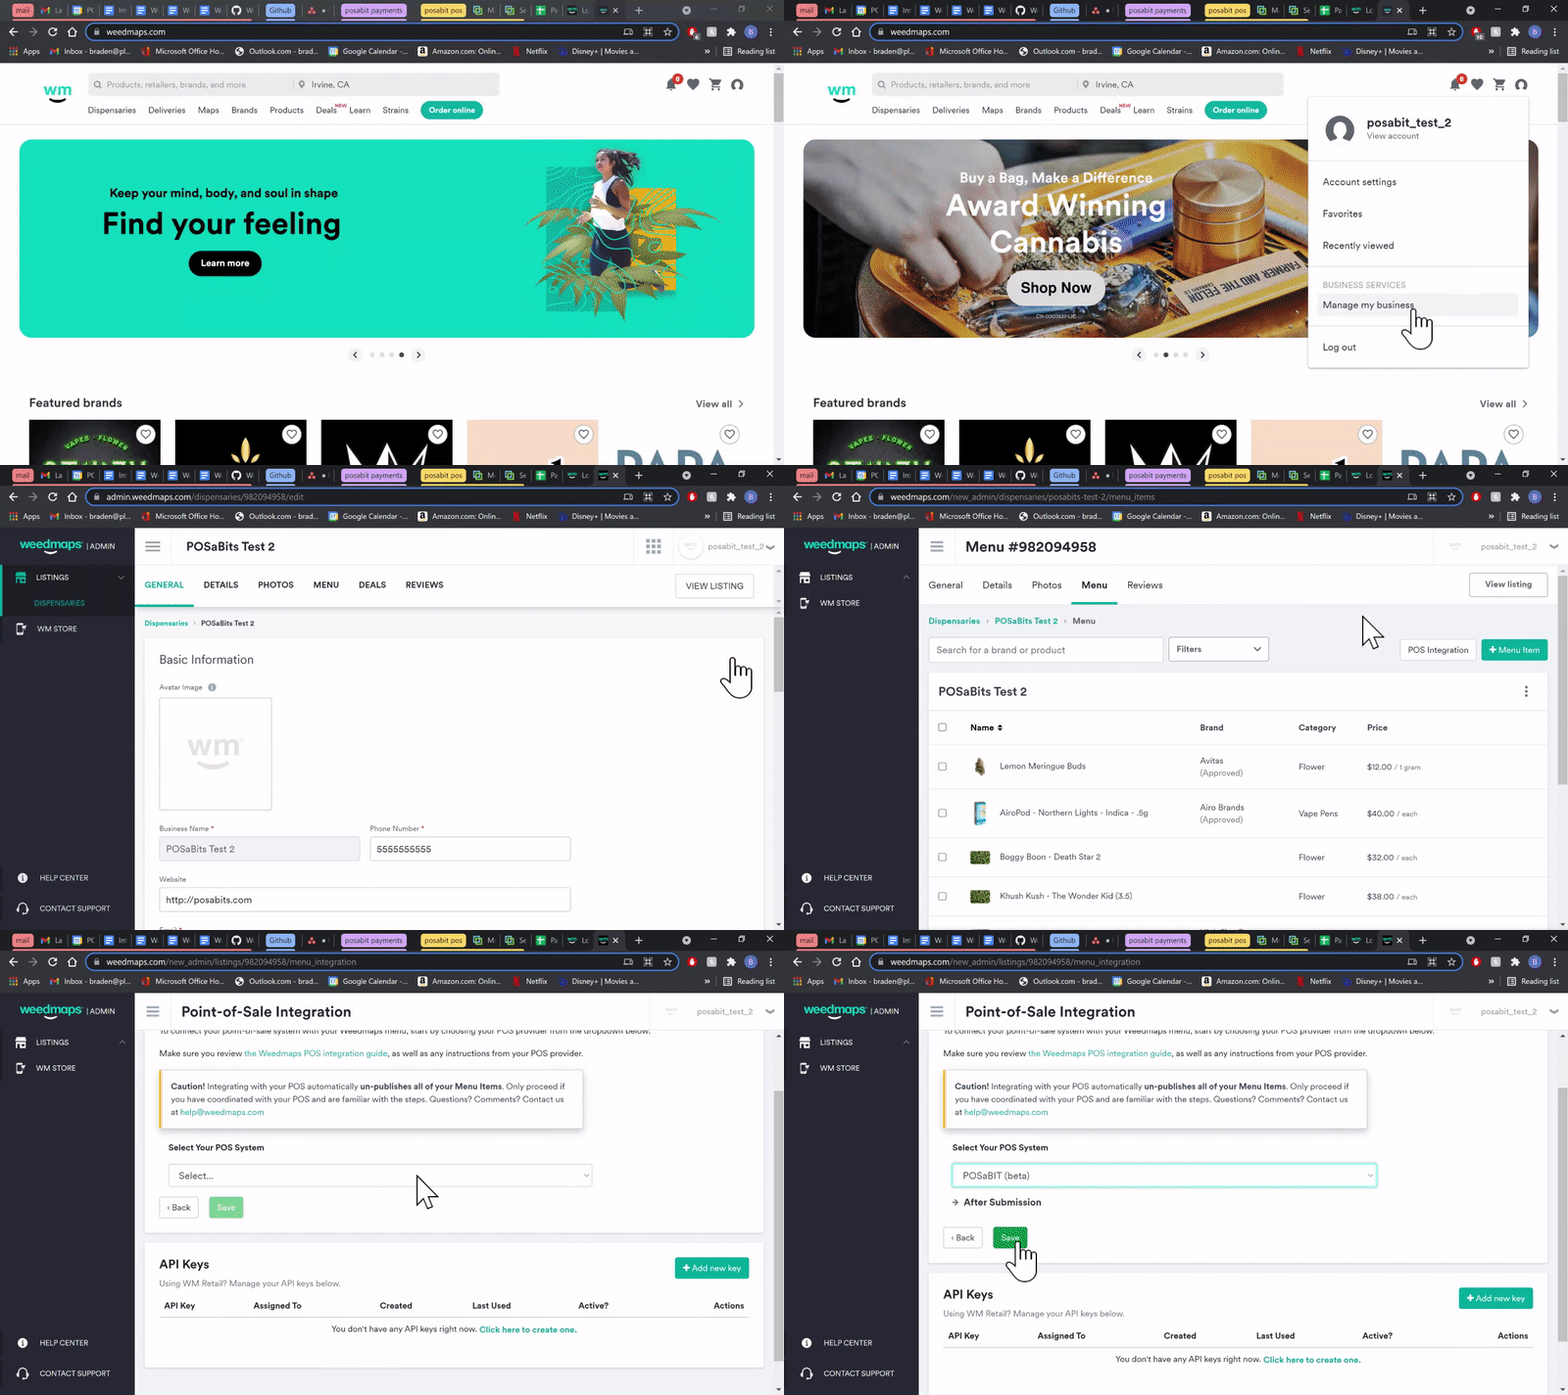
- Login to your Weedmaps web portal
- Once logged in, press the account icon in the top right
 then press “Manage my Business”
 - You should now see a list of all dispensaries under your account, locate the appropriate listing for your venue (if multiple exist) and select the "Edit" icon on the far right side of the corresponding row.
- If you have a merchant account you might see several different venues listed here
- Select the "Menu" tab from the horizonal menu at the top of the page
- Locate and press the white button labeled "POS Integration" on the right side of the page
- On the "Live Menu Integration Setup" page, use the drop-down selector to find and select "POSaBIT"
- Once POSaBIT has been selected from the list of POS systems, press the green "Save" button to enable the integration
For additional information checkout the Weedmaps instructions HERE

Now that you have enabled the POSaBIT integration within both the POSaBIT and Weedmaps portals, your integration is almost complete. If you would like to publish your new Weedmaps menu using only your existing POSaBIT product data click HERE to learn how to do so.
However, if you would like to utilize Weedmaps' curated data in order to offer enhanced product descriptions, effects and images, click HERE to map your POSaBIT product details to Weedmaps curated brands & products.
