Set up your POSaBIT menu on WordPress (Single or Multi-store)
 Updated 1 minute ago
The POSaBIT WordPress plugin puts your POSaBIT online menu directly on your own website, for example https://yourstore.com/menu, instead of sending shoppers to ecomm-app.posabit.com. This guide takes about 20 minutes. You (or your web developer) will enter settings in two places: the POSaBIT portal and your WordPress dashboard.
Before you start
- ☐ You have a POSaBIT V2 (ecommerce) menu. If not, set one up first: How to set up a new POSaBIT menu.
- ☐ Your site runs self-hosted WordPress (Bluehost, Hostinger, WP Engine, SiteGround, etc.). On wordpress.com hosting you need the Business plan or higher to upload plugins.
- ☐ You can log in to WordPress as an Administrator, or your developer has an account that can install plugins and edit pages.
- ☐ You know the address you want your menu at, e.g. https://yourstore.com/menu. For several stores, pick one address per store, e.g. https://yourstore.com/menu/bellevue and https://yourstore.com/menu/kirkland.
- ☐ All stores you want on this site are under the same POSaBIT merchant account. Stores under a different merchant need their own site or a POSaBIT-hosted menu.
Step 1. Point your POSaBIT menu at your website (POSaBIT portal)
Repeat for each store.
- Log in to the POSaBIT portal and select the store.
- Go to Menu Feeds and click Edit on your POSaBIT V2 menu.
- In the menu settings, click Edit.
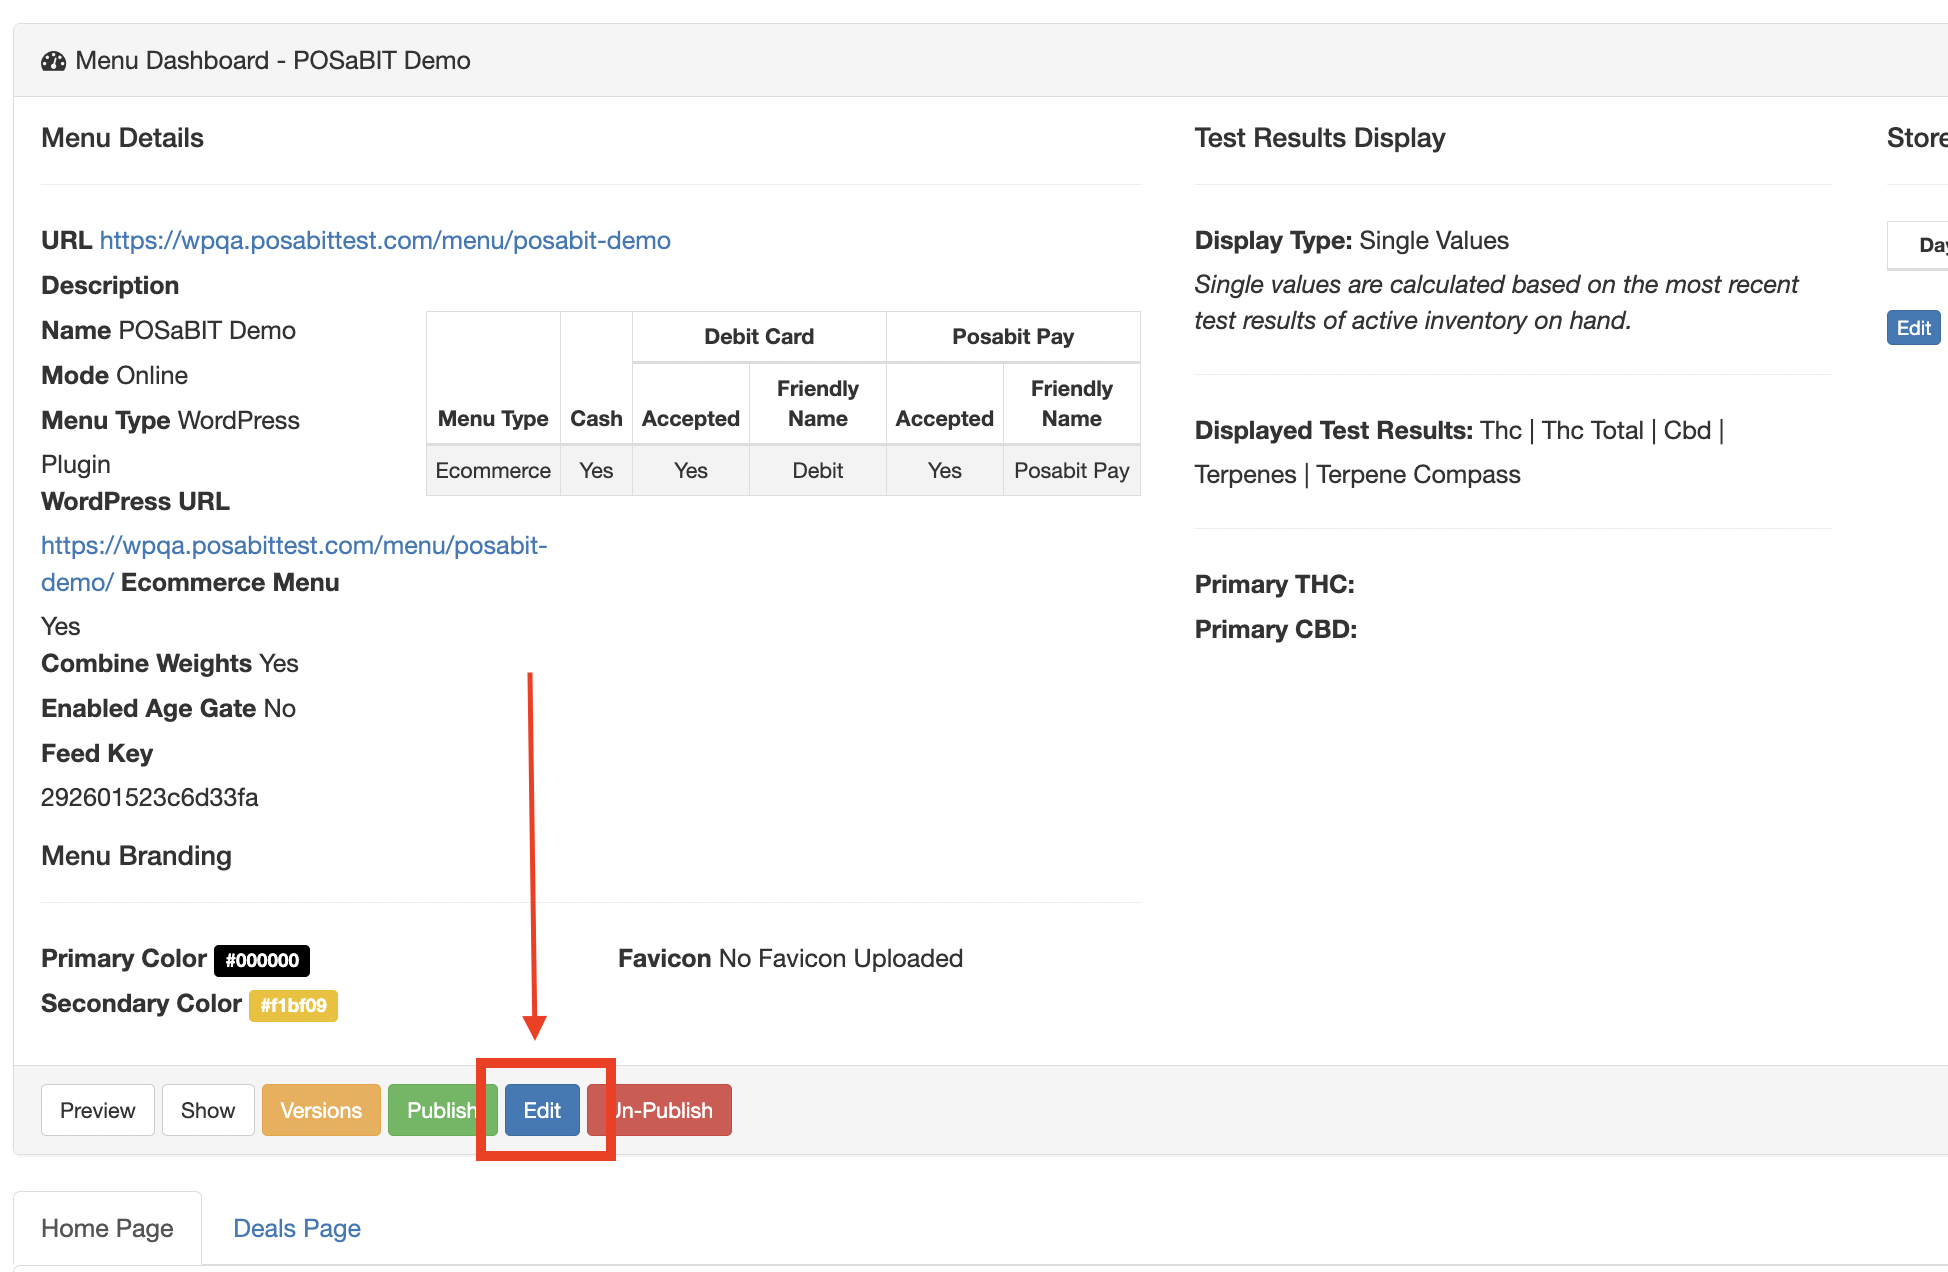
- Set Menu Type to WordPress Plugin.
- In Wordpress URL, enter the full address of this store's menu page, e.g. https://yourstore.com/menu.
- In Ecommerce URL, enter the same address. Replace the default ecomm-app.posabit.com address; leaving it will block the menu on your site.
- Click Save.
- Click Publish. WordPress can only show a published menu; Preview does not work on WordPress.
Step 2. Install the plugin (WordPress)
- Download the POSaBIT Menu plugin (https://app.posabit.com/pb/ecomm_wordpress_download) (a .zip file; don't unzip it).
- In WordPress, go to Plugins → Add New Plugin → Upload Plugin, choose the .zip, click Install Now, then Activate.
Step 3. Connect the plugin to POSaBIT (WordPress)
- Navigate to the WordPress Dashboard.
- On the left side of the page, find the Settings tab on the menu toolbar.
- Click Settings → POSaBIT Menu.
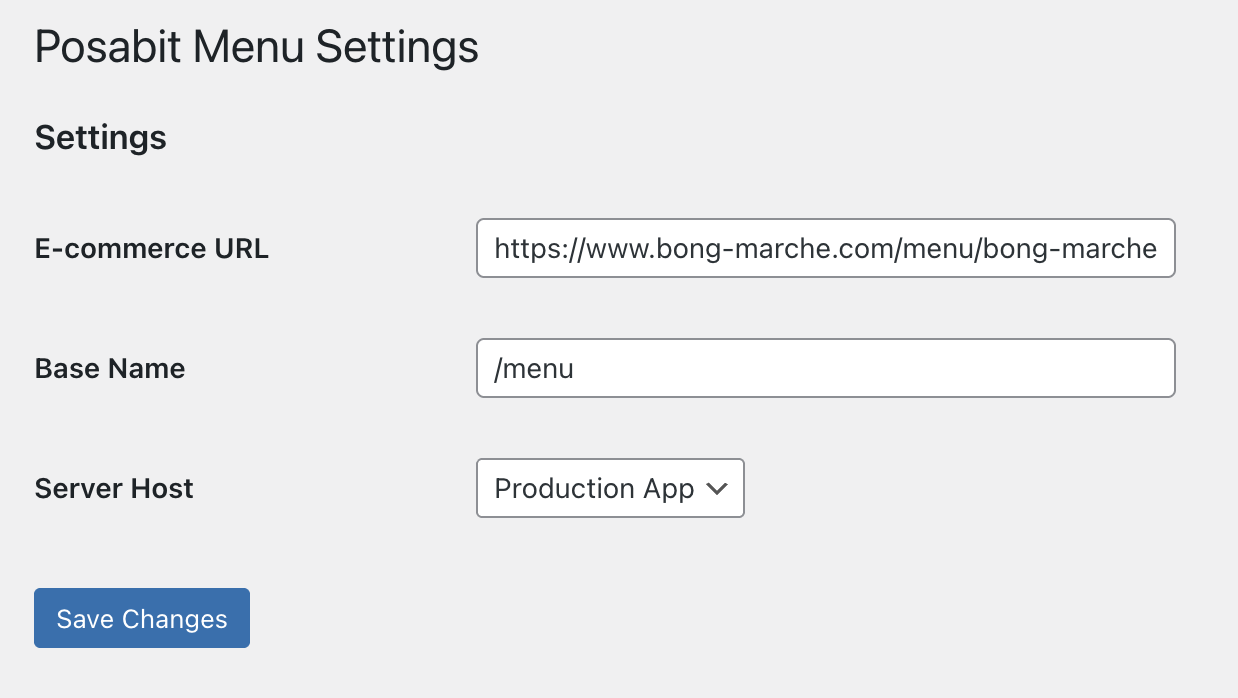
- Fill in the three fields:
Field | What to enter | Example |
E-commerce URL | The Ecommerce URL from Step 1 that was inputted into your POSaBIT portal. Several stores: you can use any Ecommerce URL from one of the stores. | https://yourstore.com/menu |
Base Name | A slash plus the slug of your main menu page | /menu |
Server Host | Always Production App | Production App |
- Click Save Changes.
Step 4. Add the menu to a page (WordPress)
- Go to Pages and open the page whose address matches your menu (e.g. a page with slug menu), or click Add Page to create it.
- Optional: in the page Settings panel, set Template to Full Width if your theme offers it. Skip if there's no Template option and keep it set to 'Default Template'.
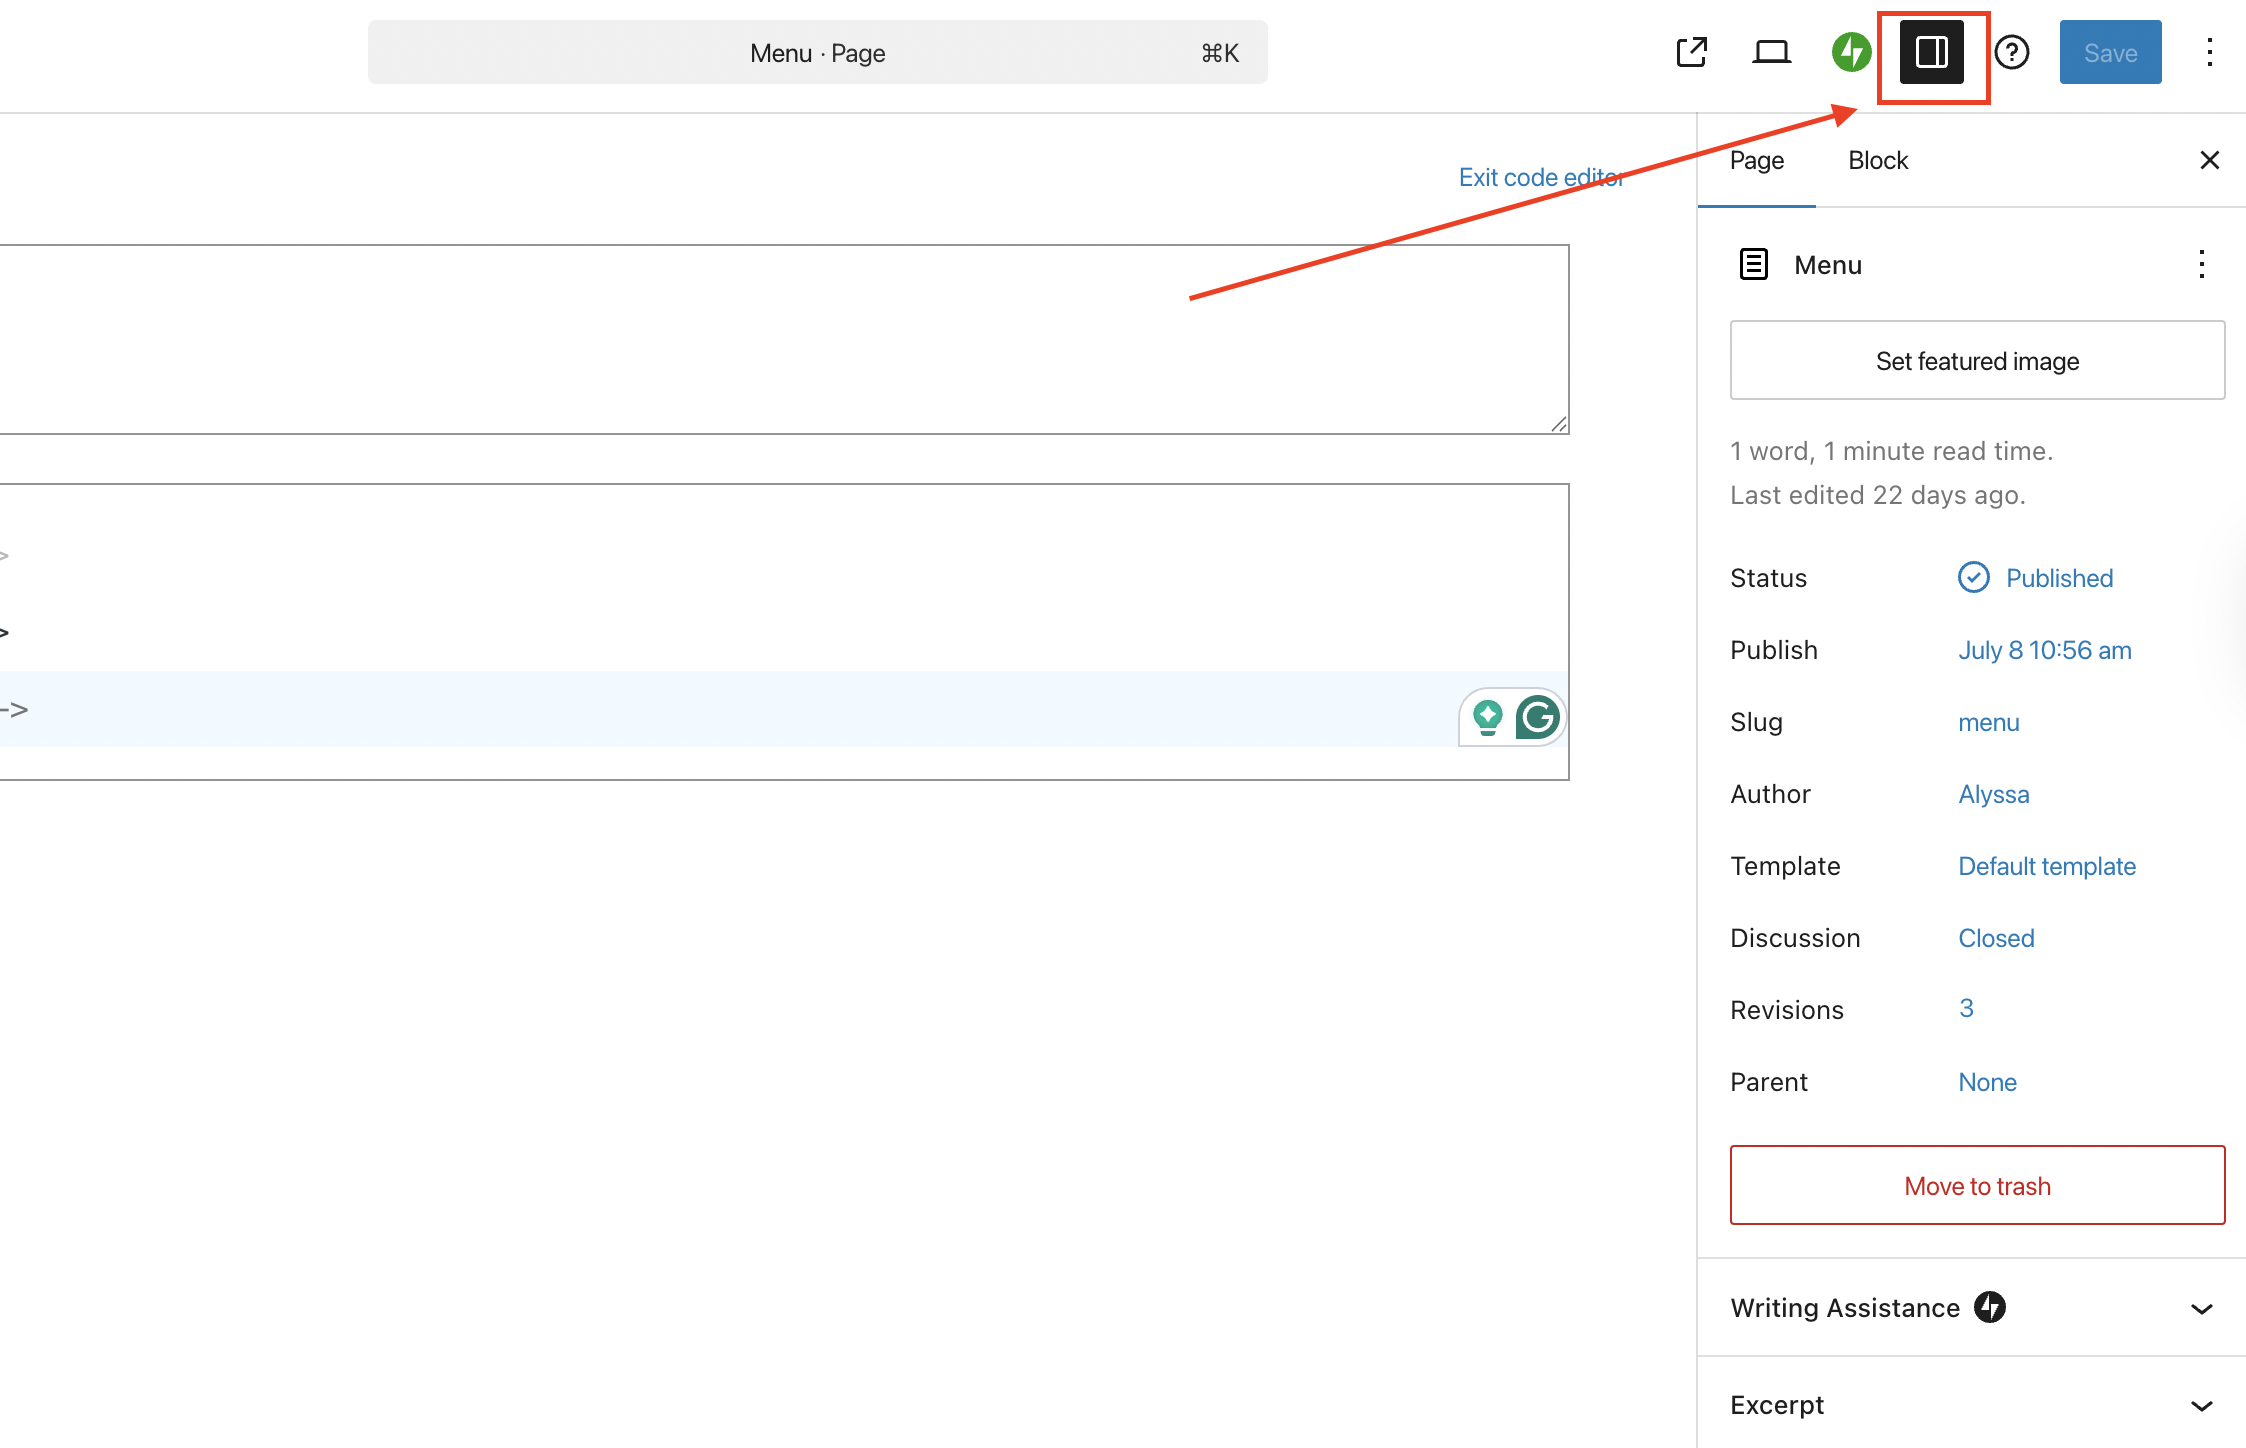
- Open the three-dot menu (top right) and switch to Code Editor.
- Paste:
<style>
.wrap { max-width: 1600px !important; }
</style>
[posabit_menu]
- Click Save or Publish.
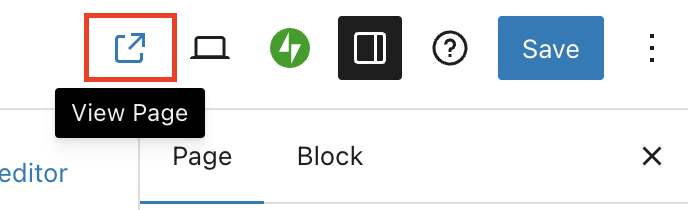
- To preview the page, click the preview icon in the top right corner of the page.
Step 5 (Multi-stores only). Add a page for each store (WordPress)
One plugin install handles all your stores. Each store gets its own child page under your main menu page.
- Click Add Page. In Settings, set Parent to your main menu page (e.g. "Menu").
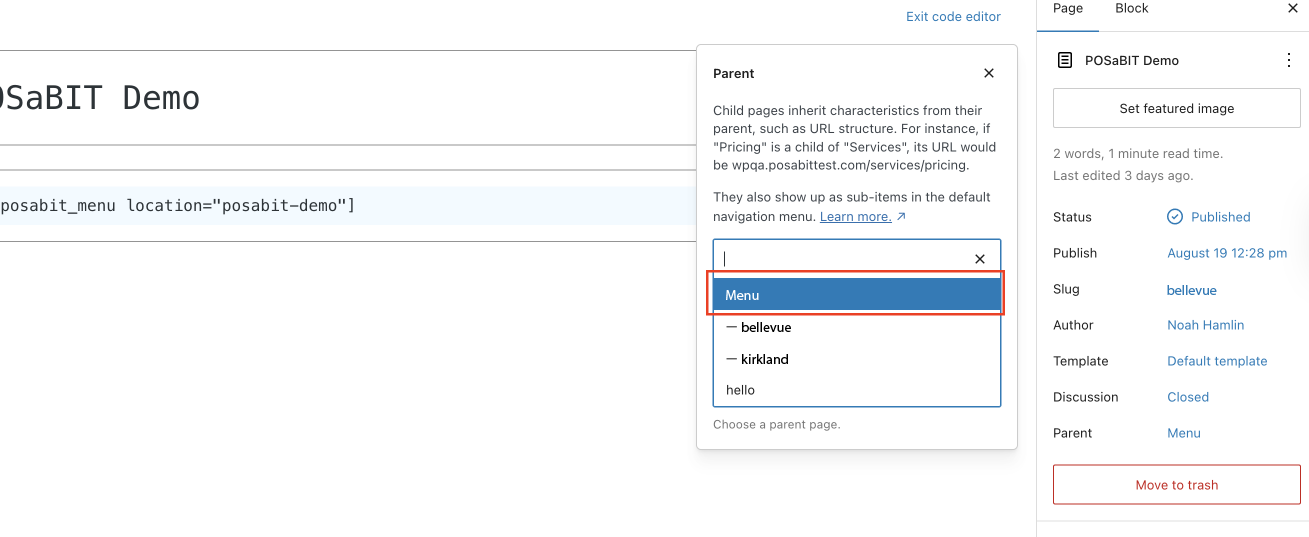
- Set the page Slug to the last part of that store's address from Step 1. For https://yourstore.com/menu/bellevue, the slug is bellevue.
- In Code Editor, paste the shortcode with the same value:
[posabit_menu location="bellevue"]
- Save, then click View Page and confirm the address in your browser exactly matches the Ecommerce URL for that store in the portal.
- Repeat for each store.
Store | Ecommerce URL in POSaBIT | Page slug | Shortcode |
Bellevue | https://yourstore.com/menu/bellevue | bellevue | [posabit_menu location="bellevue"] |
Kirkland | https://yourstore.com/menu/kirkland | kirkland | [posabit_menu location="kirkland"] |
Step 6. Check that it works
Open your menu page in a private/incognito window (not logged in to WordPress) and check:
- ☐ Products load within a few seconds.
- ☐ Click a product, then refresh the page. The product page reloads (no 404).
- ☐ Add an item to the cart and open checkout.
- ☐ Multi-stores: each store's page shows that store's products.
- ☐ Update your site's navigation and any "Shop" buttons to link to the new menu pages.
If anything fails, see Troubleshooting your POSaBIT WordPress menu.
Optional settings
- Google Analytics: in the portal menu settings, choose an Analytics Provider and enter your Analytics ID.
- Sitemap: on the portal menu page, click Copy Sitemap and submit it in Google Search Console. See How to setup a Sitemap for a POSaBIT Hosted Menu.
- Look and feel: add your own CSS between the <style> tags in Step 4. POSaBIT doesn't show its own logo on WordPress, because your site header already shows yours.
Testing on a staging site first? Use the staging address in both places (Steps 1 and 3). When you go live, update the Wordpress URL and Ecommerce URL in the portal and the E-commerce URL in WordPress to the live address, then Publish again. There's no IP or domain license to transfer.